

Why You’ll Love This Banana Pudding Bars
By Sage Martinez
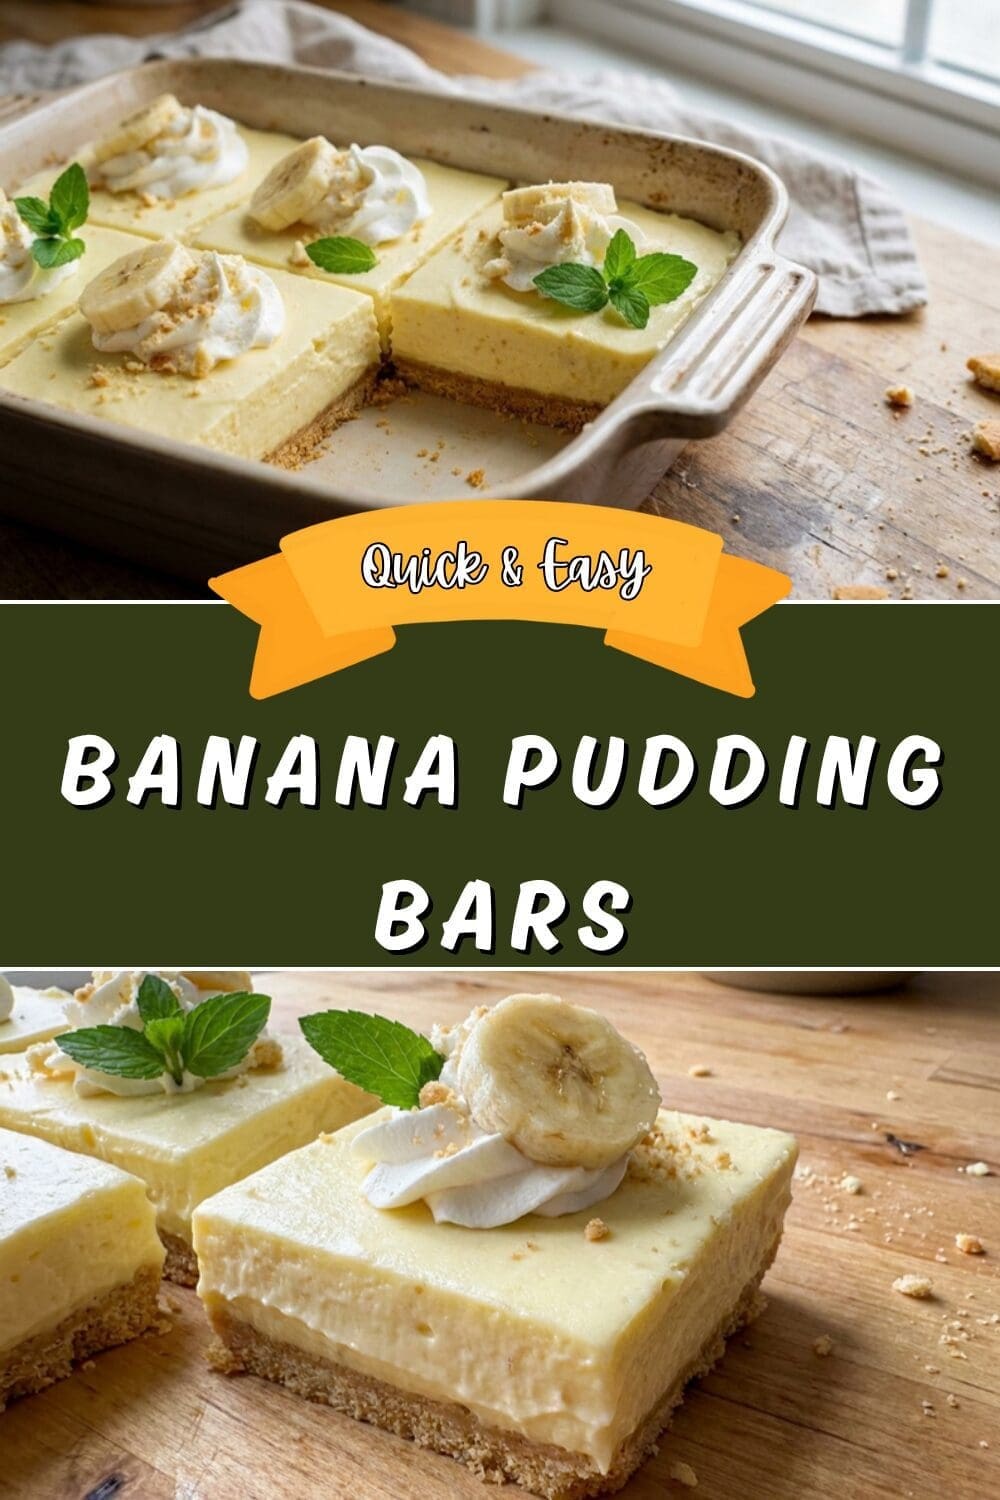
If you love classic Southern flavors without fuss, Banana Pudding Bars are a fast, crowd-pleasing way to get all the creamy, nostalgic taste of banana pudding in a sliceable dessert. This layered treat uses vanilla wafer cookies, ripe bananas, instant pudding, and whipped topping for a simple assembly that tastes like a win at every potluck or family dinner.
- Ease of preparation: Banana Pudding Bars take about 25 minutes to assemble plus chilling time. You only bake the crust briefly and then build layers, which makes these bars perfect for busy parents, students, and anyone short on baking time. The short oven time and mostly assembly-style steps make this a low-effort dessert that still reads homemade.
- Health benefits: While this is a dessert treat, bananas add potassium and vitamin C, and you can make smart swaps to lower calories or go dairy-free. The recipe lists nutrition facts per serving so you can plan portions. Banana Pudding Bars let you enjoy a sweet finish with some fruit benefit in each bite.
- Versatility: This banana dessert adapts easily to dietary needs. Use gluten-free cookies for the crust, dairy-free milk and whipped topping, or lighter whipped toppings to reduce calories. The core method stays the same, so the Banana Pudding Bars recipe is flexible for many diets.
- Distinctive flavor: The crunchy vanilla wafer crust combined with creamy pudding and ripe banana slices creates that classic banana pudding flavor in bar form. The texture contrast between the crisp cookie base and silky layers is what makes these Banana Pudding Bars stand out.
Tip: Press the cookie crumbs firmly into the pan with the bottom of a glass to get a compact crust that holds up when you slice the bars.
Jump to:
- Why You’ll Love This Banana Pudding Bars
- Essential Ingredients for Banana Pudding Bars
- Special Dietary Options
- How to Prepare the Perfect Banana Pudding Bars: Step-by-Step Guide
- Prep and Pan Setup
- Make the Crust
- Layering the Bars
- Chill and Serve
- Timing Summary
- Dietary Substitutions to Customize Your Banana Pudding Bars
- Protein and Main Component Alternatives
- Vegetable, Sauce, and Seasoning Modifications
- Mastering Banana Pudding Bars: Advanced Tips and Variations
- Pro cooking techniques
- Flavor variations
- Presentation tips
- Make-ahead options
- How to Store Banana Pudding Bars: Best Practices
- Refrigeration
- Freezing
- Reheating
- Meal prep considerations
- Nutrition Facts
- FAQs: Frequently Asked Questions About Banana Pudding Bars
- Can I make banana pudding bars gluten-free, sugar-free, or dairy-free?
- Can I make banana pudding bars the night before?
- How long do banana pudding bars last in the fridge?
- Can you freeze banana pudding bars?
- What can I substitute in banana pudding bars recipe?
- Banana Pudding Bars
- Ingredients
- Instructions
- Last Step:
- Notes
- Nutrition
- Did you make this recipe?
Essential Ingredients for Banana Pudding Bars
The ingredient list below includes exact measurements from the tested recipe and short notes on what each item does in the bars. Use the list as your shopping checklist.
- 60 vanilla wafers finely crushed (about 1 and a half cups) – forms the sweet, crunchy crust that mimics the flavor of traditional banana pudding.
- One third cup melted butter – binds the cookie crumbs into a sliceable base and adds richness.
- 3 bananas sliced – fresh fruit layer that gives natural sweetness, moisture, and banana flavor.
- Two 3.4-ounce packages of vanilla instant pudding mix – provides the creamy, stable pudding layers that set quickly with cold milk.
- 3 cups cold milk – hydrates the instant pudding to the proper consistency for layering; use the type called for on the pudding package for best results.
- Two and a half cups whipped topping, divided – adds light, airy creaminess; part is folded into one pudding layer for a mousse-like texture and the rest is a final topping.
Special Dietary Options
- Vegan: Swap the butter for a plant-based margarine, use vegan vanilla cookies for the crust, choose a vegan instant pudding (or make a stovetop vegan custard), and use coconut whipped topping.
- Gluten-free: Replace the vanilla wafers with gluten-free vanilla cookies or gluten-free graham crackers crushed to 1 and a half cups.
- Low-calorie: Try low-fat or skim milk with sugar-free instant pudding and a lighter whipped topping. For the crust, reduce butter slightly or use a lower-calorie cookie option.
How to Prepare the Perfect Banana Pudding Bars: Step-by-Step Guide
This step-by-step guide walks you through every action so the Banana Pudding Bars come out perfect. Timing and temperature details are included where relevant. Read all steps before starting the recipe to move smoothly from prep to chill.
Prep and Pan Setup
First Step: Preheat and prep your pan. Preheat your oven to 325 degrees Fahrenheit. Lightly grease a 13×9-inch baking dish or line it with parchment for easier removal. Have a bowl ready for crushing the vanilla wafers and a measuring cup for the melted butter.
Make the Crust
Second Step: Crush the cookies and combine with butter. Place 60 vanilla wafers into a food processor and pulse to fine crumbs, or put them in a sealed bag and crush with a rolling pin until you have about 1 and a half cups. Mix the cookie crumbs with one third cup melted butter until evenly coated.
Third Step: Press and bake the crust. Press the crumb mixture firmly into the bottom of the prepared 13×9-inch pan. Press tightly with the bottom of a glass or measuring cup so the crust holds together when you slice the bars. Bake the crust at 325 degrees Fahrenheit for 8 minutes, then remove and let cool in the pan for 10 minutes.
Layering the Bars
Fourth Step: Slice bananas and arrange them over the cooled crust. Use three ripe but firm bananas for the best texture; slice and spread them evenly across the crust. If you plan to serve much later, you can brush bananas lightly with lemon juice to slow browning, or add them just before serving.
Fifth Step: Make the pudding layers. Whisk together the two 3.4-ounce packages of vanilla instant pudding mix with 3 cups cold milk. Whisk for about 2 minutes until slightly thickened. Spread 2 cups of this pudding evenly over the banana layer. This forms the main creamy layer directly on the fruit.
Sixth Step: Create the mousse-style middle layer. Stir 1 cup of whipped topping into the remaining pudding (the pudding left should be about 1/2 cup if measured, but combine to reach a lighter mousse texture). Spread this pudding-whipped mixture over the first pudding layer. This gives a softer, airy middle layer that contrasts with the denser bottom pudding.
Seventh Step: Add the final topping. Top the bars with the remaining 1 and a half cups of whipped topping, spreading evenly. For extra texture, sprinkle additional crushed vanilla wafers or reserved cookie crumbs on top, or add banana slices right before serving.
Chill and Serve
Final Step: Chill and serve cold. Refrigerate the Banana Pudding Bars for at least 3 hours before slicing and serving. Chilling helps the pudding set and the layers to meld. For slightly softer crust and deeper flavor, chill overnight; just be aware the crust will soften over time. Slice into 16 bars for an average serving size. Serve cold and enjoy.
Timing Summary
- Prep time: 25 minutes
- Short bake: 8 minutes for the crust
- Chill: 3 hours minimum (overnight recommended for best texture)

Dietary Substitutions to Customize Your Banana Pudding Bars
Protein and Main Component Alternatives
Although Banana Pudding Bars are not a protein-centric recipe, you can adapt components to suit dietary needs. Swap the dairy-based instant pudding with a protein-enriched custard made from milk mixed with protein powder and a thickener if you want a higher-protein dessert. For those avoiding dairy, use plant-based milk like almond, soy, or oat and choose vegan instant pudding or a cornstarch-thickened vegan custard.
- Vegan pudding: Use a vegan instant mix or make a stovetop custard with coconut milk and cornstarch.
- Higher protein: Mix a neutral-flavored whey or plant protein powder into the milk before whisking with pudding mix; reduce mix slightly to keep the texture balanced.
- Lower sugar: Choose sugar-free pudding mixes and a lighter whipped topping; consider ripe bananas to add natural sweetness.
Vegetable, Sauce, and Seasoning Modifications
Banana Pudding Bars shine with simple flavors, but small tweaks can refresh the profile. Try folding a teaspoon of vanilla extract or a pinch of cinnamon into the pudding for warmth. For a fruity twist, swap some banana slices for fresh strawberries or peaches in part of the pan. If you like a salted contrast, lightly sprinkle flaky sea salt over the top before serving.
- Cinnamon or nutmeg: Add a pinch to the pudding for a warm note.
- Fruit swaps: Use sliced strawberries or peaches for variety.
- Texture add-ins: Toasted nuts or crushed toffee on top create crunch and contrast.
Mastering Banana Pudding Bars: Advanced Tips and Variations
Once you have the basic Banana Pudding Bars down, try these pro tips and creative ideas to make the bars more impressive or tailored to a crowd.
Pro cooking techniques
- Press the crust firmly and evenly to prevent crumbling when slicing. Chill the crust for 10 minutes right after baking to help it set before adding bananas.
- Use cold milk for the instant pudding; whisk vigorously for a full 2 minutes to activate thickening agents so the pudding sets properly.
- If making ahead, layer carefully and add the most exposed banana slices just before serving to avoid browning.
Flavor variations
- Chocolate Banana Bars: Use chocolate pudding for one layer and sprinkle mini chocolate chips between layers.
- Caramel Banana Bars: Drizzle a thin layer of caramel sauce between the banana and pudding for a richer dessert.
- Peanut butter twist: Mix 1/3 cup creamy peanut butter into one pudding layer for a peanut-butter-banana combo.
Presentation tips
- Serve squares with a single banana slice and a dusting of crushed vanilla wafer on top for a pretty plate.
- Use a hot, dry knife between cuts for clean slices; wipe the blade after each cut.
Make-ahead options
- Make the bars a day ahead and keep covered in the fridge; add extra banana slices or cookie crumbs just before serving.
- For parties, cut bars into smaller squares and chill on a tray; guests can grab bite-sized portions easily.
Interested in other easy, no-fuss desserts? Try our simple no-bake peach option for a quick crowd-pleaser: no-bake peach cobbler dump cake.
How to Store Banana Pudding Bars: Best Practices
Storing Banana Pudding Bars the right way keeps texture and flavor at their best. Here are short-term and long-term storage tips to help you plan.
Refrigeration
Store banana pudding bars in an airtight container or cover the pan tightly with plastic wrap. Keep refrigerated at 40 degrees Fahrenheit or below. Bars stay fresh for 3-4 days; for best texture, enjoy within 48 hours. If topped with fresh whipped cream, aim to consume within 24 hours.
Freezing
You can freeze these bars, but expect a slight change in texture. For best results, cut into squares, place them on a parchment-lined tray to flash-freeze for 1-2 hours, then transfer to freezer bags with air removed. Freeze up to 1-2 months. Thaw in the refrigerator overnight before serving.
Reheating
These bars are meant to be served cold; avoid microwaving. If you must bring them to room temperature, leave in the fridge for a shorter time and serve chilled. Fresh toppings added after thawing revive presentation and flavor.
Meal prep considerations
Make a double batch and freeze portions for easy dessert options later. Label containers with the date and type of topping used. Keep fresh banana slices separate until service to avoid discoloration.
Nutrition Facts
| Nutrient (per serving) | Amount |
|---|---|
| Calories | 212 kcal |
| Carbohydrates | 26 g |
| Protein | 2 g |
| Fat | 10 g |
| Saturated Fat | 5 g |
| Cholesterol | 15 mg |
| Sodium | 153 mg |
| Potassium | 170 mg |
| Sugar | 14 g |
| Vitamin A | 215 IU |
| Vitamin C | 1.9 mg |
| Calcium | 62 mg |
| Iron | 0.1 mg |
FAQs: Frequently Asked Questions About Banana Pudding Bars
Can I make banana pudding bars gluten-free, sugar-free, or dairy-free?
Making banana pudding bars fully gluten-free, sugar-free, and dairy-free is tricky since key ingredients like Nilla wafers, pudding mix, and whipped topping define the classic texture and flavor. For gluten-free, swap the crust with gluten-free graham crackers or shortbread cookies, crushed and mixed with melted dairy-free butter. Use instant gluten-free banana pudding mix with almond milk. For sugar-free, opt for sugar-free pudding and a keto-friendly crust like almond flour with erythritol. Dairy-free versions work with coconut whipped cream instead of Cool Whip and vegan cream cheese. Test small batches first—the result won’t match the original exactly but can be close. Total prep stays under 20 minutes, chill time 4 hours. Always check labels for cross-contamination. (87 words)
Can I make banana pudding bars the night before?
Yes, banana pudding bars store well overnight in the fridge, developing deeper flavors like an icebox cake. Prepare the crust, layer bananas and pudding, then chill covered with plastic wrap. Slice and add fresh banana slices or whipped topping just before serving to prevent browning—brush exposed bananas with lemon juice if needed. The crust softens slightly but holds up for 24 hours. Avoid leaving uncovered to minimize air exposure. They taste best within 1-2 days. Pro tip: Use ripe bananas for natural sweetness and firmer texture post-chill. Refrigerate at 40°F or below for food safety. Serves 12-16 easily. (92 words)
How long do banana pudding bars last in the fridge?
Banana pudding bars stay fresh in the fridge for 3-4 days when stored airtight in a single layer or covered container. Beyond that, bananas brown and pudding may weep, softening texture. For best quality, enjoy within 48 hours. Label with date and keep at 40°F. If topped with fresh whipped cream, consume within 24 hours to avoid spoilage. Freeze portions up to 1 month by wrapping tightly in plastic then foil—thaw overnight in fridge, but crust may get soggy. Yields about 24 bars; portion control helps freshness. Discard if mold appears or smell off. (89 words)
Can you freeze banana pudding bars?
Yes, freeze banana pudding bars for up to 2 months to extend enjoyment. Cut into squares first, place on a parchment-lined tray to flash-freeze for 2 hours, then transfer to freezer bags, removing air. This prevents sticking. Thaw in the fridge overnight; avoid microwave to maintain creaminess. Expect slight softening in the crust and possible banana discoloration—fresh toppings revive them. Not ideal for texture perfection, but great for parties. Skip freezing if using fresh bananas; use overripe ones pre-freeze. One batch (9×13 pan) provides 20+ servings post-thaw. (85 words)
What can I substitute in banana pudding bars recipe?
Common swaps keep banana pudding bars versatile. No Nilla wafers? Use graham crackers, vanilla cookies, or Biscoff for the crust. Skip Cool Whip with homemade whipped cream (1 cup heavy cream + 2 tbsp sugar, whipped stiff). Cream cheese layer out? Double pudding for simpler build. No bananas? Try sliced strawberries or peaches for fruit variation. Vegan? Coconut cream + agar for pudding set. Sweeten with condensed milk alternatives like coconut. Each sub takes 5 extra minutes; adjust chill time to 4-6 hours. Recipe scales for 9×13 pan, 12 servings. Experiment safely. (92 words)

Banana Pudding Bars
🍌 These creamy Banana Pudding Bars combine the classic Southern dessert flavors everyone loves into an easy-to-serve bar format perfect for potlucks and gatherings
🎂 With layers of buttery vanilla wafer crust, fresh banana slices, smooth vanilla pudding, and fluffy whipped topping, this no-fuss dessert delivers nostalgia in every bite
- Total Time: 3 hours 33 minutes
- Yield: 16 servings 1x
Ingredients
60 vanilla wafers finely crushed (about 1 and a half cups) for crust
One third cup melted butter for binding
3 bananas sliced for flavor
Two 3.4-ounce packages of vanilla instant pudding mix for pudding layers
3 cups cold milk for hydrating
Two and a half cups whipped topping for creaminess
Instructions
First Step: Preheat and prep your pan. Preheat your oven to 325 degrees Fahrenheit. Lightly grease a 13×9-inch baking dish or line it with parchment for easier removal. Have a bowl ready for crushing the vanilla wafers and a measuring cup for the melted butter.
Second Step: Crush the cookies and combine with butter. Place 60 vanilla wafers into a food processor and pulse to fine crumbs, or put them in a sealed bag and crush with a rolling pin until you have about 1 and a half cups. Mix the cookie crumbs with one third cup melted butter until evenly coated.
Third Step: Press and bake the crust. Press the crumb mixture firmly into the bottom of the prepared 13×9-inch pan. Press tightly with the bottom of a glass or measuring cup so the crust holds together when you slice the bars. Bake the crust at 325 degrees Fahrenheit for 8 minutes, then remove and let cool in the pan for 10 minutes.
Fourth Step: Slice bananas and arrange them over the cooled crust. Use three ripe but firm bananas for the best texture; slice and spread them evenly across the crust. If you plan to serve much later, you can brush bananas lightly with lemon juice to slow browning, or add them just before serving.
Fifth Step: Make the pudding layers. Whisk together the two 3.4-ounce packages of vanilla instant pudding mix with 3 cups cold milk. Whisk for about 2 minutes until slightly thickened. Spread 2 cups of this pudding evenly over the banana layer. This forms the main creamy layer directly on the fruit.
Sixth Step: Create the mousse-style middle layer. Stir 1 cup of whipped topping into the remaining pudding (the pudding left should be about 1/2 cup if measured, but combine to reach a lighter mousse texture). Spread this pudding-whipped mixture over the first pudding layer. This gives a softer, airy middle layer that contrasts with the denser bottom pudding.
Seventh Step: Add the final topping. Top the bars with the remaining 1 and a half cups of whipped topping, spreading evenly. For extra texture, sprinkle additional crushed vanilla wafers or reserved cookie crumbs on top, or add banana slices right before serving.
Final Step: Chill and serve cold. Refrigerate the Banana Pudding Bars for at least 3 hours before slicing and serving. Chilling helps the pudding set and the layers to meld. For slightly softer crust and deeper flavor, chill overnight; just be aware the crust will soften over time. Slice into 16 bars for an average serving size. Serve cold and enjoy.
Last Step:
Please leave a rating and comment letting us know how you liked this recipe! This helps our business to thrive and continue providing free, high-quality recipes for you.Notes
🍌 To prevent bananas from browning, slice them just before assembling or press them well beneath the pudding layers to minimize air exposure
🥄 Press the crust firmly using the bottom of a measuring cup or glass to ensure it holds together perfectly after chilling
⏰ For the best flavor development, refrigerate overnight – the crust will soften slightly but the flavors will meld beautifully
- Prep Time: 25 minutes
- Chilling time: 3 hours
- Cook Time: 8 minutes
- Category: Dessert
- Method: No-Bake
- Cuisine: American
Nutrition
- Serving Size: 1 bar
- Calories: 212 kcal
- Sugar: 14 g
- Sodium: 153 mg
- Fat: 10 g
- Saturated Fat: 5 g
- Unsaturated Fat: 5 g
- Trans Fat: 0 g
- Carbohydrates: 26 g
- Fiber: 0 g
- Protein: 2 g
- Cholesterol: 15 mg


