

Why You’ll Love This Banoffee Poke Cake
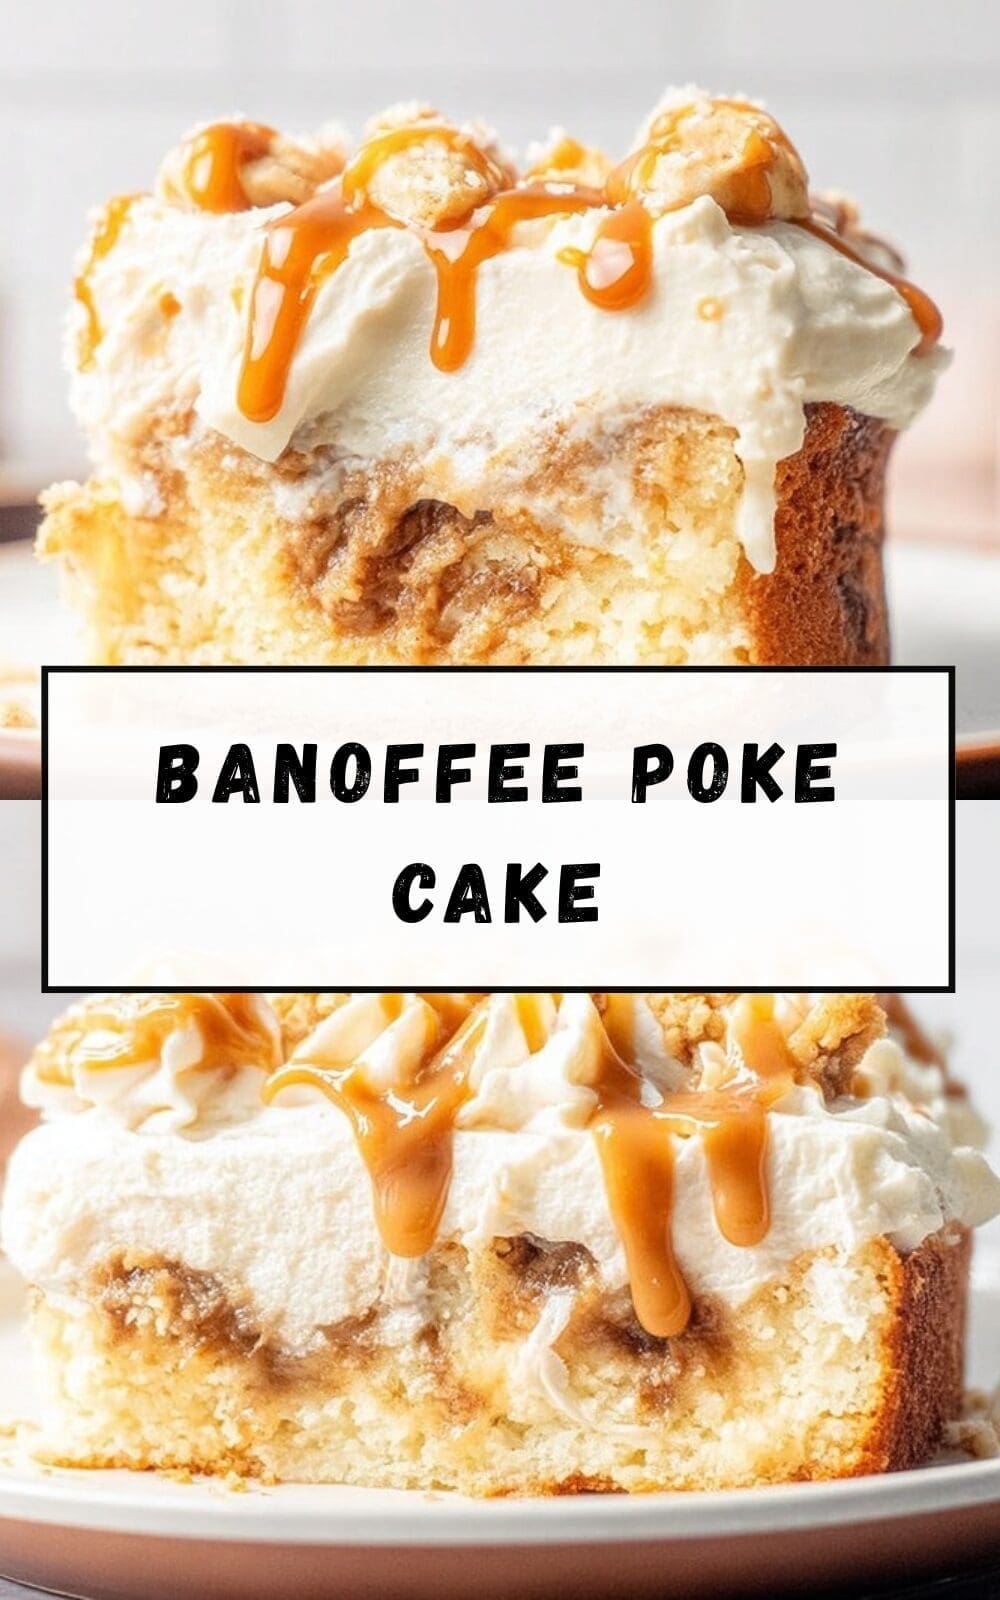
If you want a show-stopping dessert that feels fancy but is truly simple to make, this Banoffee Poke Cake hits the spot. The Banoffee Poke Cake combines a moist yellow cake base with gooey dulce de leche, sliced bananas, and a cloud of whipped cream for an easy banana toffee cake that works for weeknight treats, potlucks, and special occasions.
Ease of preparation:
This banoffee poke cake recipe is built for busy home cooks. Start with a boxed yellow cake mix or a quick homemade yellow cake, bake in a 9×13-inch pan, poke holes, and pour in warmed dulce de leche. Most of the work is baking and a few minutes of assembly, so total hands-on time is under 30 minutes.
Health benefits:
While this banana toffee cake is an indulgence, it does include fresh fruit. Bananas add potassium, vitamin B6, and a bit of fiber, giving the dessert a fruit-forward element. For readers curious about the benefits of bananas, check reliable resources on the health benefits of bananas for more context. These references explain why bananas are a smart add to desserts and snacks.
Versatility:
The Banoffee Poke Cake adapts easily. Use canned dulce de leche or make your own from sweetened condensed milk. Swap the regular cake mix for gluten-free or use plant-based substitutes to create a vegan-friendly version. This flexibility makes it a crowd-pleasing banana toffee cake for many diets.
Distinctive flavor:
What sets this banoffee cake apart is the balance between caramel-like dulce de leche, sweet bananas, and whipped cream. Each slice offers soft cake, creamy toffee soaked into pockets, and fresh banana slices on top for bright flavor and texture contrast.
Jump to:
- Why You’ll Love This Banoffee Poke Cake
- Ease of preparation:
- Health benefits:
- Versatility:
- Distinctive flavor:
- Essential Ingredients for Banoffee Poke Cake
- Special Dietary Options
- How to Prepare the Perfect Banoffee Poke Cake: Step-by-Step Guide
- Mise en place
- Batter and baking
- Poking and filling
- Whipping, topping, and chilling
- Serving and timing
- Dietary Substitutions to Customize Your Banoffee Poke Cake
- Protein and Main Component Alternatives
- Vegetable, Sauce, and Seasoning Modifications
- Mastering Banoffee Poke Cake: Advanced Tips and Variations
- Pro cooking techniques
- Flavor variations
- Presentation tips
- Make-ahead options
- How to Store Banoffee Poke Cake: Best Practices
- Refrigeration
- Freezing
- Reheating and meal prep considerations
- FAQs: Frequently Asked Questions About Banoffee Poke Cake
- What is banoffee poke cake?
- Can I make banoffee poke cake with a homemade cake mix?
- What if I can’t find dulce de leche for banoffee poke cake?
- How do I store banoffee poke cake?
- Can I make banoffee poke cake ahead of time?
- Banoffee Poke Cake
- Ingredients
- Instructions
- Last Step:
- Notes
- Nutrition
- Did you make this recipe?
Essential Ingredients for Banoffee Poke Cake
Below is a clear, structured list of every ingredient you need for this dulce de leche banana poke cake. Each item lists the exact quantity followed by a short note on purpose or benefit.
- 13.25 ounces yellow cake mix – convenient base; follow package directions for preparation if using boxed mix.
- 2 1/2 cups all-purpose flour – for homemade yellow cake option; builds structure.
- 2 1/2 teaspoons baking powder – leavening for homemade cake.
- 1/2 teaspoon salt – balances sweetness and strengthens gluten.
- 3/4 cup room temperature butter – adds richness in homemade cake.
- 1 3/4 cups granulated sugar – sweetens the homemade cake.
- 3 room temperature eggs – provide structure and moisture for homemade cake.
- 2 teaspoons vanilla extract – flavor enhancer for cake and whipped cream.
- 1 1/4 cups whole milk – moistens the homemade cake batter.
- 2 cups canned Dulce de Leche – main filling for the poke cake; warm until pourable.
- 1 (14 ounces) can sweetened condensed milk – optional, if making homemade dulce de leche by slow-cooking or the stovetop method.
- 2 cups heavy whipping cream – whip with vanilla for the topping.
- 1 teaspoon vanilla extract – adds flavor to the whipped cream.
- 2 to 3 medium bananas, sliced – fresh topping; adds banana flavor and texture.
- 1/4 cup chopped toffee pieces – crunchy topping contrast.
- Additional Dulce de Leche for drizzling – optional; for a glossy finish.
- Nonstick spray – to grease a 9×13-inch baking dish.
- Parchment paper – for creating a sling to lift the cake from the pan.
Special Dietary Options
- Vegan: Use a vegan yellow cake mix or swap ingredients in the homemade batter for 3/4 cup vegan butter, 3 flax eggs (3 tbsp ground flaxseed + 9 tbsp water), and plant milk. Replace heavy whipping cream with a stabilized coconut whipped cream and use dairy-free dulce de leche or a caramel made with coconut condensed milk.
- Gluten-free: Choose a 13.25 ounce gluten-free yellow cake mix, or replace the all-purpose flour with a 1-to-1 gluten-free blend and verify baking powder is gluten-free.
- Low-calorie: Make a lighter whipped topping using chilled evaporated skim milk whipped with a stabilizer, swap to a lighter dulce-style sauce, and reduce toffee bits to a sprinkle for crunch.
How to Prepare the Perfect Banoffee Poke Cake: Step-by-Step Guide
This step-by-step section walks you through making the banoffee poke cake from either a boxed mix or the homemade yellow cake ingredients. Timing and small tips are included so you end with a stable whipped topping and fresh bananas.
Mise en place
First Step: Gather ingredients and equipment. Preheat the oven to 350 degrees F (175 degrees C) if using the homemade cake recipe or follow the box instructions if using a mix. Lightly spray a 9×13-inch baking dish with nonstick spray and create a parchment sling by lining the pan with parchment paper that hangs over the long sides. This makes removing the cake easier after chilling.
Batter and baking
Second Step: Prepare the cake batter.
- If using boxed mix: Prepare the yellow cake mix according to package directions, substituting milk for water if you want a richer crumb. Pour batter into the prepared 9×13-inch pan, smoothing the top.
- If using homemade yellow cake: In a medium bowl whisk together 2 1/2 cups all-purpose flour, 2 1/2 teaspoons baking powder, and 1/2 teaspoon salt. In a separate large bowl, beat 3/4 cup softened butter with 1 3/4 cups granulated sugar until light. Add 3 room temperature eggs one at a time, then beat in 2 teaspoons vanilla extract. Alternately add the dry ingredients and 1 1/4 cups whole milk, beginning and ending with dry ingredients, mixing until just combined. Pour into the prepared pan.
Third Step: Bake and initial cooling. Bake at 350 degrees F for about 25 minutes, or until a toothpick inserted in the center comes out clean. Let the cake cool in the pan for 15 minutes. This short cooling period prevents collapsing when poking holes.
Poking and filling
Fourth Step: Poke the cake. After the 15-minute initial cooling, use the handle of a wooden spoon to poke holes evenly across the cake, spacing about 1 inch apart. Let the cake cool completely for about 30 minutes before adding the filling; this prevents the whipped cream from melting when added later.
Fifth Step: Warm the dulce de leche. Heat 2 cups canned Dulce de Leche gently until pourable. You can microwave in short bursts or warm on the stovetop over low heat, stirring to smooth. If you made homemade dulce de leche from a 14 oz can of sweetened condensed milk, be sure it is thick but pourable.
Sixth Step: Pour the dulce de leche over the cake and spread. Pour the warm dulce de leche evenly over the cake, using a spatula to press the sauce into the holes so the filling soaks into the crumb. This is what makes it a true poke cake – the dulce de leche pools inside the cake for gooey bites.
Whipping, topping, and chilling
Seventh Step: Whip the cream. Use 2 cups of cold heavy whipping cream with 1 teaspoon vanilla extract. Chill the mixing bowl and whisk briefly if possible. Whip to soft peaks and then spread evenly over the dulce-soaked cake. Cold cream whips faster and holds better on the cake.
Eighth Step: Chill the cake. Place the cake in the refrigerator and chill until ready to serve, at least 2 hours. Chilling helps the dulce de leche set slightly and makes cleaner slices.
Ninth Step: Finish just before serving. Just before serving, slice 2 to 3 medium bananas and arrange them across the top. Sprinkle 1/4 cup chopped toffee pieces over the bananas and whipped cream. Drizzle additional dulce de leche for extra shine and toffee flavor. Slice and serve immediately after arranging the toppings so bananas stay fresh.
Serving and timing
Final Step: Slice and serve. Use a sharp knife dipped in hot water and wiped dry for cleaner cuts. Serve chilled for the best texture. Prep time is about 20 minutes, cook time about 25 minutes, with additional cooling and chilling time included in the process.
Tip: Allow the cake to cool 15 minutes before poking holes to prevent it from collapsing, and be sure the cake is completely cool before adding the whipped cream so the topping remains light and stable.

Dietary Substitutions to Customize Your Banoffee Poke Cake
Protein and Main Component Alternatives
If you need to swap key components of this banoffee poke cake, here are some straightforward swaps that keep texture and taste close to the original.
- Egg replacements: For vegan baking, replace each egg with a flax egg (1 tbsp ground flaxseed + 3 tbsp water, mixed and rested for 5 minutes) or a commercial egg replacer.
- Butter alternatives: Use coconut oil or plant-based butter stick-by-stick if making a dairy-free cake. Keep the same quantity for similar texture.
- Dulce de leche alternatives: Use store-bought caramel sauce as a simple swap, or make a quick caramel by simmering 1 cup sweetened condensed milk with 1/4 cup brown sugar and 2 tbsp butter until thickened for a similar flavor.
- Whipped topping: Replace heavy whipping cream with chilled full-fat coconut cream whipped to soft peaks for a dairy-free topping that holds shape.
Vegetable, Sauce, and Seasoning Modifications
While this recipe does not use vegetables, small seasoning changes can tweak flavor to your liking.
- Vanilla swap: Infuse the whipped cream with a teaspoon of bourbon or rum for a grown-up twist, or use a teaspoon of almond extract for a nutty note.
- Fruit variations: Swap or add sliced strawberries, raspberries, or thin apple slices if you want more acidity to cut the sweetness.
- Crunch options: Instead of toffee pieces, try crushed digestive biscuits, graham crackers, or chopped pecans for a different crunch profile.
Mastering Banoffee Poke Cake: Advanced Tips and Variations
These tips help you get bakery-quality results and give creative paths to customize your banoffee poke cake.
Pro cooking techniques
- Even baking: Rotate the pan halfway through baking if your oven has hot spots to get an even crumb.
- Consistent holes: Use a chopstick or a skewer if you want thinner filling channels; a wooden spoon handle makes larger pockets that hold more dulce.
- Stabilized whipped cream: For cleaner slices and longer display, fold a teaspoon of unflavored gelatin dissolved in 1 tablespoon warm water into whipped cream, or use 2 tablespoons instant pudding mix to stabilize without gelatin.
Flavor variations
- Chocolate banoffee: Sprinkle dark chocolate shavings or mini chocolate chips between the whipped cream and bananas for a chocolatey finish.
- Tropical twist: Add a tablespoon of lime zest to the dulce before pouring for bright citrus notes that balance sweetness.
- Nutty upgrade: Fold 1/3 cup finely chopped toasted hazelnuts or pecans into the whipped cream for added texture.
Presentation tips
- Neat slices: Chill the cake at least 2 hours and warm the knife under hot water between cuts for tidy slices.
- Layered look: Create decorative banana fans or use a piping bag to add rosettes of whipped cream before adding toffee pieces.
Make-ahead options
- Bake and fill: You can bake and pour the dulce de leche over the cake up to one day ahead. Chill overnight for deeper flavor infusion, then add bananas and whipped cream just before serving.
- Travel-friendly prep: Assemble everything but the bananas for transport. Add sliced bananas and toffee at the event for the freshest look.
- Related recipes: If you enjoy quick fruit-forward desserts, try our peach cobbler dump cake for another easy, crowd-pleasing option: peach cobbler dump cake recipe.
How to Store Banoffee Poke Cake: Best Practices
Proper storage keeps the cake tasting fresh and keeps the whipped cream stable as long as possible. Below are recommended methods for short- and long-term storage.
Refrigeration
Refrigerate the assembled banoffee poke cake covered with plastic wrap or in an airtight container for up to 3 days. The bananas may darken after day 2, so for best presentation, add banana slices no more than a few hours before serving.
Freezing
Freezing is not recommended for fully assembled cake with whipped cream because the texture of whipped cream and fresh bananas will change. If you must freeze, remove a single unfrosted portion or the baked cake layer only, wrap tightly in plastic wrap and foil, and freeze for up to 2 months. Thaw in the refrigerator overnight and finish assembly the next day.
Reheating and meal prep considerations
There is no reheating needed for this dessert. For meal prep, bake the cake layer ahead and store the layer separately from toppings. Add whipped cream and bananas the day of serving to preserve texture.
| Nutrient | Amount |
|---|---|
| Calories | 296 |
| Carbohydrates | 35 grams |
| Protein | 3 grams |
| Fat | 17 grams |
| Saturated Fat | 11 grams |
| Cholesterol | 50 milligrams |
| Sodium | 245 milligrams |
| Potassium | 126 milligrams |
FAQs: Frequently Asked Questions About Banoffee Poke Cake
What is banoffee poke cake?
Banoffee poke cake is a twist on the classic British banoffee pie, adapted into an easy poke cake format. Start with a soft yellow cake base, poke holes all over the top, and pour in warm dulce de leche or sweetened condensed milk for a gooey filling. Layer sliced bananas on top, then finish with whipped cream, chocolate shavings, and crushed biscuits for crunch. It’s no-bake assembly after the cake bakes, making it perfect for parties. The result is a moist, indulgent dessert with banana sweetness, creamy toffee, and fluffy topping in every bite. Prep takes about 20 minutes, bake 25-30 minutes, and chill for 2 hours. Serve chilled for best texture. This crowd-pleaser feeds 12-16 and stores well in the fridge for up to 3 days.
Can I make banoffee poke cake with a homemade cake mix?
Yes, homemade yellow cake makes banoffee poke cake even better and fresher. Use this simple recipe: Preheat oven to 350°F (175°C). Mix 1 ½ cups flour, 1 cup sugar, 2 tsp baking powder, ½ tsp salt, ½ cup butter (softened), 2 eggs, 1 cup milk, and 1 tsp vanilla. Beat until smooth, pour into a greased 9×13-inch pan, and bake 25-30 minutes until a toothpick comes out clean. Cool 10 minutes, then poke holes every inch with a wooden spoon handle. Pour 1 can (14 oz) warm dulce de leche over it to soak in. This from-scratch version avoids box mixes, adds better flavor, and costs less. Full recipe card below the post has exact steps and tips for fluffy results.
What if I can’t find dulce de leche for banoffee poke cake?
Dulce de leche is usually near sweetened condensed milk in grocery stores or online via Amazon. If unavailable, make a quick substitute: Pour one 14 oz can sweetened condensed milk into a glass jar, cover with water in a pot, boil 3 hours (check water level), cool, and it turns into thick toffee. Or microwave: Remove label from can, place unopened in dish with water halfway up, microwave on medium 4 hours, rotating occasionally. For faster, mix 1 cup sweetened condensed milk with ¼ cup brown sugar and 2 tbsp butter, simmer 10-15 minutes until thickened. These options keep the signature caramel-banana flavor intact. Use immediately warm on your poke cake for best absorption.
How do I store banoffee poke cake?
Store banoffee poke cake covered in the fridge for up to 3-4 days. Use plastic wrap or an airtight container to prevent drying out and absorbing fridge odors. The bananas may brown slightly after day 2, but flavor improves as it sits. For best taste, serve within 24 hours. Don’t leave at room temp over 2 hours due to dairy toppings. To portion, cut into squares and wrap individually for grab-and-go. If stacking layers, place parchment between pieces. Freezing works for up to 2 months: wrap tightly in plastic and foil, thaw overnight in fridge. Avoid refreezing after thawing to maintain texture. Always chill before serving for firm slices.
Can I make banoffee poke cake ahead of time?
Yes, banoffee poke cake is ideal for make-ahead prep. Bake the cake and add dulce de leche up to 1 day in advance; it soaks fully overnight for extra moisture. Add bananas and whipped cream right before serving to keep them fresh—bananas oxidize quickly. Assemble fully up to 4 hours ahead, but cover loosely to avoid smudging the topping. For events, bake 2 days early, poke and fill day-of, top last minute. This saves time and lets flavors meld. Pro tip: Chill 2-4 hours minimum after full assembly for clean cuts. It travels well in a cake carrier. Check our banana bread recipe for more banana dessert ideas linking here.

Banoffee Poke Cake
🍌 Irresistible combination of sweet bananas and rich toffee poured into a tender yellow cake for the ultimate dessert experience
🍯 Easy poke cake technique creates moist, flavorful layers that soak up every drop of delicious dulce de leche caramel
- Total Time: 3 hours
- Yield: 12 servings 1x
Ingredients
13.25 ounces yellow cake mix convenient base
2 1/2 cups all-purpose flour for homemade yellow cake option
2 1/2 teaspoons baking powder leavening for homemade cake
1/2 teaspoon salt balances sweetness and strengthens gluten
3/4 cup room temperature butter adds richness in homemade cake
1 3/4 cups granulated sugar sweetens the homemade cake
3 room temperature eggs provide structure and moisture for homemade cake
2 teaspoons vanilla extract flavor enhancer for cake and whipped cream
1 1/4 cups whole milk moistens the homemade cake batter
2 cups canned Dulce de Leche main filling for the poke cake
14 ounces can sweetened condensed milk if making homemade dulce de leche
2 cups heavy whipping cream whip with vanilla for the topping
1 teaspoon vanilla extract adds flavor to the whipped cream
2 to 3 medium bananas, sliced fresh topping
1/4 cup chopped toffee pieces crunchy topping contrast
Additional Dulce de Leche for drizzling for a glossy finish
Nonstick spray to grease a 9×13-inch baking dish
Parchment paper for creating a sling to lift the cake from the pan
Instructions
1-First Step: Gather ingredients and equipment. Preheat the oven to 350 degrees F (175 degrees C) if using the homemade cake recipe or follow the box instructions if using a mix. Lightly spray a 9×13-inch baking dish with nonstick spray and create a parchment sling by lining the pan with parchment paper that hangs over the long sides. This makes removing the cake easier after chilling.
2-Second Step: Prepare the cake batter.
* If using boxed mix: Prepare the yellow cake mix according to package directions, substituting milk for water if you want a richer crumb. Pour batter into the prepared 9×13-inch pan, smoothing the top.
* If using homemade yellow cake: In a medium bowl whisk together 2 1/2 cups all-purpose flour, 2 1/2 teaspoons baking powder, and 1/2 teaspoon salt. In a separate large bowl, beat 3/4 cup softened butter with 1 3/4 cups granulated sugar until light. Add 3 room temperature eggs one at a time, then beat in 2 teaspoons vanilla extract. Alternately add the dry ingredients and 1 1/4 cups whole milk, beginning and ending with dry ingredients, mixing until just combined. Pour into the prepared pan.
3-Third Step: Bake and initial cooling. Bake at 350 degrees F for about 25 minutes, or until a toothpick inserted in the center comes out clean. Let the cake cool in the pan for 15 minutes. This short cooling period prevents collapsing when poking holes.
4-Fourth Step: Poke the cake. After the 15-minute initial cooling, use the handle of a wooden spoon to poke holes evenly across the cake, spacing about 1 inch apart. Let the cake cool completely for about 30 minutes before adding the filling; this prevents the whipped cream from melting when added later.
5-Fifth Step: Warm the dulce de leche. Heat 2 cups canned Dulce de Leche gently until pourable. You can microwave in short bursts or warm on the stovetop over low heat, stirring to smooth. If you made homemade dulce de leche from a 14 oz can of sweetened condensed milk, be sure it is thick but pourable.
6-Sixth Step: Pour the dulce de leche over the cake and spread. Pour the warm dulce de leche evenly over the cake, using a spatula to press the sauce into the holes so the filling soaks into the crumb. This is what makes it a true poke cake – the dulce de leche pools inside the cake for gooey bites.
7-Seventh Step: Whip the cream. Use 2 cups of cold heavy whipping cream with 1 teaspoon vanilla extract. Chill the mixing bowl and whisk briefly if possible. Whip to soft peaks and then spread evenly over the dulce-soaked cake. Cold cream whips faster and holds better on the cake.
8-Eighth Step: Chill the cake. Place the cake in the refrigerator and chill until ready to serve, at least 2 hours. Chilling helps the dulce de leche set slightly and makes cleaner slices.
9-Ninth Step: Finish just before serving. Just before serving, slice 2 to 3 medium bananas and arrange them across the top. Sprinkle 1/4 cup chopped toffee pieces over the bananas and whipped cream. Drizzle additional dulce de leche for extra shine and toffee flavor. Slice and serve immediately after arranging the toppings so bananas stay fresh.
10-Final Step: Slice and serve. Use a sharp knife dipped in hot water and wiped dry for cleaner cuts. Serve chilled for the best texture. Prep time is about 20 minutes, cook time about 25 minutes, with additional cooling and chilling time included in the process.
Last Step:
Please leave a rating and comment letting us know how you liked this recipe! This helps our business to thrive and continue providing free, high-quality recipes for you.Notes
⏰ Allow cake to cool for 15 minutes before poking holes to prevent collapsing
🌡️ Ensure cake is completely cooled before frosting to avoid melting the whipped cream
🍌 Best eaten within 48 hours – do not freeze as whipped cream will weep and bananas will brown
- Prep Time: 20 minutes
- Cooling and chilling time: 2 hours 15 minutes
- Cook Time: 25 minutes
- Category: Dessert
- Method: Baking
- Cuisine: American
- Diet: Vegetarian
Nutrition
- Serving Size: 1 slice
- Calories: 296
- Sugar: 20 g
- Sodium: 245 mg
- Fat: 17 g
- Saturated Fat: 11 g
- Unsaturated Fat: 5 g
- Trans Fat: 0.1 g
- Carbohydrates: 35 g
- Fiber: 1 g
- Protein: 3 g
- Cholesterol: 50 mg


