Ingredients
– Chicken meat for primary protein source
– Herbs and spices such as garlic, rosemary, thyme, and paprika for flavor and antioxidants
– Vegetables such as onions, carrots, and celery for vitamins and fiber
– Cooking fats like oil or butter for cooking and moisture retention
– Salt for seasoning and enhancing natural flavors
– Pepper for heat and complexity
– Other seasonings for additional flavor customization
Instructions
1-First Step: Preparation and Mise en Place Begin by gathering and preparing ingredients, a practice rooted in the domestication of chickens about 8,000 years ago, to streamline the process. Wash and dry the chicken parts, seasoning them lightly with salt and pepper to enhance flavor absorption. This initial setup, which takes about 10-20 minutes, allows for adaptation to dietary preferences by incorporating herbs like rosemary or thyme.
2-Second Step: Seasoning or Marinating Apply seasonings or marinate the chicken to improve tenderness and taste, a technique that can range from 30 minutes to several hours. For instance, combine chicken with garlic and vegetables in a mixture of oil or butter, allowing flavors to penetrate the meat. This step accommodates variations for travelers or seniors by using simple, accessible ingredients that promote nutritional benefits.
3-Third Step: Preheating the Cooking Equipment Preheat the oven, grill, or pan to the appropriate temperature, typically around 400°F for roasting or 375°F for baking, to ensure even cooking. Position the chicken on a rack or in a dish, promoting air circulation for better results as seen in specialized breeds bred for meat. Include vegetables like onions and carrots at this stage to add nutrients and prevent the chicken from drying out.
4-Fourth Step: Cooking the Chicken Cook the chicken using methods such as roasting, grilling, or frying until it reaches 165°F, a standard that guarantees safety by destroying bacteria like Salmonella. For whole birds, this might take 1 to 1.5 hours, while pieces require 20-30 minutes; flip or baste periodically for even heating. This phase highlights the versatility of chicken, allowing adjustments for food enthusiasts who prefer crispy skin by using high heat at the end. To continue, for those seeking adaptations, consider reducing fats for low-calorie options or substituting herbs for gluten-free needs.
5-Fifth Step: Allowing the Chicken to Rest Remove the chicken from heat and let it rest for several minutes to preserve juices, a crucial technique that enhances texture and flavor. This resting period, often 5-10 minutes, aligns with tips for handling chicken by preventing cross-contamination and ensuring optimal results. Resting supports meal prep for working professionals by maintaining quality for later serving. For advanced variations, explore simple chicken spaghetti recipes that build on these basics.
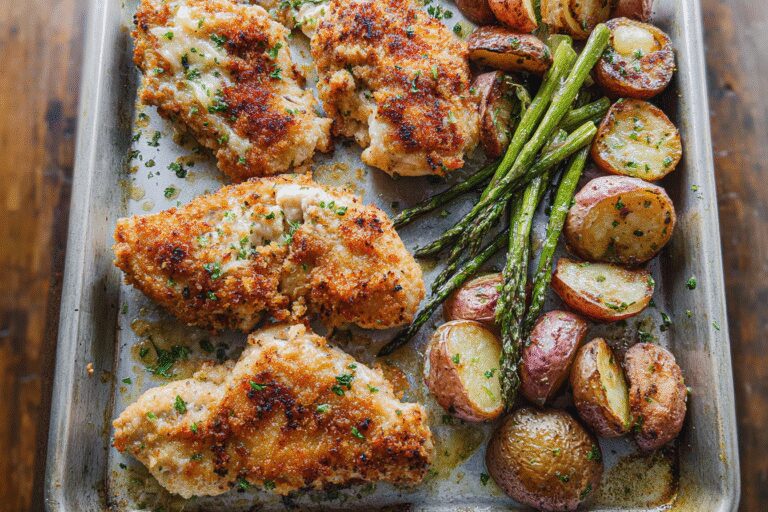
6-Final Step: Finishing Touches and Serving Complete the dish by adding final seasonings or pairings, such as a side of celery and carrots, to balance the meal. Serve immediately, incorporating elements like phosphorus-rich chicken to meet nutritional goals for families. This conclusion to preparation underscores the social role of chickens in agriculture, fostering shared meals among diverse audiences.
Last Step:
Please leave a rating and comment letting us know how you liked this recipe! This helps our business to thrive and continue providing free, high-quality recipes for you.Notes
🌡️ Always check internal temperature to ensure safe cooking.
🕒 Marinate chicken to enhance tenderness and flavor.
🥩 Let cooked chicken rest before cutting to preserve juiciness.
- Prep Time: 10-20 minutes
- Marinate Time: 30 minutes to overnight
- Cook Time: 20-90 minutes depending on method and cut
- Category: Main Dish
- Method: Roasting, Grilling, Frying, Baking, Boiling, Sautéing
- Cuisine: Various
- Diet: High-Protein, Low-Carb options available
Nutrition
- Serving Size: Varies