

Why You’ll Love This Chocolate Hedgehog Slice
If you are craving a sweet treat that comes together fast and still feels special, this Chocolate Hedgehog Slice is a winner. It is one of those easy no bake desserts that fits busy days, hot afternoons, and last-minute snack attacks without any fuss.
- Easy to make: This hedgehog slice needs no oven and only about 15 minutes of hands-on prep, which makes it perfect for beginners, kids helping in the kitchen, or anyone who wants dessert without much effort.
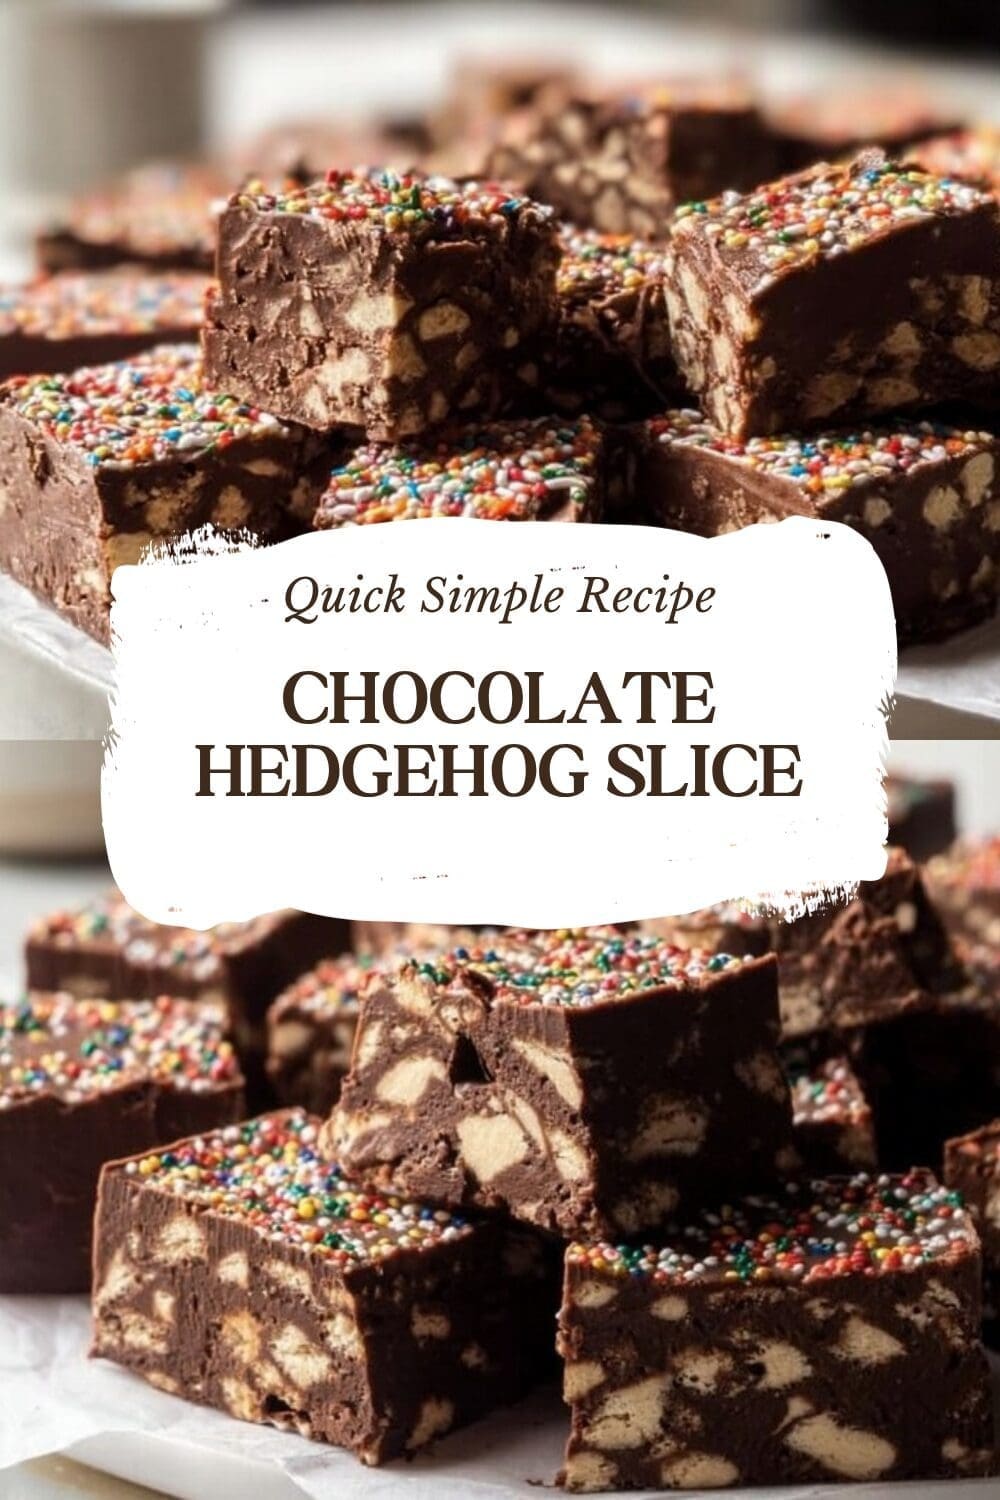
- Great texture: The mix of crunchy biscuits, walnuts, coconut, and smooth chocolate gives every bite a fun contrast. You get a fudgy base with a glossy chocolate top.
- Flexible for different diets: You can swap in plain biscuits, use nut-free options, or try white chocolate for a sweeter finish. It is a very forgiving no bake slice.
- Rich chocolate flavor: The dark chocolate base keeps the slice deep and balanced, while the milk chocolate topping adds a softer, sweeter layer.
This is the kind of no bake chocolate biscuit slice that disappears fast at family gatherings, school events, and tea breaks.
If you enjoy easy tray desserts, you may also like this easy peach cobbler dump cake recipe for another simple crowd-pleaser.
For readers curious about chocolate choices, you can also compare slice styles with this chocolate slice recipe guide and read about the benefits of dark chocolate in this dark chocolate nutrition article.
Jump to:
- Why You’ll Love This Chocolate Hedgehog Slice
- Essential Ingredients for Chocolate Hedgehog Slice
- Main Ingredients
- Special Dietary Options
- How to Prepare the Perfect Chocolate Hedgehog Slice: Step-by-Step Guide
- First Step: Prepare the pan and dry ingredients
- Second Step: Melt the chocolate base mixture
- Third Step: Combine the wet and dry ingredients
- Fourth Step: Press into the pan
- Fifth Step: Make the chocolate topping
- Sixth Step: Add the topping and chill again
- Final Step: Slice and serve
- Dietary Substitutions to Customize Your Chocolate Hedgehog Slice
- Protein and Main Component Alternatives
- Vegetable, Sauce, and Seasoning Modifications
- Mastering Chocolate Hedgehog Slice: Advanced Tips and Variations
- Pro cooking techniques
- Flavor variations
- Presentation tips
- Make-ahead options
- How to Store Chocolate Hedgehog Slice: Best Practices
- Refrigeration
- Freezing
- Reheating
- Meal prep considerations
- Nutrition Information for Chocolate Hedgehog Slice
- FAQs: Frequently Asked Questions About Chocolate Hedgehog Slice
- What biscuits can I use for chocolate hedgehog slice?
- What type of coconut works best in chocolate hedgehog slice?
- Can I make chocolate hedgehog slice without nuts or with substitutes?
- What chocolate is best for chocolate hedgehog slice?
- How do I store chocolate hedgehog slice and prevent cracking?
- Chocolate Hedgehog Slice
- Ingredients
- Instructions
- Last Step:
- Notes
- Nutrition
- Did you make this recipe?
Essential Ingredients for Chocolate Hedgehog Slice
This chocolate hedgehog slice recipe uses simple pantry ingredients, which is part of its charm. Below is the full ingredient list with exact measurements so you can prep everything before you start.
Main Ingredients
- 250 grams digestive biscuits or about 17 biscuits, 9 ounces – forms the crunchy base and helps the slice hold together.
- 1/2 cup chopped walnuts, 65 grams – adds nuttiness and a little bite.
- 1/2 cup desiccated coconut, 50 grams – gives the slice texture and helps absorb the chocolate mixture.
- 85 grams unsalted butter, 6 tablespoons – melts into the base and gives richness.
- 3 tablespoons cocoa powder – deepens the chocolate flavor in the filling.
- 1 can sweetened condensed milk, 395 grams or 14 ounces – binds everything together and adds sweetness.
- 250 grams dark chocolate, 9 ounces for the base – creates the fudgy chocolate center.
- 150 grams milk chocolate, 5.3 ounces for the topping – makes the top smooth and sweet.
- 2 teaspoons vegetable oil – keeps the topping softer and helps prevent cracking.
Special Dietary Options
- Vegan: Use plant-based butter, dairy-free condensed milk, and vegan chocolate. The texture will still work well if the substitute condensed milk is thick.
- Gluten-free: Swap the digestive biscuits for gluten-free digestives or another crisp gluten-free plain biscuit.
- Low-calorie: Use a lighter biscuit option, reduce the topping thickness, and choose a chocolate with a higher cocoa percentage.
For best results, keep the biscuit pieces varied. Some crumbs help the slice bind, while a few bigger chunks add crunch and make the finished bars look more homemade.
| Prep Detail | Time or Amount |
|---|---|
| Prep time | 15 minutes |
| Chilling time | 2 hours total |
| Total time | 2 hours 15 minutes |
| Servings | 16 pieces |
How to Prepare the Perfect Chocolate Hedgehog Slice: Step-by-Step Guide
This easy no bake chocolate hedgehog slice comes together in layers. Take your time with the melting and chilling stages, and you will get neat squares that slice beautifully.
First Step: Prepare the pan and dry ingredients
Line an 18×28 cm or 20×20 cm slice pan with parchment paper, leaving some overhang if possible so the slice lifts out easily later. Break the 250 grams of digestive biscuits by hand into a mix of pieces and crumbs. Put them in a large bowl with the chopped walnuts and desiccated coconut, then stir everything together.
Keeping some biscuit pieces larger gives the finished slice more crunch and makes it look more interesting when cut. Do not worry about making the crumbs perfectly even, because that rustic texture is part of the charm.
Second Step: Melt the chocolate base mixture
Set a saucepan over low heat. Add the unsalted butter, cocoa powder, sweetened condensed milk, and dark chocolate. Stir slowly until everything melts into a smooth, glossy mixture. Keep the heat low so the chocolate does not scorch.
This part should smell rich and chocolatey. If the mixture looks a little thick, keep stirring gently until it becomes silky and pourable. Once smooth, remove it from the heat right away.
Third Step: Combine the wet and dry ingredients
Pour the melted chocolate mixture over the biscuit, walnut, and coconut mixture. Use a sturdy spoon or spatula to stir until every piece is coated. Work quickly but carefully so the mixture stays warm and easy to spread.
The goal is to coat every crumb without crushing all the texture out of the biscuits. A few larger bits should still be visible. That is what makes this chocolate biscuit slice so satisfying to bite into.
Fourth Step: Press into the pan
Spoon the mixture into the prepared pan and spread it out evenly. Press it down firmly with the back of a spoon or a flat spatula. You want a compact layer so the slice holds together well when cut.
Once it is packed in, place the pan in the fridge for 30 minutes. This first chill helps the base set up before you add the topping. While it chills, you can clean up your kitchen and get the topping ready.
Fifth Step: Make the chocolate topping
Put the milk chocolate in a microwave-safe bowl and heat it in 30-second intervals. Stir after each burst until the chocolate is fully smooth. When it is melted, stir in the vegetable oil.
The oil gives the topping a softer finish and helps stop cracking later. It also gives the slice a glossy look. If you prefer a darker top, you can use dark chocolate instead of milk chocolate, but the original version is sweet and smooth.
Sixth Step: Add the topping and chill again
Spread the melted topping over the chilled base in an even layer. If you want a neat finish, gently tilt the pan so the chocolate settles into the corners. Return the slice to the fridge for 1 to 2 hours, or until firm.
A good tip is to score the top when it is about 75 percent hardened. That makes cutting cleaner later and helps prevent cracks.
Avoid cutting the bars when they are fully cold and rock hard. Letting them sit for a few minutes before slicing makes the knife move through more smoothly.
Final Step: Slice and serve
Lift the set slice from the pan using the parchment paper. Place it on a cutting board and use a sharp knife to cut it into 16 squares. Wipe the knife between cuts if the chocolate starts to smear.
Serve the squares chilled or let them sit at room temperature for a few minutes if you want a softer bite. Either way, the contrast between the crunchy base and creamy topping is what makes this simple no bake hedgehog slice so good.

Dietary Substitutions to Customize Your Chocolate Hedgehog Slice
One of the best things about this recipe is how easy it is to adjust. Whether you are working around allergies, missing ingredients, or just want to try something new, the base recipe is flexible.
Protein and Main Component Alternatives
Although this is a dessert rather than a protein-focused dish, the main components can still be changed to suit your needs. If you need a nut-free version, replace the 1/2 cup walnuts with 1/2 cup raisins. You can also use dried cranberries or chopped dates for a sweeter, chewier result.
If you want to skip nuts completely, increase the desiccated coconut to 3/4 cup and use 300 grams biscuits instead of 250 grams. That helps the slice stay sturdy. For a different flavor, try pecans or hazelnuts in the same amount as the walnuts.
Vegetable, Sauce, and Seasoning Modifications
For the topping, white chocolate is a fun swap if you want a sweeter version of this simple no bake hedgehog slice. You can also use dark chocolate for the topping if you want a stronger cocoa taste. If you use a thicker chocolate, keep the vegetable oil in place so the top stays smooth.
If digestive biscuits are not in your pantry, graham crackers or similar plain biscuits work well. Avoid very soft or highly sweet biscuits because they can make the slice too dense or soggy. A plain, crisp biscuit gives the best structure.
Mastering Chocolate Hedgehog Slice: Advanced Tips and Variations
Once you make this recipe once, it becomes easy to tweak. A few small tricks can make your chocolate hedgehog slice recipe look neater and taste even better.
Pro cooking techniques
- Use low heat when melting the base mixture so the chocolate stays smooth.
- Keep the biscuit pieces uneven for better texture and a more handmade look.
- Press the base firmly into the pan so the bars hold their shape when sliced.
- Stir the topping until fully glossy before spreading it on top.
- Score the top when it is partly set, not fully hard, for cleaner cuts.
Flavor variations
You can change the flavor without changing the method. Try adding a handful of crushed pretzels for a salty crunch, or swap in white chocolate for a softer sweet profile. If you like a stronger chocolate taste, use more dark chocolate in the base and a slightly thinner milk chocolate topping.
For a festive version, sprinkle the top with extra coconut, chopped nuts, or chocolate curls before the topping sets. A pinch of sea salt on top also works well with the dark chocolate base.
Presentation tips
For cleaner squares, use a long sharp knife and wipe it between cuts. If you want a neat finish for a party tray, line the slice pan with enough parchment so you can lift the whole block out in one piece. Then trim the edges before cutting the bars.
A simple serving plate makes this dessert look polished enough for guests. You do not need much garnish because the chocolate layers already look appealing on their own.
Make-ahead options
This is a smart dessert to make ahead for birthdays, lunchboxes, and weekend gatherings. Since it needs a full chill, you can prepare it the day before and leave it in the fridge overnight. That gives the flavors time to settle and makes slicing easier.
If you are planning ahead for a busy week, cut the slice into squares and store them in layers separated by baking paper. That way, you can grab a piece whenever you need a quick sweet snack.
How to Store Chocolate Hedgehog Slice: Best Practices
Proper storage keeps this chocolate biscuit slice tasting fresh and helps the topping stay neat. Since it is a chilled no bake dessert, the fridge is the best short-term home for it.
Refrigeration
Store the slice in an airtight container in the fridge for up to 5 days. If stacking the pieces, place baking paper between layers so they do not stick. This also helps the chocolate top stay smooth.
Freezing
For longer storage, wrap individual squares tightly and place them in a freezer-safe container. Freeze for up to 2 months. Thaw in the fridge overnight before serving for the best texture.
Reheating
This recipe does not need reheating. In fact, warming it too much can make the topping soft or sticky. If you want a softer bite, let a piece sit at room temperature for a few minutes before eating.
Meal prep considerations
If you are making this for school lunches, parties, or snack prep, cut it into squares once fully set and store the pieces in individual containers. That makes it easy to pack and helps the bars stay tidy.
Nutrition Information for Chocolate Hedgehog Slice
Below is the nutrition estimate per serving, based on 16 pieces.
| Nutrient | Per Serving |
|---|---|
| Calories | 293 |
| Carbohydrates | 27 grams |
| Protein | 4 grams |
| Fat | 20 grams |
| Saturated Fat | 11 grams |
| Cholesterol | 12 milligrams |
| Sodium | 81 milligrams |
| Potassium | 205 milligrams |
| Fiber | 4 grams |
| Sugar | 14 grams |
| Vitamin A | 139 IU |
| Calcium | 24 milligrams |
| Iron | 3 milligrams |
This dessert is rich, so smaller squares are a good way to enjoy it. The walnut, coconut, and biscuit base gives each piece a satisfying texture, while the chocolate topping makes it feel extra special.
FAQs: Frequently Asked Questions About Chocolate Hedgehog Slice
What biscuits can I use for chocolate hedgehog slice?
Digestive biscuits are the traditional choice for chocolate hedgehog slice due to their crisp texture and mild flavor, but you can easily substitute with graham crackers, Arnott’s Marie biscuits, or Walkers shortbread biscuits. Use the same weight (around 250-300g) and crush them into small chunks for the base. Avoid overly sweet or soft biscuits, as they may make the slice soggy. For a gluten-free option, try gluten-free digestive alternatives. This keeps the no-bake structure intact while matching the crumbly texture needed to bind with chocolate, coconut, and nuts. Crush by hand or in a food processor for even pieces.
What type of coconut works best in chocolate hedgehog slice?
Desiccated coconut is ideal for chocolate hedgehog slice, providing fine texture and moisture absorption without overpowering chewiness. Opt for unsweetened desiccated coconut (about 1 cup) to balance the natural sweetness from condensed milk and chocolate—sweetened works if you reduce sugar elsewhere. Shredded coconut can substitute but use less (3/4 cup) as it’s larger and may affect setting. Toast it lightly for extra flavor if desired. Always stir it evenly into the mixture before pressing into the pan. This ingredient helps create the signature fudgy consistency in this classic Australian no-bake treat.
Can I make chocolate hedgehog slice without nuts or with substitutes?
Yes, chocolate hedgehog slice is flexible for nut-free diets. Replace 1/2 cup walnuts with 1/2 cup raisins, dried cranberries, or chopped dates for chewiness and sweetness. Alternatively, omit nuts entirely and increase to 3/4 cup desiccated coconut plus 300g biscuits for bulk. For other swaps, use pecans or hazelnuts (same quantity, toasted for better taste). Chop nuts finely to distribute evenly and avoid large bites. This maintains the crunchy contrast against the smooth chocolate base. Check for allergies and label if sharing—it’s a crowd-pleaser for school events or picnics.
What chocolate is best for chocolate hedgehog slice?
For the base of chocolate hedgehog slice, choose 50% dark chocolate, semi-sweet, or 60% dark (about 300g melted) to cut through the sweetness without bitterness—skip milk chocolate as it can make it too cloying. The topping (150-200g) allows flexibility: milk, dark, or semi-sweet all work for drizzle or full coverage. Melt gently over simmering water or in microwave bursts, stirring until smooth. Add 1/2 tsp neutral oil like vegetable or coconut to prevent cracking and ensure glossy finish. Score the top at 75% set for clean cuts. Store-bought blocks or chips both perform well in this recipe.
How do I store chocolate hedgehog slice and prevent cracking?
Store chocolate hedgehog slice in an airtight container in the fridge for up to 5 days; it firms up nicely when chilled. For longer storage, wrap portions in plastic and freeze up to 2 months, thawing in the fridge overnight. To avoid cracking, mix 1/2 tsp oil into melted chocolate for topping, let it set at room temp until 75% hardened, then score lightly with a knife before full chill. Cut with a hot knife for smooth edges—run under hot water and dry. Serve at room temp for best flavor and texture. This keeps slices looking perfect for gifting or parties.

Chocolate Hedgehog Slice
🍫🦔 Dive into fudgy, no-bake hedgehog slice packed with crunchy biscuits, nuts, and double chocolate layers for ultimate indulgent satisfaction!
🍪🦔 Easy 15-minute prep yields 16 rich treats – perfect for parties, afternoon tea, or sharing sweet Aussie-inspired delight without baking!
- Total Time: 2 hours 15 minutes
- Yield: 16 pieces
Ingredients
– 250 grams digestive biscuits forms the crunchy base and helps the slice hold together
– 1/2 cup chopped walnuts adds nuttiness and a little bite
– 1/2 cup desiccated coconut gives the slice texture and helps absorb the chocolate mixture
– 85 grams unsalted butter melts into the base and gives richness
– 3 tablespoons cocoa powder deepens the chocolate flavor in the filling
– 1 can sweetened condensed milk binds everything together and adds sweetness
– 250 grams dark chocolate for the base creates the fudgy chocolate center
– 150 grams milk chocolate for the topping makes the top smooth and sweet
– 2 teaspoons vegetable oil keeps the topping softer and helps prevent cracking
Instructions
1-First Step: Prepare the pan and dry ingredients Line an 18×28 cm or 20×20 cm slice pan with parchment paper, leaving some overhang if possible so the slice lifts out easily later. Break the 250 grams of digestive biscuits by hand into a mix of pieces and crumbs. Put them in a large bowl with the chopped walnuts and desiccated coconut, then stir everything together. Keeping some biscuit pieces larger gives the finished slice more crunch and makes it look more interesting when cut. Do not worry about making the crumbs perfectly even, because that rustic texture is part of the charm.
2-Second Step: Melt the chocolate base mixture Set a saucepan over low heat. Add the unsalted butter, cocoa powder, sweetened condensed milk, and dark chocolate. Stir slowly until everything melts into a smooth, glossy mixture. Keep the heat low so the chocolate does not scorch. This part should smell rich and chocolatey. If the mixture looks a little thick, keep stirring gently until it becomes silky and pourable. Once smooth, remove it from the heat right away.
3-Third Step: Combine the wet and dry ingredients Pour the melted chocolate mixture over the biscuit, walnut, and coconut mixture. Use a sturdy spoon or spatula to stir until every piece is coated. Work quickly but carefully so the mixture stays warm and easy to spread. The goal is to coat every crumb without crushing all the texture out of the biscuits. A few larger bits should still be visible. That is what makes this chocolate biscuit slice so satisfying to bite into.
4-Fourth Step: Press into the pan Spoon the mixture into the prepared pan and spread it out evenly. Press it down firmly with the back of a spoon or a flat spatula. You want a compact layer so the slice holds together well when cut. Once it is packed in, place the pan in the fridge for 30 minutes. This first chill helps the base set up before you add the topping. While it chills, you can clean up your kitchen and get the topping ready.
5-Fifth Step: Make the chocolate topping Put the milk chocolate in a microwave-safe bowl and heat it in 30-second intervals. Stir after each burst until the chocolate is fully smooth. When it is melted, stir in the vegetable oil. The oil gives the topping a softer finish and helps stop cracking later. It also gives the slice a glossy look. If you prefer a darker top, you can use dark chocolate instead of milk chocolate, but the original version is sweet and smooth.
6-Sixth Step: Add the topping and chill again Spread the melted topping over the chilled base in an even layer. If you want a neat finish, gently tilt the pan so the chocolate settles into the corners. Return the slice to the fridge for 1 to 2 hours, or until firm. A good tip is to score the top when it is about 75 percent hardened. That makes cutting cleaner later and helps prevent cracks. Avoid cutting the bars when they are fully cold and rock hard. Letting them sit for a few minutes before slicing makes the knife move through more smoothly.
7-Final Step: Slice and serve Lift the set slice from the pan using the parchment paper. Place it on a cutting board and use a sharp knife to cut it into 16 squares. Wipe the knife between cuts if the chocolate starts to smear. Serve the squares chilled or let them sit at room temperature for a few minutes if you want a softer bite. Either way, the contrast between the crunchy base and creamy topping is what makes this simple no bake hedgehog slice so good.
Last Step:
Please leave a rating and comment letting us know how you liked this recipe! This helps our business to thrive and continue providing free, high-quality recipes for you.Notes
🍪 Keep some larger biscuit pieces for extra crunch and appealing texture in every bite.
🛢️ Add oil to melted chocolate topping to make it softer, easier to slice without cracking.
❄️ Score the semi-set topping and slice when not fully cold to prevent cracks and clean cuts.
- Prep Time: 15 minutes
- Chilling: 2 hours
- Category: Desserts
- Method: No-Bake
- Cuisine: Australian
- Diet: Vegetarian
Nutrition
- Serving Size: 1 piece
- Calories: 293 kcal
- Sugar: 14g
- Sodium: 81mg
- Fat: 20g
- Saturated Fat: 11g
- Unsaturated Fat: 9g
- Trans Fat: 0g
- Carbohydrates: 27g
- Fiber: 4g
- Protein: 4g
- Cholesterol: 12mg


