

Why You’ll Love This Homemade Pie Crust
This homemade pie crust is a reliable, easy-to-make base that gives you flaky layers and a tender bite every time. Whether you are a baking enthusiast or a beginner, this simple scratch pie crust brings bakery-style texture to home baking with minimal fuss. I will walk you through each step so you can get a perfect flaky crust for sweet or savory pies.
- Ease of preparation: This Homemade Pie Crust uses just five core ingredients and a quick food processor or a pastry cutter. Prep time is only 10 minutes with a 1 hour chill, so you can make dough quickly between errands or while the kids nap. The method is straightforward and forgiving for new bakers.
- Health-minded ingredients: With all-purpose flour, cold unsalted butter, a touch of sugar and salt, and ice water, this scratch crust uses familiar pantry staples without unnecessary additives. You control the fat source and salt, which helps if you are watching calories, fat types, or sodium.
- Versatility: This flaky pie crust works for fruit pies, savory quiches, tarts, and galettes. It adapts to vegan, gluten-free, or lower-calorie needs with simple swaps. The Homemade Pie Crust formula allows many variations while keeping flaky layers and a tender bite.
- Distinctive flavor and texture: Because the dough keeps small bits of cold butter intact, you get the classic laminated pockets that create flakiness and light, buttery flavor. That texture makes store-bought crusts feel flat in comparison.
For another easy dessert that uses a simple crust or base, you might like this peach cobbler dump cake for quick summer baking: peach cobbler dump cake. For an expert take on a similar easy pie crust, check out this detailed guide at Natasha’s Kitchen: Natasha’s Kitchen easy pie crust recipe.
Jump to:
- Why You’ll Love This Homemade Pie Crust
- Essential Ingredients for Homemade Pie Crust
- Main Ingredients
- Special Dietary Options
- How to Prepare the Perfect Homemade Pie Crust: Step-by-Step Guide
- First Step: Gather and measure
- Second Step: Combine dry ingredients
- Third Step: Cut in the butter
- Fourth Step: Add ice water gradually
- Fifth Step: Gather, divide, and chill
- Sixth Step: Rolling and shaping
- Seventh Step: Blind bake when needed
- Final Step: Bake with your filling or store
- Timing summary
- Dietary Substitutions to Customize Your Homemade Pie Crust
- Protein and Main Component Alternatives
- Vegetable, Sauce, and Seasoning Modifications
- Mastering Homemade Pie Crust: Advanced Tips and Variations
- Pro cooking techniques
- Flavor variations
- Presentation tips
- Make-ahead options
- How to Store Homemade Pie Crust: Best Practices
- Refrigeration
- Freezing
- Reheating
- Meal prep considerations
- Nutrition Facts
- Ingredients
- Directions
- Tips and Tricks
- FAQs: Frequently Asked Questions About Homemade Pie Crust
- What ingredients do I need for homemade pie crust?
- How do you make pie crust dough in a food processor?
- How do you roll out and shape homemade pie crust?
- Why is my homemade pie crust tough and how do I fix it?
- How do you blind bake pie crust and can you make it ahead?
- Homemade Pie Crust
- Ingredients
- Instructions
- Last Step:
- Notes
- Nutrition
- Did you make this recipe?
Essential Ingredients for Homemade Pie Crust
Here is a clear list of what you need for this Homemade Pie Crust and why each item matters. The ingredient list below follows the exact measurements provided for a classic double-crust or two single crusts.
Main Ingredients
- 2 1/2 cups all-purpose flour, plus more for dusting – Provides structure; all-purpose gives the best balance for a tender, slightly flaky crust.
- 1/2 tablespoon sugar – Adds a touch of sweetness and helps with browning if using the crust for desserts.
- 1/2 teaspoon salt – Balances flavor and strengthens the dough structure slightly.
- 1/2 pound cold unsalted butter (2 sticks), diced into 1/4-inch pieces – Creates the flaky layers when kept cold and left in pea-sized pieces.
- 7 tablespoons ice water (7 to 8 tablespoons) – Hydrates the dough while keeping it cold; use a tablespoon at a time for control.
Special Dietary Options
- Vegan: Substitute cold vegan butter or a solid vegetable shortening in the same weight amount. Keep it cold and cut into small pieces for similar flakiness.
- Gluten-free: Use a 1-to-1 gluten-free all-purpose blend designed for baking, and consider adding 1/4 teaspoon xanthan gum if your blend lacks binding agents.
- Low-calorie: Reduce butter slightly and replace part with chilled applesauce or a lower-fat shortening, but note the texture will change and may be less flaky.
How to Prepare the Perfect Homemade Pie Crust: Step-by-Step Guide
This step-by-step guide follows the trusted method provided. It includes exact actions for both food processor and hand methods, plus timing and temperature details. Follow each step without overworking the dough to keep those buttery pockets intact for a flaky finish.
First Step: Gather and measure
Measure ingredients precisely. Spoon flour into the measuring cup and level it off to avoid packing. Dice 1/2 pound cold unsalted butter into 1/4-inch pieces and keep them refrigerated until ready. Have ice water measured into a small cup and keep it on ice. If using a food processor, assemble the bowl and blade; if working by hand, use a large mixing bowl and pastry cutter.
Second Step: Combine dry ingredients
In a food processor, pulse the flour, sugar, and salt a few times to combine. If mixing by hand, whisk the dry ingredients in a bowl. This distributes the salt and sugar evenly throughout the flour so you get consistent flavor and texture.
Third Step: Cut in the butter
Add the cold diced butter to the dry mix. Pulse in the food processor until coarse crumbs form with some pea-sized butter pieces remaining. The texture should be dry and powdery with visible bits of butter. If using a pastry cutter by hand, work quickly until you see similar pea-sized chunks. Avoid overprocessing; continuous running will warm the butter and lead to a tougher crust.
Fourth Step: Add ice water gradually
Add ice water 1 tablespoon at a time, pulsing or stirring until the dough forms moist clumps. You may need 7 to 8 tablespoons; the recipe lists 7 tablespoons as a precise amount, but add up to 8 if needed. Test by pinching a bit of dough between your fingers; it should hold together without being wet or sticky. If the dough is still crumbly after 7 tablespoons, add the extra teaspoon or two of water as needed rather than dumping it all at once.
Fifth Step: Gather, divide, and chill
Dump the clumpy dough onto a clean work surface and gather it into a ball by folding gently. Fold only enough to bring the dough together; do not knead. Keep the dough crumbly with visible butter pieces. Divide the dough into two equal halves, flatten each into a disk about 1 inch thick, wrap tightly in plastic wrap, and refrigerate for 1 hour. Chilling firms the butter and relaxes the gluten so rolling is easier and the crust bakes flaky.
Sixth Step: Rolling and shaping
When ready to roll, lightly dust a clean surface and rolling pin with flour. Remove one disk from the fridge and let it rest 10 to 20 minutes if it is too stiff to roll. Roll from the center outward to form a 12-inch circle for a 9-inch pie dish. Fold the dough in half or drape it over the rolling pin to transfer it to the pie dish, then gently press it into the bottom and sides. Trim the excess to about a 1/2-inch overhang, tuck under to create a thick edge, and flute the rim by pinching between your thumb and index finger of one hand and the fingers of the other hand around the edge.
Seventh Step: Blind bake when needed
If your recipe calls for blind baking, freeze the shaped crust for 30 minutes first to help it hold its shape. Line the chilled shell with parchment and fill with pie weights, dried beans, or rice. Bake at 425 F for 17 minutes until the edges are golden. Remove the weights and parchment and bake 5 more minutes until the bottom is dry and golden. Let cool before adding fillings like custard or fruit.
Final Step: Bake with your filling or store
If using as a raw shell for a baked filling, follow your pie recipe’s temperatures and bake times. For fully baked shells, cool completely before filling. To store, refrigerate wrapped dough disks up to 3 days or freeze up to 3 months. Thaw frozen dough overnight in the fridge before rolling.
Timing summary
- Prep: 10 minutes
- Chilling: 1 hour
- Total: 1 hour 10 minutes

Dietary Substitutions to Customize Your Homemade Pie Crust
This section offers practical swaps if you need vegan, gluten-free, or lower-fat options. Try one substitution at a time so you can judge texture and flavor changes.
Protein and Main Component Alternatives
Butter is the main fat responsible for flakiness and flavor. Below are reliable substitutes and what to expect from each.
- Vegan butter – Use a solid vegan stick butter in the same weight (1/2 pound). Keep it very cold and cut into small cubes. Vegan butter gives a similar flaky texture and buttery taste, though it may brown differently.
- Vegetable shortening – Shortening creates a tender crust but with a slightly different mouthfeel and less buttery flavor. Use the same weight measure and keep cold. Many bakers combine half butter and half shortening for the best balance.
- Part butter, part trimming – For a slightly lower-calorie crust, replace up to 25 percent of the butter with unsweetened applesauce or yogurt. Expect a less flaky, more tender crust; this works best in fruit tarts where moisture helps the filling.
Vegetable, Sauce, and Seasoning Modifications
These swaps help you match the crust to sweet or savory fillings and seasonal produce.
- Savory pies – Reduce sugar to zero and add 1/4 to 1/2 teaspoon dried herbs like thyme or rosemary for a savory edge that pairs well with quiche or meat pies.
- Sweet pies – Keep the 1/2 tablespoon sugar and consider adding 1/2 teaspoon vanilla or a pinch of cinnamon to complement fruit fillings.
- Gluten-free flour blends – Use a commercially prepared 1-to-1 gluten-free flour mix. Add 1/4 teaspoon xanthan gum if your blend lacks it to help bind the dough and improve elasticity.
Mastering Homemade Pie Crust: Advanced Tips and Variations
Once you have the basic method down, these pro tips and creative twists will help you make better crusts and try interesting flavors.
Pro cooking techniques
- Keep everything cold: Chill the flour and bowl briefly if your kitchen is warm. Cold tools preserve butter pockets for flakiness.
- Pulse, don’t puree: When using a food processor, use short pulses to avoid heating the butter and activating gluten in the flour.
- Roll gently and rotate: Rotate the dough while rolling and use light, even pressure to keep the crust thickness uniform.
Flavor variations
Try these ideas to make your homemade pie crust stand out:
- Nutty crust – Replace 1/4 cup of the flour with finely ground almonds for a rich, nutty flavor that pairs beautifully with fruit fillings.
- Herb crust – Add 1 teaspoon finely chopped fresh herbs for savory tarts.
- Sweet citrus – Add 1 teaspoon grated lemon or orange zest for bright notes in fruit pies.
Presentation tips
- Edge styles: Try a rope edge, braid, or lattice top for a decorative finish. Pressing a fork gently around the rim also creates a rustic look.
- Egg wash: For a deep golden crust, brush with a beaten egg white or yolk plus 1 teaspoon water before final baking.
Make-ahead options
- Prep dough disks up to 3 days ahead in the fridge. Bring to room temperature for 10 to 20 minutes before rolling if too stiff.
- Freeze wrapped disks up to 3 months. Thaw in the fridge overnight before use.
How to Store Homemade Pie Crust: Best Practices
Storing dough and baked shells correctly keeps quality high and makes baking easier on busy days.
Refrigeration
Wrap dough disks tightly in plastic wrap and refrigerate up to 3 days. If you need to roll the crust directly from chilled dough, let it sit 10 to 20 minutes at room temperature so it relaxes slightly and won’t crack while rolling.
Freezing
Wrap disks in plastic and place in a freezer bag for up to 3 months. Thaw overnight in the refrigerator before rolling. Fully baked shells can also be frozen for 1 month; to re-crisp, heat at 350 F for 8 to 10 minutes.
Reheating
To refresh a prebaked shell, warm at 350 F for 8 to 10 minutes so the bottom crisps. Avoid microwaving or high heat that can make the crust soggy or burned.
Meal prep considerations
- Make dough in bulk and freeze portions for quick pie nights.
- Blind bake shells ahead and store cooled shells in an airtight container for up to one week in the fridge.
Nutrition Facts
| Nutrient | Per Serving |
|---|---|
| Calories | 232 |
| Carbohydrates | 20g |
| Protein | 2g |
| Fat | 15g |
| Saturated Fat | 9g |
| Cholesterol | 40mg |
| Sodium | 99mg |
| Potassium | 32mg |
| Vitamin A | 470 IU |
| Calcium | 8mg |
| Iron | 1.2mg |
Tip: Keep the butter cold and work quickly. Small pea-sized bits of butter in the dough are what give you those perfect flaky layers.
Ingredients
(Structured list with exact measurements for this Homemade Pie Crust)
- 2 1/2 cups all-purpose flour, plus more for dusting
- 1/2 tablespoon sugar
- 1/2 teaspoon salt
- 1/2 pound cold unsalted butter (2 sticks), diced into 1/4-inch pieces
- 7 tablespoons ice water (7 to 8 tablespoons)
Directions
- In a food processor, pulse flour, sugar, and salt a few times to combine. Or whisk dry ingredients in a bowl by hand.
- Add cold diced butter and pulse until coarse crumbs form with some pea-sized butter pieces, keeping it dry and powdery. Use a pastry cutter by hand for the same texture.
- Add ice water 1 tablespoon at a time, pulsing or stirring until moist clumps form. Test by pinching dough; it should hold together without excess water to avoid stickiness.
- Gather dough on a clean surface into a ball, folding gently to combine without overmixing- keep it crumbly with visible butter pieces.
- Divide into two halves, flatten into disks, wrap in plastic, and refrigerate for 1 hour.
- To roll: Dust surface with flour, roll a disk into a 12-inch circle, transfer to pie dish using rolling pin, and press gently to fit. Tuck excess under for a thick edge.
- Flute the rim by pinching edge between thumb/index of one hand and fingers of the other, all around.
- For blind baking: Freeze shaped crust 30 minutes, line with parchment, fill with pie weights (or dry beans/rice), bake at 425 F for 17 minutes until edges are golden. Remove weights and bake 5 more minutes until bottom is dry and golden.
Tips and Tricks
- Use fridge-cold butter and handle minimally for flakiness.
- Add ice water by teaspoon if too crumbly, avoiding stickiness.
- Don’t overmix or knead to preserve butter pockets for tenderness.
- Rest refrigerated dough 10-20 minutes at room temp if too firm to roll.
- Store refrigerated up to 3 days or freeze up to 3 months (thaw in fridge).
- Chill before blind baking for better shape retention.
- Reuse beans (not for eating) or toast rice after blind baking.

FAQs: Frequently Asked Questions About Homemade Pie Crust
What ingredients do I need for homemade pie crust?
For a classic homemade pie crust that makes two single crusts or one double-crust pie, gather these simple ingredients: 2 1/2 cups all-purpose flour, 1 teaspoon salt, 1 teaspoon sugar, 1 cup (2 sticks) cold unsalted butter diced into small cubes, and 6-8 tablespoons ice water. Use all-purpose flour for the best texture—bread flour makes it too chewy. Keep butter very cold to create flaky layers; freeze it briefly if needed. Ice water prevents gluten development for tenderness. Measure flour by spooning into the cup and leveling off to avoid packing. This basic recipe works for sweet or savory pies and yields about 1 pound of dough. Prep time is just 15 minutes plus chilling. (78 words)
How do you make pie crust dough in a food processor?
Making pie crust in a food processor is quick and ensures even texture. Pulse 2 1/2 cups flour, 1 tsp salt, and 1 tsp sugar 5 times. Add 1 cup cold diced butter and pulse 6-8 times until pea-sized pieces form—don’t overprocess. Drizzle in 6-8 tbsp ice water, pulsing until moist clumps appear, about 4-5 pulses. Dump onto a floured surface, gather gently into a ball without kneading, divide in half, flatten into 1-inch disks, wrap in plastic, and chill 1 hour. This method cuts butter fast for flakiness. Avoid running the machine continuously to prevent tough dough from excess gluten. Total active time: 10 minutes. (112 words)
How do you roll out and shape homemade pie crust?
After chilling dough 1 hour, let it rest 10-20 minutes if too firm. Dust a clean surface and rolling pin lightly with flour. Start at center, roll outward to a 12-13 inch circle, 1/8-inch thick, rotating dough quarterly for evenness. Fold gently in half or wrap around pin to lift into a 9-inch pie pan. Unfold, press into bottom and sides. Trim overhang to 1/2 inch, tuck under for a sturdy edge. For fluting, pinch between thumb and fingers every inch. Crimps hold up during baking. If dough cracks, patch with scraps and pinch smooth. Keeps shape better than store-bought. Practice on parchment for beginners. (108 words)
Why is my homemade pie crust tough and how do I fix it?
Tough, chewy pie crust usually comes from overmixing or overworking dough, which builds excess gluten in the flour—like kneading bread. Warm butter or hot water also toughens it by melting fat prematurely. Fixes: Handle minimally—pulse or cut butter just until pea-sized, add water gradually until clumps form, and press together without kneading. Keep everything ice-cold; chill tools if needed. Let dough rest after chilling to relax gluten. For next time, measure flour accurately (spoon and level) and use unsalted butter. If baked tough, note 90% of home bakers face this from overhandling per baking forums. Result: Tender, flaky layers every time. (104 words)
How do you blind bake pie crust and can you make it ahead?
Blind baking prevents soggy bottoms for custard or fruit pies. Form crust in pan, chill 30 minutes, line with parchment, fill with pie weights (or beans/rice), bake at 425°F for 17-20 minutes until edges are golden. Remove weights/parchment, bake 5-10 more minutes until bottom is dry and light gold. Cool before filling. Make dough ahead: Refrigerate disks up to 3 days (soften 15 minutes before rolling) or freeze wrapped airtight up to 3 months—thaw overnight in fridge. Fully baked shells freeze 1 month; thaw and crisp at 350°F 10 minutes. Perfect for holiday prep; saves time without quality loss. (102 words)
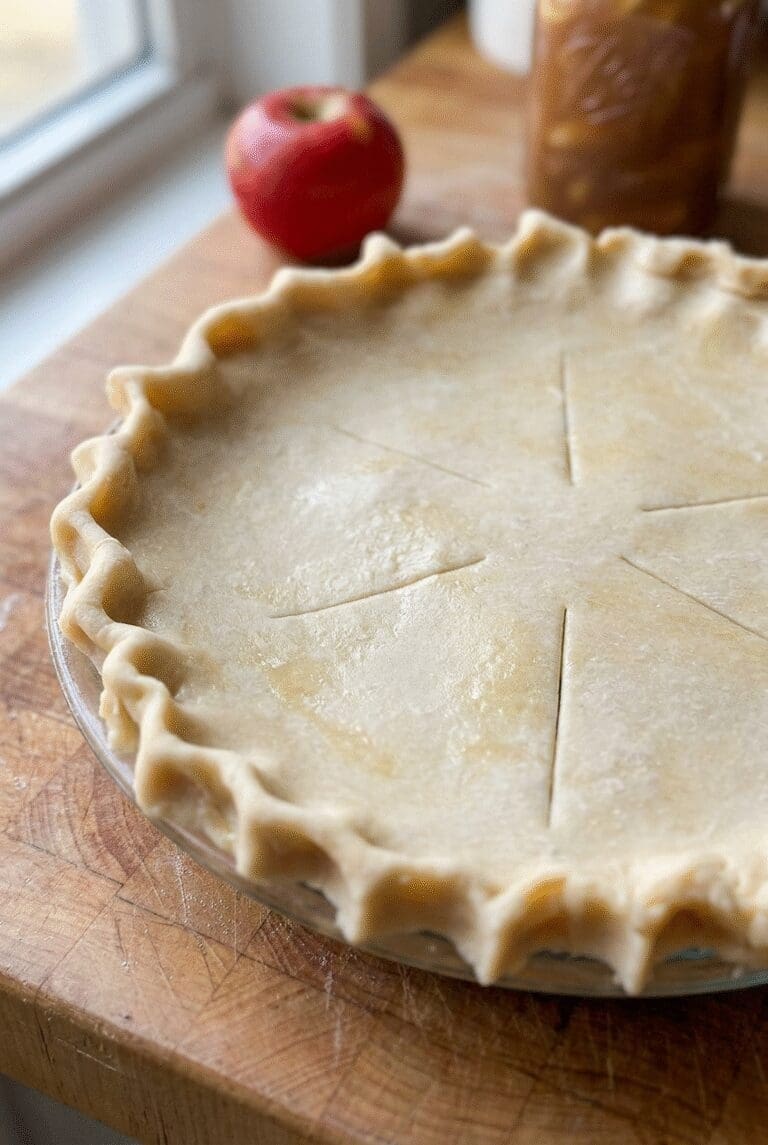
Homemade Pie Crust
🥧 Create perfect flaky pie crusts every time with this foolproof recipe that delivers professional bakery results at home
🍎 Save money and avoid store-bought crusts while enjoying superior texture and taste in all your homemade pies and tarts
- Total Time: 1 hour 32 minutes
- Yield: 2 pie crusts (makes two 9-inch crusts) 1x
Ingredients
2 1/2 cups all-purpose flour Provides structure; all-purpose gives the best balance for a tender, slightly flaky crust.
1/2 tablespoon sugar Adds a touch of sweetness and helps with browning if using the crust for desserts.
1/2 teaspoon salt Balances flavor and strengthens the dough structure slightly.
1/2 pound cold unsalted butter Creates the flaky layers when kept cold and left in pea-sized pieces.
7 tablespoons ice water Hydrates the dough while keeping it cold; use a tablespoon at a time for control.
Instructions
1-First Step: Gather and measure Measure ingredients precisely. Spoon flour into the measuring cup and level it off to avoid packing. Dice 1/2 pound cold unsalted butter into 1/4-inch pieces and keep them refrigerated until ready. Have ice water measured into a small cup and keep it on ice. If using a food processor, assemble the bowl and blade; if working by hand, use a large mixing bowl and pastry cutter.
2-Second Step: Combine dry ingredients In a food processor, pulse the flour, sugar, and salt a few times to combine. If mixing by hand, whisk the dry ingredients in a bowl. This distributes the salt and sugar evenly throughout the flour so you get consistent flavor and texture.
3-Third Step: Cut in the butter Add the cold diced butter to the dry mix. Pulse in the food processor until coarse crumbs form with some pea-sized butter pieces remaining. The texture should be dry and powdery with visible bits of butter. If using a pastry cutter by hand, work quickly until you see similar pea-sized chunks. Avoid overprocessing; continuous running will warm the butter and lead to a tougher crust.
4-Fourth Step: Add ice water gradually Add ice water 1 tablespoon at a time, pulsing or stirring until the dough forms moist clumps. You may need 7 to 8 tablespoons; the recipe lists 7 tablespoons as a precise amount, but add up to 8 if needed. Test by pinching a bit of dough between your fingers; it should hold together without being wet or sticky. If the dough is still crumbly after 7 tablespoons, add the extra teaspoon or two of water as needed rather than dumping it all at once.
5-Fifth Step: Gather, divide, and chill Dump the clumpy dough onto a clean work surface and gather it into a ball by folding gently. Fold only enough to bring the dough together; do not knead. Keep the dough crumbly with visible butter pieces. Divide the dough into two equal halves, flatten each into a disk about 1 inch thick, wrap tightly in plastic wrap, and refrigerate for 1 hour. Chilling firms the butter and relaxes the gluten so rolling is easier and the crust bakes flaky.
6-Sixth Step: Rolling and shaping When ready to roll, lightly dust a clean surface and rolling pin with flour. Remove one disk from the fridge and let it rest 10 to 20 minutes if it is too stiff to roll. Roll from the center outward to form a 12-inch circle for a 9-inch pie dish. Fold the dough in half or drape it over the rolling pin to transfer it to the pie dish, then gently press it into the bottom and sides. Trim the excess to about a 1/2-inch overhang, tuck under to create a thick edge, and flute the rim by pinching between your thumb and index finger of one hand and the fingers of the other hand around the edge.
7-Seventh Step: Blind bake when needed If your recipe calls for blind baking, freeze the shaped crust for 30 minutes first to help it hold its shape. Line the chilled shell with parchment and fill with pie weights, dried beans, or rice. Bake at 425 F for 17 minutes until the edges are golden. Remove the weights and parchment and bake 5 more minutes until the bottom is dry and golden. Let cool before adding fillings like custard or fruit.
8-Final Step: Bake with your filling or store If using as a raw shell for a baked filling, follow your pie recipe’s temperatures and bake times. For fully baked shells, cool completely before filling. To store, refrigerate wrapped dough disks up to 3 days or freeze up to 3 months. Thaw frozen dough overnight in the fridge before rolling.
Last Step:
Please leave a rating and comment letting us know how you liked this recipe! This helps our business to thrive and continue providing free, high-quality recipes for you.Notes
❄️ Keep all ingredients especially butter and water as cold as possible for the flakiest results – cold butter creates steam pockets that make layers
🧊 Let refrigerated dough sit at room temperature for 10-20 minutes if too firm to roll – this prevents cracking while maintaining flakiness
⏰ Always chill shaped crust before blind baking to prevent shrinking and ensure it holds its shape beautifully during baking
- Prep Time: 10 minutes
- Chilling time: 1 hour
- Cook Time: 22 minutes
- Category: Dough
- Method: Food Processor
- Cuisine: American
- Diet: Vegetarian
Nutrition
- Serving Size: 1/8 of crust
- Calories: 232
- Sugar: 0.5 g
- Sodium: 99 mg
- Fat: 15 g
- Saturated Fat: 9 g
- Unsaturated Fat: 6 g
- Trans Fat: 0 g
- Carbohydrates: 20 g
- Fiber: 0.8 g
- Protein: 2 g
- Cholesterol: 40 mg


