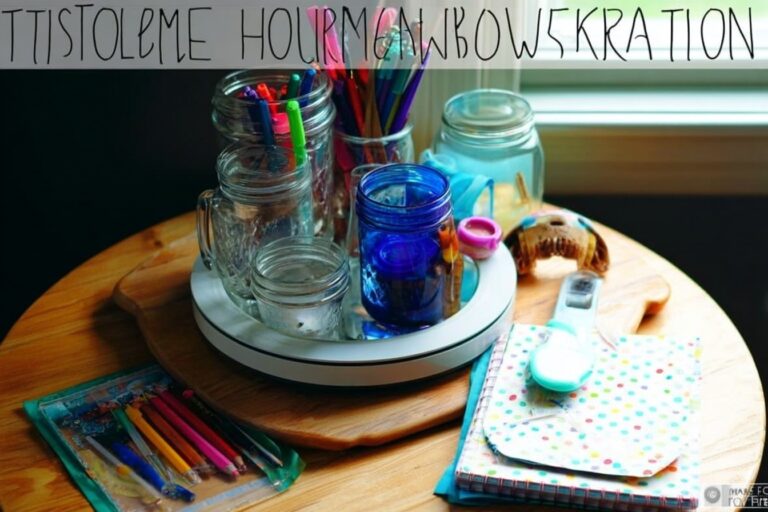
Ingredients
– 1 rotating turntable for serving as the base and allowing the organizer to spin smoothly
– 6 glass mason jars for holding pencils, crayons, and small supplies
– 1 cylindrical plastic container or large jar for bulky or high-use items like a stapler or scissors
– 1 pair scissors for trimming washi tape and packaging
– 1 ruler for marking equal sections on the turntable
– 1 pencil for marking layout lines on the turntable
– 3 to 5 rolls washi tape for outlining sections and decorating jar bands
– 12 adhesive fasteners for securing jars to the turntable base
– 1 bottle glue for classroom-style glue sticks or liquid glue used by kids
– 12 pencils for homework
– 6 pens for older students and quick notes
– 1 pack sticky notes for reminders and quick labels
– 1 stapler for projects and handouts
– 20 pipe cleaners for craft storage and fidget-friendly material
– 1 roll tape for assignments and crafts
– 1 ruler for keeping one inside the station for easy measuring
– 1 box crayons for coloring tasks
– 1 pair scissors for child-safe or adult pair depending on age
Instructions
1-First Step: Gather and clean your tools Collect the rotating turntable, six mason jars, one center plastic container, washi tape, adhesive fasteners, ruler, pencil, scissors, and the assortment of supplies you want to store. Wipe the turntable and jar bottoms with a clean, dry cloth to remove dust and any manufacturing residue. This helps adhesive fasteners stick better and keeps jars stable.
2-Second Step: Layout and mark the base Place the turntable on a flat surface. Use the ruler and pencil to lightly mark six equal sections around the edge. For a 14-inch turntable, mark points every 60 degrees, which you can estimate by spacing marks evenly. These marks act as a guide for jar placement so weight is balanced.
3-Third Step: Secure section outlines Trace your pencil marks with washi tape to create visible sections. This helps when positioning jars and makes the finished project look tidy. Choose matching or complementary washi tape patterns for a cohesive look. Trim tape ends carefully with scissors so bands look neat.
4-Fourth Step: Arrange jars and center container Position three larger jars and three smaller jars around the outer sections. Place the cylindrical plastic container in the center. The center container is ideal for bulky or frequently used items like a stapler, ruler, or larger scissors. Take a moment to test spin balance by rotating the empty turntable; adjust positions if it wobbles.
5-Fifth Step: Prepare jars and decorative bands Remove lids and bands from the jars. Wrap each metal band with a strip of washi tape for decoration, trimming neatly. Replace the bands on the jars if you prefer the banded look, or leave them off for a cleaner glass appearance. Decorating bands provides a consistent, kid-friendly theme and hides any mismatched metal.
6-Sixth Step: Attach adhesive fasteners Cut adhesive fasteners to fit jar bottoms if needed. Attach one side of the fastener to the jar bottom and the matching side to the marked section on the turntable. Press firmly for 10 to 20 seconds. Use two fastener sets for the center container to keep it steady during rotation. Adhesive fasteners prevent jars from shifting while spinning and allow jars to be removed for washing.
7-Seventh Step: Fill and finalize Organize supplies into the jars. Suggested layout: pencils and pens in one jar, crayons in another, glue and sticky notes together, scissors and ruler in the center container, pipe cleaners and tape in separate small jars, and the stapler in the central plastic container. Label jars with washi tape or removable labels to help kids find items quickly. Place the completed Homework Station Turntable on the desk or homework area and test spin with a few items to confirm balance.
8-Final Step: Placement and daily use Set the turntable on a kid-height desk or a dedicated corner of a table. If the desk surface is slick, add small non-slip pads under the turntable. Teach kids the system: one jar per category, return items after use, and rotate to find what they need. The rotating organizer makes independent work faster and tidier.
Last Step:
Please leave a rating and comment letting us know how you liked this recipe! This helps our business to thrive and continue providing free, high-quality recipes for you.Notes
📎 Use adhesive fasteners to prevent jars from shifting during rotation and ensure stability
🎨 Match washi tape patterns for a cohesive look that complements your child’s room decor
🏷️ Label jars by supply type for quick access and to help kids learn organization skills
- Prep Time: 30 minutes
- Cook Time: 0 minutes
- Category: Organization
- Method: DIY Craft
- Cuisine: Not applicable
- Diet: Not applicable
Nutrition
- Serving Size: 1 station
- Calories: 0
- Sugar: 0
- Sodium: 0
- Fat: 0
- Saturated Fat: 0
- Unsaturated Fat: 0
- Trans Fat: 0
- Carbohydrates: 0
- Fiber: 0
- Protein: 0
- Cholesterol: 0