

Why You’ll Love This Ninja Creami Key Lime Pie
If you crave a refreshing treat that combines the zesty tang of key lime pie with the convenience of a simple no-cook recipe, you’ll adore this Ninja Creami Key Lime Pie option. It’s perfect for busy days when you want something homemade without much effort, and it’s packed with protein to keep you fueled. Let’s explore what makes this Ninja Creami Key Lime Pie a go-to choice for home cooks and health fans alike.
- Ease of preparation: This Ninja Creami Key Lime Pie comes together in just 10 minutes of hands-on time before freezing, making it ideal for busy parents and working professionals. You simply blend a few ingredients and let the freezer do the rest, so it’s perfect for hot summer days when you want to avoid the kitchen heat. Plus, the Ninja Creami simplifies turning your mixture into creamy ice cream, adding an element of fun without needing advanced skills.
- Health benefits: Each serving boasts 26 grams of protein from the Greek yogurt and vanilla protein powder, helping you stay full and energized without the sugar crash. It’s lower in calories at 373 per serving and includes fiber-rich ingredients that support digestion, making it a smart pick for diet-conscious individuals and seniors. Using fresh lime juice also brings in vitamin C for an immune boost, as backed by discussions on lime health benefits at various health sites.
- Versatility: Adapt this Ninja Creami Key Lime Pie to fit different needs, like going gluten-free with special graham crackers or making it dairy-free with simple swaps. It’s great for families, from students grabbing a quick snack to travelers packing portable treats. The base works for various mix-ins, so you can customize it for baking enthusiasts or newlyweds looking for effortless desserts.
- Distinctive flavor: The bright, citrusy taste of key lime pie shines through with a creamy texture that rivals traditional desserts, yet it’s free from artificial additives. The vanilla protein powder adds a subtle sweetness that enhances the zing of the lime, creating a balanced treat that feels indulgent but is actually nutritious. This makes Ninja Creami Key Lime Pie a standout for food enthusiasts who want something fresh and exciting.
With its straightforward process and adaptable nature, this recipe fits seamlessly into a no-cook lifestyle. It’s not just about the taste it’s about enjoying a guilt-free delight that supports your wellness goals.
Jump to:
- Why You’ll Love This Ninja Creami Key Lime Pie
- Essential Ingredients for Ninja Creami Key Lime Pie
- Main Ingredients:
- Special Dietary Options:
- How to Prepare the Perfect Ninja Creami Key Lime Pie: Step-by-Step Guide
- First Step: Gather and Blend the Ingredients
- Second Step: Freeze the Mixture
- Third Step: Process in the Ninja Creami
- Fourth Step: Add Mix-Ins if Desired
- Final Step: Serve and Enjoy
- Dietary Substitutions to Customize Your Ninja Creami Key Lime Pie
- Protein and Main Component Alternatives
- Vegetable, Sauce, and Seasoning Modifications
- Mastering Ninja Creami Key Lime Pie: Advanced Tips and Variations
- Pro Cooking Techniques
- Flavor Variations
- Presentation Tips
- Make-Ahead Options
- How to Store Ninja Creami Key Lime Pie: Best Practices
- FAQs: Frequently Asked Questions About Ninja Creami Key Lime Pie
- How do you make key lime pie in a Ninja Creami?
- Can you make dairy-free Ninja Creami key lime pie?
- Can I use a different yogurt flavor in Ninja Creami key lime pie?
- How do you store leftover Ninja Creami key lime pie?
- What mix-ins go best with Ninja Creami key lime pie?
- Ninja Creami Key Lime Pie
- Ingredients
- Instructions
- Last Step:
- Notes
- Nutrition
- Did you make this recipe?
Essential Ingredients for Ninja Creami Key Lime Pie
Gathering the right ingredients is key to nailing this Ninja Creami Key Lime Pie recipe. Each one plays a role in creating that creamy, tangy texture that’s both delicious and nutritious. Below is a detailed list with precise measurements and why they matter, ensuring you can whip it up with ease.
Main Ingredients:
- 2 cartons (5.3 ounces each) key lime pie Greek yogurt – This forms the creamy base and adds a boost of protein, making your Ninja Creami Key Lime Pie rich and satisfying while promoting gut health.
- ½ cup whole milk – Provides the creamiest texture for your Ninja Creami Key Lime Pie, helping it churn smoothly without turning icy.
- 1 scoop (about 35 grams) vanilla protein powder – Boosts the protein content to 26 grams per serving and enhances creaminess, turning this Ninja Creami dessert into a muscle-supporting snack.
- 2 teaspoons lime juice – Delivers that signature tart flavor, adding a fresh zing that makes the Ninja Creami Key Lime Pie taste authentic and vibrant.
- Optional toppings: whipped cream, gluten-free graham cracker crumbs, and optional mix-ins such as white chocolate chips or frozen cream cheese chunks – These elevate the experience, with whipped cream for extra indulgence and mix-ins for texture and fun variations in your Ninja Creami Key Lime Pie.
Special Dietary Options:
- Vegan: Swap the Greek yogurt for a plant-based version like coconut or almond yogurt, and use a vegan protein powder to keep your Ninja Creami Key Lime Pie creamy and dairy-free.
- Gluten-free: Stick with gluten-free graham cracker crumbs for toppings, and ensure your protein powder is certified gluten-free, allowing allergy-sensitive eaters to enjoy Ninja Creami Key Lime Pie safely.
- Low-calorie: Opt for low-fat milk or reduce the optional mix-ins to lower the calorie count to under 300 per serving, making this Ninja Creami treat lighter for those watching their intake.
By using these ingredients, you’re set for a successful batch of Ninja Creami Key Lime Pie that caters to various preferences. Remember, fresh components like lime juice can enhance the overall flavor profile, as explored in resources on Greek yogurt advantages.
How to Prepare the Perfect Ninja Creami Key Lime Pie: Step-by-Step Guide
Making this Ninja Creami Key Lime Pie is as easy as blending a few items and letting time do the work. With a total prep time of just 10 minutes and freezing for 8-10 hours, you’ll have a creamy treat ready for those warm days. This guide walks you through each step to ensure your recipe turns out smooth and delicious every time.
First Step: Gather and Blend the Ingredients
Start by collecting all your ingredients in a pint container designed for your ice cream maker. Combine 2 cartons (5.3 ounces each) of key lime pie Greek yogurt, ½ cup whole milk, 1 scoop (about 35 grams) of vanilla protein powder, and 2 teaspoons of lime juice. Use a whisk, immersion blender, or frother to blend everything until it’s smooth and frothy this step ensures the base for your Ninja Creami Key Lime Pie is creamy and well-mixed.
Second Step: Freeze the Mixture
Seal the container with its lid and place it in the freezer for at least 8 to 10 hours, or overnight for the best results. This freezing time is crucial for the Ninja Creami Key Lime Pie to reach the right consistency, transforming the liquid base into a solid that’s ready for processing. Keep in mind the total time is about 10 hours and 10 minutes, so plan ahead for your schedule.
Third Step: Process in the Ninja Creami
Once frozen, remove the lid and secure the pint container into your Ninja Creami machine. Select the lite ice cream setting and process it according to the device’s instructions this will turn your frozen mixture into a soft, scoopable Ninja Creami Key Lime Pie. If it comes out crumbly, add a splash of milk or a spoonful of yogurt and re-spin for a smoother texture.
Fourth Step: Add Mix-Ins if Desired
Optional: After processing, make an indent in the middle of the ice cream and add mix-ins like graham cracker pieces or frozen cream cheese chunks. Use the mix-ins setting on your Ninja Creami to blend them in evenly, enhancing the key lime pie flavor and making your dessert even more customizable for different tastes.
Final Step: Serve and Enjoy
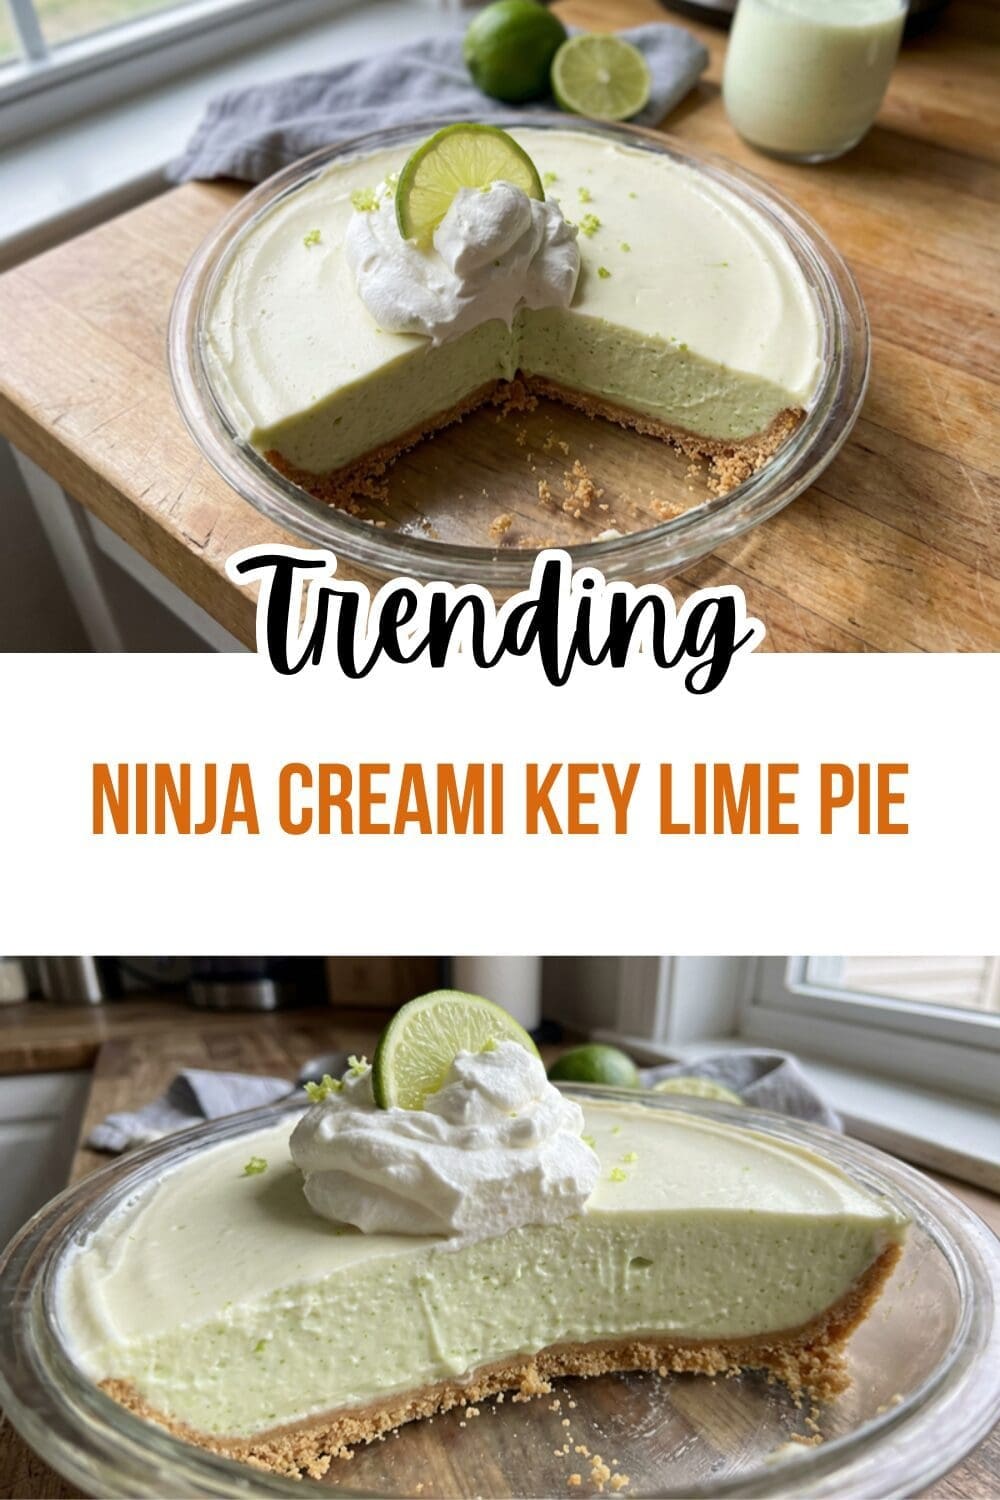
Serve your Ninja Creami Key Lime Pie right away, either plain or topped with whipped cream and gluten-free graham cracker crumbs. This step lets you enjoy the fresh, tangy taste at its peak, and it’s a great way to adapt for dietary needs by choosing the right toppings. For similar no-cook desserts, check out our Peach Cobbler Dump Cake recipe on the blog.
| Nutrient | Per Serving (2 servings total) |
|---|---|
| Calories | 373 kcal |
| Carbohydrates | 48 g |
| Protein | 26 g |
| Fat | 10 g (Saturated Fat 4 g, Polyunsaturated Fat 6 g) |
| Cholesterol | 12 mg |
| Sodium | 282 mg |
| Fiber | 4 g |
| Sugar | 21 g |
This table shows the nutritional breakdown, helping you see why this Ninja Creami Key Lime Pie is a healthy choice.

Dietary Substitutions to Customize Your Ninja Creami Key Lime Pie
Protein and Main Component Alternatives
When making Ninja Creami Key Lime Pie, you can swap the vanilla protein powder for options like plant-based protein to suit vegan diets or unflavored powder if you want a purer lime taste. If Greek yogurt isn’t your thing, try a low-sugar version to cut calories while keeping that creamy base intact.
Vegetable, Sauce, and Seasoning Modifications
For a twist on the lime juice, use lemon juice as a substitute for a milder citrus note, which works well in warmer seasons. Adjust seasonings by adding vanilla extract for extra flavor, and for sauces, opt for a dairy-free whipped topping to make your Ninja Creami Key Lime Pie fit gluten-free or low-calorie preferences.
Mastering Ninja Creami Key Lime Pie: Advanced Tips and Variations
Pro Cooking Techniques
To get the smoothest Ninja Creami Key Lime Pie, let the frozen pint sit out for 5-10 minutes before processing. An immersion blender makes blending easier for that frothy base, and adding protein powder not only boosts nutrition but also improves the creaminess.
Flavor Variations
Experiment with mix-ins like white chocolate chips or frozen cream cheese for a fun twist on your Ninja Creami Key Lime Pie. For more ideas, our Peach Cobbler Dump Cake offers similar no-cook inspiration.
Presentation Tips
Top with whipped cream and crumbs for a polished look, and serve in bowls for a casual feel.
Make-Ahead Options
Freeze and re-spin leftovers to keep them fresh for busy weeks.
This recipe is a game-changer for no-cook meals simple yet tasty!
How to Store Ninja Creami Key Lime Pie: Best Practices
Proper storage keeps your Ninja Creami Key Lime Pie tasting great for days. For short-term, refrigerate in an airtight container to maintain freshness.
FAQs: Frequently Asked Questions About Ninja Creami Key Lime Pie
How do you make key lime pie in a Ninja Creami?
To make key lime pie in your Ninja Creami, blend 1 cup plain Greek yogurt, 1/2 cup key lime juice, 1/4 cup sweetened condensed milk, 1 tsp lime zest, and 2 tbsp honey until smooth. Pour into a Ninja Creami pint container, ensuring it doesn’t exceed the max fill line. Freeze for 24 hours. Install the pint in the Creami, select “Ice Cream” or “Sorbet” mode, and process once. If powdery, add 1-2 tbsp milk and re-spin on “Re-spin.” For pie crust flavor, mix in 2 tbsp crushed graham crackers after the first spin. Serve topped with whipped cream and extra crumbs. This no-churn method yields 2 servings of creamy, tangy treat in under 5 minutes of active time. Total prep is simple and requires no ice cream maker experience. (98 words)
Can you make dairy-free Ninja Creami key lime pie?
Yes, adapt Ninja Creami key lime pie to be dairy-free by swapping ingredients. Use 1 cup coconut or almond-based Greek-style yogurt, 1/2 cup key lime juice, 1/4 cup coconut condensed milk (or full-fat coconut cream mixed with 2 tbsp maple syrup), 1 tsp lime zest, and 1 tbsp agave. Blend smooth, pour into the pint, and freeze 24 hours. Process on “Sorbet” cycle; re-spin with 1 tbsp coconut milk if needed. Add dairy-free graham cracker crumbs for crust texture post-spin. It freezes well without separation if fully chilled first. Taste-test before freezing to adjust sweetness. This version stays creamy and holds up to multiple re-spins. Yields 2 servings. Store up to 2 weeks in freezer. (112 words)
Can I use a different yogurt flavor in Ninja Creami key lime pie?
Absolutely, swap yogurt flavors in Ninja Creami key lime pie for variety. Start with lemon Greek yogurt instead of plain, paired with lemon juice over lime for a citrus twist—use equal amounts. For vanilla yogurt, reduce added sweeteners by half to avoid overpowering. Blend 1 cup yogurt, 1/2 cup citrus juice, 1/4 cup condensed milk, zest, and 1 tbsp honey. Freeze 24 hours in the pint, then process on “Ice Cream.” Re-spin as needed. Plain or full-fat works best for texture; low-fat may need extra liquid. Experiment with key lime yogurt for double flavor. This keeps the pie creamy and customizable. Serve 2. (102 words)
How do you store leftover Ninja Creami key lime pie?
Store leftover Ninja Creami key lime pie easily for later enjoyment. After processing, smooth the top flat with a spoon to prevent ice crystals. Snap on the lid tightly and return the pint to the freezer. It keeps fresh up to 2 weeks. To serve again, let sit 5-10 minutes at room temp, reinstall in the Creami, and run a “Re-spin” cycle—add 1 tbsp milk if crumbly. Key lime pie holds texture well unless it has banana (which softens faster). Avoid refreezing after scooping out portions. Label with date for tracking. This method maintains creaminess without waste. Perfect for meal prep. (108 words)
What mix-ins go best with Ninja Creami key lime pie?
Top-notch mix-ins elevate Ninja Creami key lime pie texture and flavor. After the first “Ice Cream” spin, create a mix-in groove and add 2 tbsp crushed graham crackers for pie crust crunch, white chocolate chips for sweetness, or toasted coconut flakes for tropical vibe. For tartness, stir in key lime curd dollops. Process once more on “Mix-in” if available, or manually fold. Freeze 4 hours post-mix-in for best hold. Use 1/4 cup total to avoid overloading. These additions make it taste like real key lime pie—pairs great with whipped topping. Experiment in small batches. Serves 2 generously. (104 words)

Ninja Creami Key Lime Pie
🍧 Treat yourself to a creamy, tart key lime pie-inspired ice cream boosted with protein for a guilt-free dessert that satisfies sweet cravings while supporting muscle recovery and fitness goals.
🥧 This no-machine hassle recipe captures the zesty flavors of classic pie in a frozen form, perfect for quick prep and indulgent snacks that feel light yet nourishing any time of year.
- Total Time: 10 hours 10 minutes
- Yield: 2 servings
Ingredients
– 2 cartons (5.3 ounces each) key lime pie Greek yogurt
– ½ cup whole milk
– 1 scoop (about 35 grams) vanilla protein powder
– 2 teaspoons lime juice
– whipped cream (optional topping)
– gluten-free graham cracker crumbs (optional topping)
– white chocolate chips (optional mix-in)
– frozen cream cheese chunks (optional mix-in)
Instructions
1-First Step: Gather and Blend the Ingredients Start by collecting all your ingredients in a pint container designed for your ice cream maker. Combine 2 cartons (5.3 ounces each) of key lime pie Greek yogurt, ½ cup whole milk, 1 scoop (about 35 grams) of vanilla protein powder, and 2 teaspoons of lime juice. Use a whisk, immersion blender, or frother to blend everything until it’s smooth and frothy this step ensures the base for your Ninja Creami Key Lime Pie is creamy and well-mixed.
2-Second Step: Freeze the Mixture Seal the container with its lid and place it in the freezer for at least 8 to 10 hours, or overnight for the best results. This freezing time is crucial for the Ninja Creami Key Lime Pie to reach the right consistency, transforming the liquid base into a solid that’s ready for processing. Keep in mind the total time is about 10 hours and 10 minutes, so plan ahead for your schedule.
3-Third Step: Process in the Ninja Creami Once frozen, remove the lid and secure the pint container into your Ninja Creami machine. Select the lite ice cream setting and process it according to the device’s instructions this will turn your frozen mixture into a soft, scoopable Ninja Creami Key Lime Pie. If it comes out crumbly, add a splash of milk or a spoonful of yogurt and re-spin for a smoother texture.
4-Fourth Step: Add Mix-Ins if Desired Optional: After processing, make an indent in the middle of the ice cream and add mix-ins like graham cracker pieces or frozen cream cheese chunks. Use the mix-ins setting on your Ninja Creami to blend them in evenly, enhancing the key lime pie flavor and making your dessert even more customizable for different tastes.
5-Final Step: Serve and Enjoy Serve your Ninja Creami Key Lime Pie right away, either plain or topped with whipped cream and gluten-free graham cracker crumbs. This step lets you enjoy the fresh, tangy taste at its peak, and it’s a great way to adapt for dietary needs by choosing the right toppings. For similar no-cook desserts, check out our Peach Cobbler Dump Cake recipe on the blog.
Last Step:
Please leave a rating and comment letting us know how you liked this recipe! This helps our business to thrive and continue providing free, high-quality recipes for you.Notes
🥛 Choose whole milk for the creamiest, richest texture in your protein ice cream, as it helps create that indulgent mouthfeel without added sugars.
🌀 Let the frozen pint soften for 5-10 minutes at room temp before processing to minimize crumbliness and avoid the need for excess liquid re-spins.
🔧 An immersion blender or frother ensures a lump-free base quickly, but a vigorous whisk works too—focus on fully dissolving the protein powder for smoothness.
- Prep Time: 10 minutes
- Freezing: 8-10 hours
- Category: Dessert
- Method: Freezer
- Cuisine: American
- Diet: High Protein
Nutrition
- Serving Size: 1/2 pint
- Calories: 373 kcal
- Sugar: 21 g
- Sodium: 282 mg
- Fat: 10 g
- Saturated Fat: 4 g
- Unsaturated Fat: 6 g
- Trans Fat: 0 g
- Carbohydrates: 48 g
- Fiber: 4 g
- Protein: 26 g
- Cholesterol: 12 mg


