

Why You’ll Love This Pickled Garlic Recipe
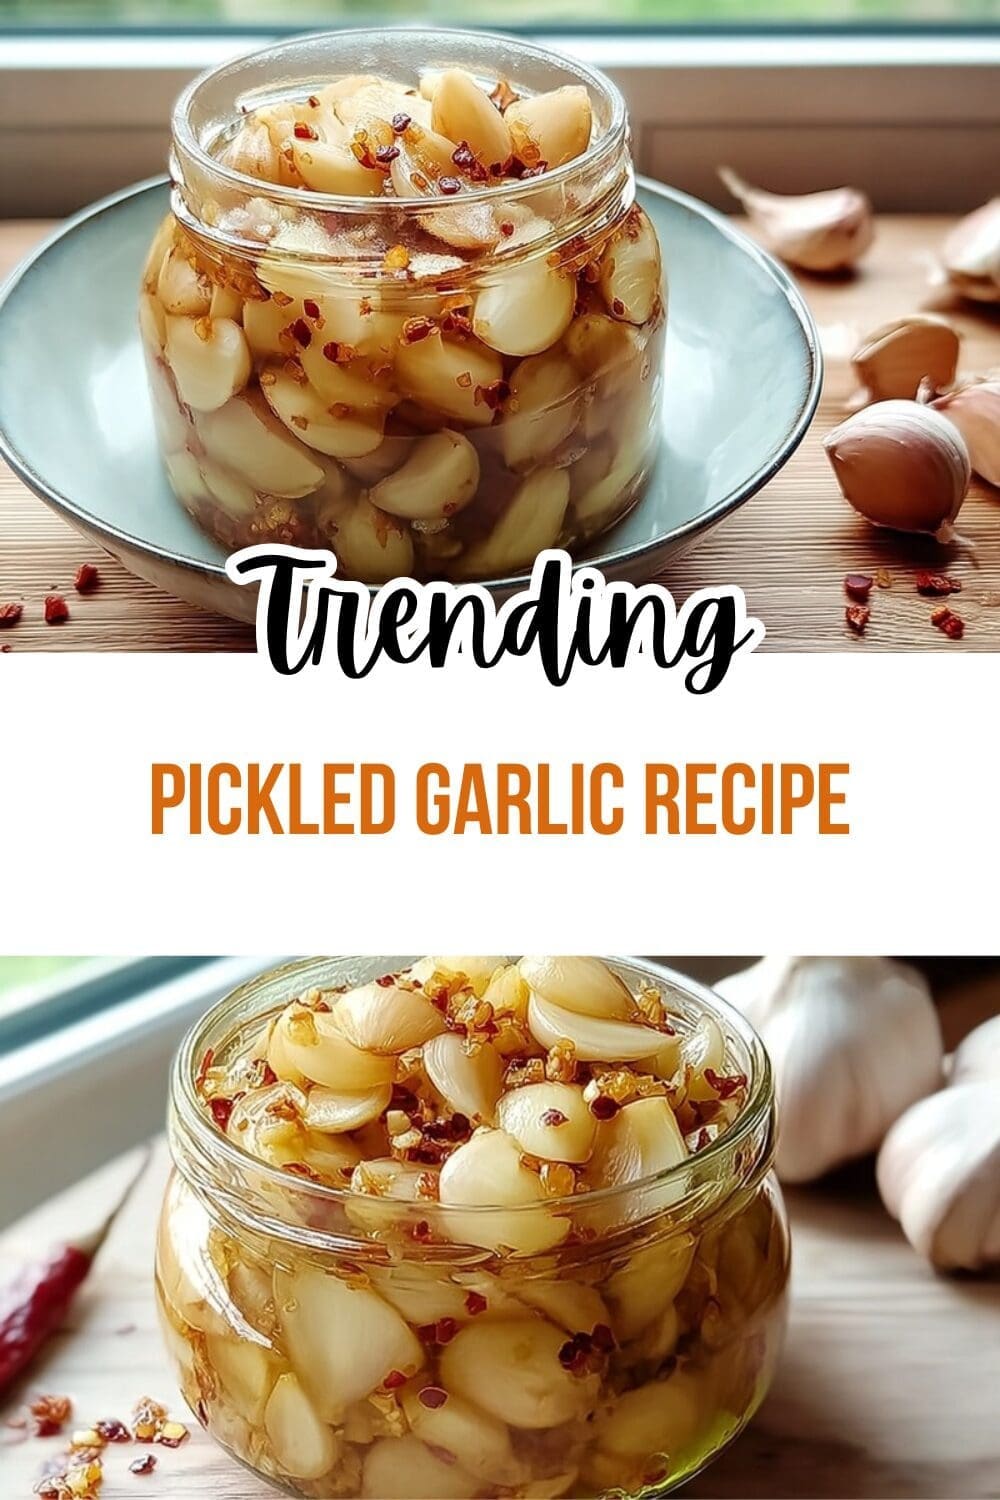
If you like bold flavors with very little fuss, this Pickled Garlic Recipe is a fun one to keep in your fridge. It turns sharp garlic cloves into tangy, crunchy bites that work in snacks, meals, and quick garnishes. The best part is that the process is simple, and you do not need a hot oven or a long ingredient list.
- Easy to make: This easy pickled garlic recipe uses a short simmer, a few jars, and basic pantry items. You only need to pack the cloves, pour over the hot brine, and let time do the rest.
- Great for health-minded eaters: Garlic is well known for its natural compounds, and vinegar-based pickling gives you a flavorful condiment with a small serving size. For more on garlic’s wellness benefits, see Healthline’s overview of garlic’s health benefits.
- Works with many meals: Pickled garlic can be sliced into salads, chopped into dips, added to grain bowls, or eaten straight from the jar. It fits busy kitchens, student meals, and meal prep plans.
- Bright, crunchy flavor: This homemade pickled garlic has a sweet-tangy bite with a crisp texture when chilled long enough. The dill and red pepper flakes add a classic pickles-style taste that stands out.
Patience matters here. Pickled garlic tastes good after a short rest, but the flavor gets much better after a few weeks in the fridge.
Jump to:
- Why You’ll Love This Pickled Garlic Recipe
- Essential Ingredients for Pickled Garlic Recipe
- Special dietary notes
- Ingredient tips that help with color and texture
- How to Prepare the Perfect Pickled Garlic Recipe: Step-by-Step Guide
- First Step: Prep your jars and garlic
- Second Step: Make the pickling liquid
- Third Step: Pack the jars
- Fourth Step: Add the hot brine
- Fifth Step: Remove air bubbles and seal
- Sixth Step: Chill and wait
- Seventh Step: Optional water bath processing
- Quick recipe snapshot
- Dietary Substitutions to Customize Your Pickled Garlic Recipe
- Garlic and brine swaps
- Vegetable, sauce, and seasoning modifications
- What if you are watching calories?
- Mastering Pickled Garlic Recipe: Advanced Tips and Variations
- Pro cooking techniques
- Flavor variations
- Presentation tips
- Make-ahead options
- How to Store Pickled Garlic Recipe: Best Practices
- Refrigeration
- Freezing
- Reheating
- Meal prep considerations
- FAQs: Frequently Asked Questions About Pickled Garlic Recipe
- How do you make pickled garlic at home?
- How long does homemade pickled garlic last?
- Is pickled garlic healthy to eat?
- Can you eat pickled garlic right away?
- What can you use pickled garlic for?
- Pickled Garlic Recipe
- Ingredients
- Instructions
- Last Step:
- Notes
- Nutrition
- Did you make this recipe?
Essential Ingredients for Pickled Garlic Recipe
Here is the full ingredient list for this pickled garlic recipe. Every item matters for flavor, safety, and texture, so measure carefully before you start.
- 1/4 cup canning salt – Helps build the brine and supports the right pickle texture.
- 5 cups vinegar – Gives the pickled garlic its tang and helps preserve the cloves in the refrigerator.
- 2 pounds peeled garlic cloves – The star of the recipe. Use fresh, firm cloves for the best crunch.
- 1 teaspoon red pepper flakes – Adds a little heat without overpowering the garlic.
- 4 heads dill or 2 cups fresh chopped dill – Brings that classic herbal pickle flavor to each jar.
Special dietary notes
- Vegan: This recipe is naturally vegan because it uses plant-based ingredients only.
- Gluten-free: The ingredient list is naturally gluten-free, as long as your vinegar brand is gluten-free.
- Low-calorie: Keep portions small, and use it as a flavor boost instead of a main side dish.
Ingredient tips that help with color and texture
Use kosher or sea salt if you do not have canning salt, and choose distilled water if you are testing a version that includes water. Stainless steel or enamel cookware is the safest choice for the brine. Avoid aluminum or reactive pans, since they may affect color. Also, keep the jars out of direct sunlight while they rest to help prevent discoloration.
How to Prepare the Perfect Pickled Garlic Recipe: Step-by-Step Guide
This pickled garlic cloves recipe is simple, but the timing matters. You will start with a hot brine, pack the jars, then let the garlic sit long enough for the flavor to settle in. If you are new to homemade pickles, take it one step at a time and keep your jars clean and ready.
First Step: Prep your jars and garlic
Sterilize 4 pint jars before you begin. A clean jar is a big deal for any homemade pickled garlic batch. Peel enough garlic cloves to reach 2 pounds. If you buy pre-peeled cloves, check that they are fresh and firm, not soft or dried out.
Second Step: Make the pickling liquid
In a saucepan, combine 1/4 cup canning salt with 5 cups vinegar. Bring the mixture to a boil over medium heat. Once it boils, reduce the heat and simmer for 10 minutes. This hot brine is what gives the garlic its sharp pickle flavor and helps the texture stay crisp.
The recipe takes about 15 minutes of prep time and 30 minutes of cook time, for a total active time of about 45 minutes. You will also need 12 hours of cooling time and at least 3 weeks in the refrigerator before the flavor is fully developed.
Third Step: Pack the jars
Place the peeled garlic cloves into the 4 sterilized pint jars. Divide the 1 teaspoon red pepper flakes evenly among the jars, then add the dill. You can use 4 heads dill or 2 cups fresh chopped dill, depending on what you have on hand. Pack the jars firmly, but do not crush the cloves.
Fourth Step: Add the hot brine
Carefully pour the hot pickling liquid over the garlic in each jar. Leave 1/2-inch headspace at the top. That little gap matters, because it gives the jars room for the contents to settle and helps reduce overflow when the jars cool.
Fifth Step: Remove air bubbles and seal
Run a clean utensil along the inside edge of each jar to remove air bubbles. Wipe the rims clean, then secure the lids. If you are making refrigerator pickles, let the jars cool for about 12 hours, then place them in the fridge.
Sixth Step: Chill and wait
Let the pickled garlic rest in the refrigerator for at least 3 weeks before serving. It can be tempting to taste early, but the flavor gets smoother and the cloves become more pleasant after that waiting period. If you want a stronger pickle flavor, let them sit even longer.
Seventh Step: Optional water bath processing
If you want to process the sealed jars in boiling water, do so for 10 minutes. After that, still refrigerate the jars. This recipe is not meant for shelf-stable pantry canning, so the refrigerator is still the safest place to store it.
Important safety note: This is not suitable for shelf-stable canning. It must be refrigerated to avoid botulism.
Quick recipe snapshot
| Detail | Amount |
|---|---|
| Yield | 4 pints, or 32 servings of 1/4 cup each |
| Prep time | 15 minutes |
| Cook time | 30 minutes |
| Total active time | 45 minutes |
| Cooling time | 12 hours |
| Refrigeration time | At least 3 weeks |

Dietary Substitutions to Customize Your Pickled Garlic Recipe
Garlic and brine swaps
This garlic recipe is flexible, but it works best when you keep the basic acid balance close to the original. If you do not have canning salt, kosher salt or sea salt can work in many home pickles. Just keep the measurement close and avoid table salt if it contains anti-caking additives that may cloud the brine.
If you want a milder jar, reduce the red pepper flakes. For a stronger bite, add a little more dill or a few peppercorns. You can also switch between dill heads and chopped fresh dill based on what is easier to find. The final flavor stays bright either way.
Vegetable, sauce, and seasoning modifications
While this recipe is built around garlic cloves, you can mix in small amounts of sliced chilies for heat or a few extra herb sprigs for a garden-style jar. Some home cooks like to add mustard seed or coriander seed for a different pickle profile. If you like the flavor of homemade pickles, try pairing these cloves with pickled onions, carrots, or cucumbers in the same meal.
For those who want a lighter-tasting batch, use less dill and a smaller amount of red pepper flakes. If you need a low-sodium version, talk with a food safety source before changing the salt level too much, since pickling acid and salt both matter for safety and texture.
What if you are watching calories?
This pickled garlic recipe is naturally portion-friendly. A 1/4 cup serving is small but flavorful, so it can work well for diet-conscious eaters who want something punchy without a lot of extra calories. Use it as a topping instead of eating big spoonfuls if you are keeping track of intake.
For another cozy, make-ahead dish that fits busy schedules, you might also like this easy chicken spaghetti recipe for a fuller meal idea.
Mastering Pickled Garlic Recipe: Advanced Tips and Variations
Pro cooking techniques
Choose plump, evenly sized garlic cloves so they pickle at the same rate. If your cloves are very large, you can slice a few in half to help the brine move through the layers more quickly. Use stainless steel or enamel cookware for the brine, since reactive pans can affect taste and color. Also, keep the jars away from direct sun during the resting period.
Another smart move is to make sure all jars are filled to the same headspace. That keeps the batch more even and helps the lids seal properly if you do the boiling water step. If you notice a little blue or turquoise color in the garlic, do not panic. That can happen naturally and is considered normal and safe.
Flavor variations
You can keep the base recipe as written or give it a twist. Add a bay leaf to each jar for a more classic pickle note. A few black peppercorns bring gentle heat. If you want a sweeter edge, pair the garlic with a slightly softer vinegar flavor in a future batch, though the standard version already has a nice tangy balance.
- Spicy version: Add extra red pepper flakes.
- Herb version: Add more dill and a sprig of thyme.
- Bold version: Add black peppercorns and a slice of fresh chili.
Presentation tips
Serve the cloves whole on snack boards, or slice them thin for sandwiches and salads. They look great beside cheese, olives, and crackers. If you want a nice homemade gift, use a clean label and list the date so the person receiving it knows when the jar was made.
Make-ahead options
This is a great recipe for busy weeks. Make one batch on Sunday, then let it chill while you handle other meals. Because the flavor improves over time, it works well for meal prep. You can keep a jar in the fridge and use a few cloves each day as needed.
How to Store Pickled Garlic Recipe: Best Practices
Storage matters with this pickled garlic recipe. Because it is a refrigerated pickle, the fridge is the main home for the jars. That keeps the garlic safe and crisp while the brine does its job.
Refrigeration
Store the jars in the refrigerator for up to 4 months. Keep the cloves submerged in the brine, and always use a clean utensil when removing any from the jar. If you see mold or yeast, toss the jar right away.
Freezing
Freezing is not the best choice for pickled garlic cloves, since the texture can turn soft and watery once thawed. If you need long-term storage, use proper refrigerated pickling or follow a safe canning method only if the recipe is designed for it.
Reheating
You do not need to reheat this recipe for normal serving. Eat it cold or at room temperature. If you use the garlic in cooked dishes, add it near the end so the texture does not disappear.
Meal prep considerations
For batch cooking, keep one jar near the front of the fridge for easy access. Label each jar with the date made. That helps you use older jars first and makes it easier to track freshness over time.
If the jar smells off, looks fuzzy, or shows yeast growth, do not taste it. Throw it out.
FAQs: Frequently Asked Questions About Pickled Garlic Recipe
How do you make pickled garlic at home?
Making pickled garlic is straightforward with just a few ingredients: 1 pound peeled garlic cloves, 2 cups white vinegar, 1 cup water, 2 tablespoons sugar, 1 tablespoon salt, and optional spices like peppercorns, bay leaves, or red pepper flakes. Sterilize a pint-sized jar by boiling it for 10 minutes. Pack garlic cloves into the jar. In a saucepan, bring vinegar, water, sugar, and salt to a boil, stirring until dissolved, then pour over garlic, leaving ½-inch headspace. Seal and cool to room temperature. Refrigerate for at least 1 week before eating—the flavors mellow over time. For shelf-stable versions, process jars in a boiling water bath for 10 minutes. This yields tangy, crunchy cloves perfect for snacking or adding to salads. Total time: 20 minutes active, plus pickling.
How long does homemade pickled garlic last?
Homemade pickled garlic stored in the refrigerator lasts 3-6 months when kept in a clean, sealed jar submerged in brine. The vinegar’s acidity (at least 5%) prevents spoilage, but always check for off smells, mold, or softened texture before eating—discard if in doubt. For longer storage up to a year, use a water bath canning method: after filling jars, process pint jars in boiling water for 10 minutes (adjust for altitude). Cool undisturbed for 24 hours, then store in a cool, dark pantry. Once opened, refrigerate and use within a month. Pro tip: Label jars with dates. Properly canned pickled garlic retains crunch and flavor, making it ideal for pantry stocking.
Is pickled garlic healthy to eat?
Yes, pickled garlic offers health benefits from garlic’s natural compounds like allicin, which support immune function and heart health. Fermentation-like pickling preserves antioxidants, and the vinegar aids digestion while providing probiotics if left to sit longer. A 1-ounce serving has about 40 calories, negligible fat, and vitamins C and B6. It’s low-sodium if you control the salt (aim for 1 tsp per pint). Studies link garlic to reduced blood pressure and cholesterol. Eat 1-2 cloves daily as a snack or topping. Caveat: High acidity may upset sensitive stomachs, so rinse before eating if needed. Pair with meals for better absorption—it’s a tasty way to boost your diet without raw garlic’s bite.
Can you eat pickled garlic right away?
You can taste pickled garlic after 24-48 hours, but it’s best after 1-2 weeks in the fridge for optimal flavor and texture. Freshly packed cloves are pungent and firm; pickling softens the sharpness, turning them sweet-tangy and pliable. Rush it by microwaving the brine for faster infusion (30 seconds bursts), but refrigerate immediately. Quick-pickled versions for immediate use: slice cloves thin, cover with hot vinegar mix, and let sit 30 minutes. Full pickle needs time for osmosis to draw out sulfur compounds. Signs it’s ready: cloves translucent and pickle aroma dominant. Patience yields addictive results—perfect for charcuterie or stir-fries.
What can you use pickled garlic for?
Pickled garlic adds zesty crunch to countless dishes. Snack straight from the jar, or chop into salads, sandwiches, and tacos for umami punch. Blend into hummus, pesto, or aioli for dips. Toss whole cloves into pasta salads, grain bowls, or roasted veggies. In Asian cooking, it elevates stir-fries and dumplings; in Mediterranean, pair with feta and olives. Use as a martini garnish or Bloody Mary stirrer. The brine shines in marinades, dressings, or pickling eggs/beets. Mildly spicy versions top pizzas or burgers. Experiment: 2-3 cloves per serving. It’s versatile, low-cal, and stores indefinitely—check our fermented garlic honey recipe for variations.

Pickled Garlic Recipe
🧄🫙 Crunchy homemade pickled garlic cloves burst with tangy spice – immune-boosting condiment elevates any dish in easy steps!
🌿🔥 Dill red pepper infused jars last 4 months refrigerated – probiotic snack safe blue tint normal try today!
- Total Time: 3 weeks 30 minutes
- Yield: 4 pints (32 servings)
Ingredients
– 1/4 cup canning salt
– 5 cups vinegar
– 2 pounds peeled garlic cloves
– 1 teaspoon red pepper flakes
– 4 heads dill or 2 cups fresh chopped dill
Instructions
1-First Step: Prep your jars and garlic Sterilize 4 pint jars before you begin. A clean jar is a big deal for any homemade pickled garlic batch. Peel enough garlic cloves to reach 2 pounds. If you buy pre-peeled cloves, check that they are fresh and firm, not soft or dried out.
2-Second Step: Make the pickling liquid In a saucepan, combine 1/4 cup canning salt with 5 cups vinegar. Bring the mixture to a boil over medium heat. Once it boils, reduce the heat and simmer for 10 minutes. This hot brine is what gives the garlic its sharp pickle flavor and helps the texture stay crisp.
3-Third Step: Pack the jars Place the peeled garlic cloves into the 4 sterilized pint jars. Divide the 1 teaspoon red pepper flakes evenly among the jars, then add the dill. You can use 4 heads dill or 2 cups fresh chopped dill, depending on what you have on hand. Pack the jars firmly, but do not crush the cloves.
4-Fourth Step: Add the hot brine Carefully pour the hot pickling liquid over the garlic in each jar. Leave 1/2-inch headspace at the top. That little gap matters, because it gives the jars room for the contents to settle and helps reduce overflow when the jars cool.
5-Fifth Step: Remove air bubbles and seal Run a clean utensil along the inside edge of each jar to remove air bubbles. Wipe the rims clean, then secure the lids. If you are making refrigerator pickles, let the jars cool for about 12 hours, then place them in the fridge.
6-Sixth Step: Chill and wait Let the pickled garlic rest in the refrigerator for at least 3 weeks before serving. It can be tempting to taste early, but the flavor gets smoother and the cloves become more pleasant after that waiting period. If you want a stronger pickle flavor, let them sit even longer.
7-Seventh Step: Optional water bath processing If you want to process the sealed jars in boiling water, do so for 10 minutes. After that, still refrigerate the jars. This recipe is not meant for shelf-stable pantry canning, so the refrigerator is still the safest place to store it.
Last Step:
Please leave a rating and comment letting us know how you liked this recipe! This helps our business to thrive and continue providing free, high-quality recipes for you.Notes
🧼 Use only canning/kosher salt – table salt clouds brine.
💙 Blue/turquoise color safe/normal from garlic compounds.
⏰ Fridge 4 months max; discard if bubbly/moldy.
- Prep Time: 15 minutes
- Refrigeration: 3 weeks
- Cook Time: 15 minutes
- Category: Condiments
- Method: Pickling
- Cuisine: American
- Diet: Vegan
Nutrition
- Serving Size: 1/4 cup
- Calories: 52 kcal
- Sugar: 1g
- Sodium: 7mg
- Fat: 1g
- Saturated Fat: 1g
- Unsaturated Fat: 0g
- Trans Fat: 0g
- Carbohydrates: 10g
- Fiber: 1g
- Protein: 2g
- Cholesterol: 0mg


