

Why You’ll Love These Pickled Vegetables
Pickled vegetables are one of those simple kitchen wins that make everyday meals feel brighter. With just a few fresh vegetables, a quick brine, and a couple of pantry spices, you can turn a pile of produce into crisp, tangy jars that taste like they took way more effort than they did. This pickled vegetables recipe is especially friendly for busy home cooks, students, and anyone who wants big flavor without a long prep list.
- Easy preparation: You only need a cutting board, a pot, and two clean mason jars. Since the brine is made in minutes, this is a fast homemade pickles recipe that fits into a weeknight routine.
- Bright, fresh flavor: The mix of vinegar, garlic, coriander, fennel, mustard seed, and dill gives these crunchy pickled vegetables a sharp, lively taste that wakes up sandwiches, grain bowls, salads, and snack plates.
- Flexible for different diets: These quick pickles are naturally vegetarian, and they can be made vegan, gluten-free, low sugar, or sugar-free with a few easy swaps.
- Great way to use extra produce: If your fridge is full of cucumbers, carrots, radishes, or green beans, this is one of the best ways to keep them from going to waste.
When your vegetables are crisp and your brine is balanced, you get that perfect crunchy bite that makes homemade pickles so satisfying.
If you like no-fuss recipes that fit the cooking style of Cookingeating.com, this jar-friendly method is a great one to keep in your back pocket.
Jump to:
- Why You’ll Love These Pickled Vegetables
- Essential Ingredients for Pickled Vegetables
- Structured Ingredient List
- Why each ingredient matters
- Special dietary options
- How to Prepare the Perfect Pickled Vegetables: Step-by-Step Guide
- First Step: Wash, trim, and slice the vegetables
- Second Step: Pack the jars
- Third Step: Add the spices
- Fourth Step: Make the pickling liquid
- Fifth Step: Pour the hot brine over the vegetables
- Sixth Step: Chill and wait for the flavor to build
- Final Step: Serve and enjoy
- Dietary Substitutions to Customize Your Pickled Vegetables
- Protein and Main Component Alternatives
- Vegetable, Sauce, and Seasoning Modifications
- Mastering Pickled Vegetables: Advanced Tips and Variations
- Pro cooking techniques
- Flavor variations
- Presentation tips
- Make-ahead options
- How to Store Pickled Vegetables: Best Practices
- FAQs: Frequently Asked Questions About Pickled Vegetables
- What are the best vegetables to pickle at home?
- How long do homemade pickled vegetables last in the fridge?
- How do you make quick pickled vegetables?
- Are pickled vegetables healthy to eat?
- Can you safely pickle vegetables without canning equipment?
- Pickled Vegetables
- Ingredients
- Instructions
- Last Step:
- Notes
- Nutrition
- Did you make this recipe?
Essential Ingredients for Pickled Vegetables
To make the best pickled vegetables, start with fresh, firm produce. You can mix and match what you have on hand, but the vegetables should be crisp enough to hold their texture after soaking in brine. This recipe makes enough for 2 quart-size mason jars, which is about 5 to 6 cups of vegetables.
Structured Ingredient List
- 5 to 6 cups fresh raw vegetables such as cucumbers, beets, carrots, radishes, turnips, okra, green beans, asparagus, red onion, zucchini, summer squash, cauliflower florets, bell peppers, garlic scapes, fennel bulbs, or rainbow chard stems
- 1 tablespoon coriander seeds
- 2 teaspoons fennel seeds
- 1 teaspoon mustard seeds
- 6 to 10 cloves garlic, thickly sliced
- 1/2 onion, sliced optional
- Few sprigs fresh dill or other herbs optional
- Whole cloves optional
- Dill seeds optional
- Whole allspice optional
- Fresh ginger slices optional
- Fresh chilies or chili flakes optional
- Celery seeds optional
- Peppercorns optional
- Cumin seeds optional
- Star anise optional
- 2 cups vinegar such as white, red wine, rice wine, apple cider, or a combination
- 2 cups water
- 2 tablespoons kosher salt
- 4 to 6 tablespoons sugar or a sugar alternative
Why each ingredient matters
| Ingredient | What it does |
|---|---|
| Fresh vegetables | Give the pickled vegetables their crunch, color, and natural flavor. |
| Vinegar | Creates the tangy brine and helps preserve the vegetables in the fridge. |
| Salt | Pulls flavor into the vegetables and keeps the brine balanced. |
| Sugar | Softens the sharp edge of the vinegar and rounds out the flavor. |
| Garlic and spices | Add depth, aroma, and that classic homemade pickle taste. |
Special dietary options
- Vegan: This recipe is already plant-based. Use a sugar alternative if you want to keep it fully vegan and tailored to your pantry.
- Gluten-free: All ingredients are naturally gluten-free, but always check labels on vinegar and spices if you are sensitive.
- Low-calorie: Reduce the sugar or use a no-calorie sweetener to keep the brine lighter.
For a helpful look at the health side of fermented and pickled foods, you can also read this guide on the health benefits of pickled and fermented foods.
How to Prepare the Perfect Pickled Vegetables: Step-by-Step Guide
First Step: Wash, trim, and slice the vegetables
Start by washing all your vegetables well under cool running water. Trim off any tough ends, peel beets or carrots if needed, and slice everything into bite-size pieces that will fit easily into your jars. Thin slices work well for radishes, onions, fennel, and bell peppers, while spears or sticks are great for cucumbers, carrots, green beans, asparagus, zucchini, and summer squash.
The goal is even sizing so the pickled vegetables soak up the brine at the same pace. If you are mixing softer vegetables with firmer ones, cut the firmer vegetables a little smaller so the jar stays balanced. This also helps the vegetables pack tightly without leaving too many air gaps.
Second Step: Pack the jars
Add the sliced garlic, optional onion, and fresh herbs to the bottom of two clean quart-size mason jars. Then pack the vegetables in as tightly as you can without crushing them. A snug pack helps the brine cover the vegetables more evenly and gives you that classic pickle texture everyone loves.
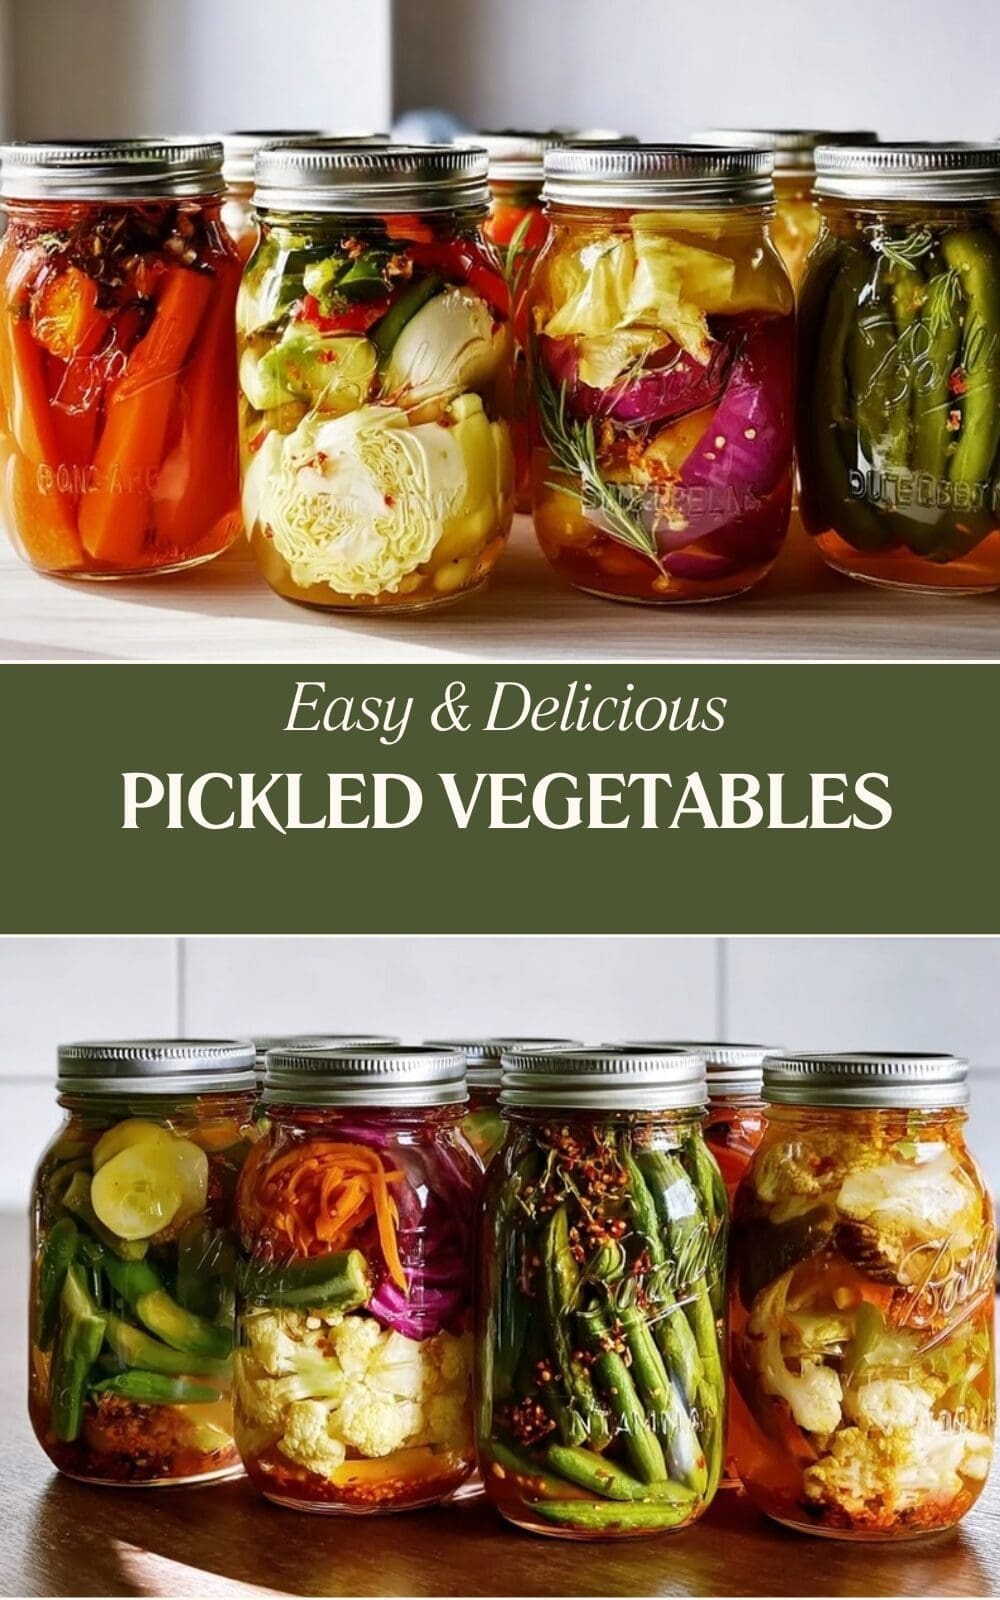
If you want a prettier jar, layer the colors. Try carrots next to cauliflower, red onion beside cucumbers, or beets with turnips for a jewel-toned mix. This is a great place to make the jars look festive for gifting or meal prep.
Third Step: Add the spices
Divide the coriander seeds, fennel seeds, and mustard seeds between the jars. If you are using optional spices like whole cloves, dill seeds, allspice, ginger, chilies, celery seeds, peppercorns, cumin seeds, or star anise, sprinkle them in now. The heat from the brine will wake up the spices and give your pickled vegetables deeper flavor as they sit.
Tip: A little spice goes a long way. Start light if you are new to homemade pickles, then adjust the next batch to match your taste.
Fourth Step: Make the pickling liquid
In a medium saucepan, combine 2 cups vinegar, 2 cups water, 2 tablespoons kosher salt, and 4 to 6 tablespoons sugar or sugar alternative. Bring the mixture to a simmer over medium heat, stirring until the salt and sugar dissolve. You do not need a hard boil. A gentle simmer is enough to blend the brine and help the flavors come together.
Use a vinegar you enjoy. White vinegar gives a sharp, classic pickle taste, while apple cider vinegar adds a softer fruit note. Red wine vinegar and rice wine vinegar each bring their own personality, and a combination can be fun if you want a more layered flavor in your quick pickled vegetables.
Fifth Step: Pour the hot brine over the vegetables
Carefully pour the hot brine into each jar, making sure the vegetables are fully covered. Leave a little space at the top of the jar so the brine can settle. If some vegetables float, press them down gently with a clean spoon or chopstick. If needed, add a little more hot water and vinegar in equal amounts to keep everything submerged.
Let the jars cool on the counter for about 30 to 45 minutes before sealing. This keeps the glass from getting too hot too fast and helps the brine settle around the vegetables. Once they are cool enough to handle, add lids and move them to the refrigerator.
Sixth Step: Chill and wait for the flavor to build
Your pickled vegetables will taste good after a few hours, but they are usually best after 24 to 48 hours in the fridge. That resting time gives the brine a chance to work its way into the vegetables and create a brighter, more balanced pickle. Softer vegetables like radishes and onions may be ready sooner, while dense carrots and beets often benefit from a full day or two.
Try to wait at least overnight before digging in if you can. The flavor gets better as the vegetables sit, and the texture stays crisp when the slices are cut evenly and packed tightly.
Final Step: Serve and enjoy
Once chilled, taste the pickled vegetables and adjust future batches if you want more sweetness, more heat, or extra garlic. Serve them with sandwiches, burgers, tacos, rice bowls, cheese boards, roasted meats, grain salads, or straight from the jar as a snack. A small forkful can brighten an entire plate.
If you like easy make-ahead sides, you may also enjoy other no-cook recipes on Cookingeating.com that keep your kitchen cool and your schedule simple.

Dietary Substitutions to Customize Your Pickled Vegetables
Protein and Main Component Alternatives
While this recipe is centered on vegetables, you can still tailor the jar to your needs or pantry. If you want a more substantial pickle mix for meal prep, add extra cauliflower florets, green beans, turnips, or carrots for a heartier crunch. If you are serving these pickled vegetables as part of a larger meal, pair them with chickpeas, tofu, boiled eggs, grilled chicken, or cheese on the side.
For people watching sodium or sugar, use a lighter brine with less sugar or a sugar substitute. For a sharper bite, increase the vinegar slightly. For a softer flavor, use part apple cider vinegar and part rice wine vinegar.
Vegetable, Sauce, and Seasoning Modifications
Swap vegetables based on the season. Summer is perfect for cucumbers, zucchini, summer squash, and bell peppers. Cooler months work well with beets, carrots, turnips, and red onion. You can also mix in okra, garlic scapes, or fennel bulbs for a more unique jar.
Flavor changes are easy too. Add fresh ginger for warmth, chili flakes for heat, peppercorns for a peppery finish, or star anise for a subtle sweet spice note. If you want a more herbal pickle, use dill, thyme, parsley, or tarragon. If you prefer a classic deli-style pickle, lean on garlic, coriander, mustard seed, and dill.
For a sugar-free version, use monk fruit, stevia blend, or simply leave the sweetener out and increase the vinegar slightly. The result will be sharper, but still delicious on sandwiches and snack plates.
Mastering Pickled Vegetables: Advanced Tips and Variations
Pro cooking techniques
The biggest trick for crisp pickled vegetables is starting with very fresh produce. Soft or wrinkled vegetables will only get softer in the brine. Also, use clean jars and make sure the vegetables are fully covered. Any piece poking above the brine can lose quality faster.
If you want extra crunch, chill the vegetables before packing them. Cold vegetables hold texture better. You can also slice firmer vegetables thinner and leave softer ones in larger pieces so the jar stays balanced. For beets and carrots, a quick blanch is not needed here, since the goal is a crisp, fresh bite.
Flavor variations
Try a dill-heavy version with extra fresh dill, dill seeds, garlic, and peppercorns. For a sweeter style, use apple cider vinegar and the full amount of sugar. For spicy pickled vegetables, add fresh chilies, chili flakes, and ginger. You can even build a mixed jar with cucumbers, onions, and carrots for a classic crunchy trio.
Another fun option is a garden harvest jar with green beans, asparagus, cauliflower, and bell peppers. This kind of mix looks beautiful and gives you different textures in every bite.
Presentation tips
For a prettier presentation, place colorful vegetables near the glass so the jar looks vibrant from the outside. Layer red onion, carrots, beets, and bell peppers for a bright striped look. A sprig of dill or a thin slice of ginger on the outside edge can make the jar feel special if you are serving guests or giving jars as gifts.
Make-ahead options
These quick pickled vegetables are a smart meal prep move. Make two jars at once so you have one ready to eat and one in the wings for later in the week. The vegetables stay handy for lunch boxes, snack trays, and last-minute dinner sides. Since the brine comes together fast, you can also prep the vegetables the night before and finish the jars the next morning.
How to Store Pickled Vegetables: Best Practices
Refrigeration is the easiest and safest storage method for this recipe. Once the jars are sealed and chilled, keep them in the refrigerator and use clean utensils each time you reach in. Properly stored quick pickled vegetables usually keep their best flavor and crunch for up to 2 weeks, though many people enjoy them most within the first week.
Freezing is not a great choice for these vegetables, since freezing changes the texture and can make them mushy after thawing. Reheating is also not needed because these are meant to be eaten cold or at room temperature. If the brine looks cloudy, smells off, or shows signs of mold, discard the jar.
For meal prep, label each jar with the date so you know when it was made. Keep them toward the back of the fridge where the temperature is steady. That way your pickled vegetables stay crisp, bright, and ready for quick meals all week long.
FAQs: Frequently Asked Questions About Pickled Vegetables
What are the best vegetables to pickle at home?
The best vegetables for pickling include cucumbers, green beans, asparagus, baby carrots, beets, salad turnips, radishes, onions, chili peppers, red bell peppers, zucchini, and summer squash. These choices work well because they hold their texture and flavor during the pickling process. Cucumbers make classic dill pickles, while green beans and asparagus offer crisp, tangy bites. Root veggies like beets and carrots add earthy sweetness, and radishes provide a peppery crunch. Start with fresh, firm produce—wash thoroughly, trim ends, and cut into spears or slices for even pickling. Use a simple brine of vinegar, water, salt, sugar, and spices like garlic, dill, or mustard seeds. Heat the brine, pour over veggies in jars, and refrigerate. This quick method yields ready-to-eat pickles in 24-48 hours. Experiment with combinations like pickled onions with beets for salads. (112 words)
How long do homemade pickled vegetables last in the fridge?
Homemade pickled vegetables typically last up to 2 weeks in a sealed container in the fridge, thanks to the acidity from vinegar that inhibits bacterial growth. For best quality, consume within 1 week when flavors peak. Always use clean, sterilized jars and fresh ingredients to maximize shelf life. Signs of spoilage include off odors, mold, or sliminess—discard if noticed. To extend beyond fridge pickles, consider water bath canning approved recipes for pantry storage up to a year, following USDA guidelines for safety. Label jars with dates. Quick pickles without canning stay crisp longer in the fridge than fermented ones. Store at 35-40°F, away from raw foods to prevent cross-contamination. Proper storage keeps crunch and tang intact for sandwiches, salads, or snacks. (118 words)
How do you make quick pickled vegetables?
Making quick pickled vegetables is simple: Gather 1 lb veggies (like cucumbers or carrots), 1 cup white vinegar, 1 cup water, 1 tbsp salt, 1 tbsp sugar, and spices (garlic, dill, peppercorns). Wash and slice veggies evenly. Pack into a pint jar. Boil brine ingredients until dissolved, then pour hot over veggies, ensuring they’re submerged. Cool, seal, and refrigerate. Ready in 24 hours, best after 2-3 days. Ratio tip: 1:1 vinegar-water with 1-2% salt by volume prevents sogginess. Customize with apple cider vinegar for sweetness or add red pepper flakes for heat. Use glass jars to avoid reactions. This no-cook method skips canning for fast results—perfect for beginners. Drain and rinse for milder taste later. Yields tangy toppers for tacos or bowls. (124 words)
Are pickled vegetables healthy to eat?
Yes, pickled vegetables can be healthy in moderation. They provide vitamins, fiber, and antioxidants from fresh produce, like vitamin C in peppers or beta-carotene in carrots. Vinegar adds probiotics if fermented, aiding gut health, though quick pickles offer less. Low-calorie (about 20-50 per serving), they’re great for weight management and blood sugar control due to acetic acid. Watch sodium—1/4 cup might have 300-500mg, so rinse before eating if monitoring intake. Pair with proteins for balanced meals. Studies show pickled foods may reduce inflammation and support digestion. Opt for low-sugar recipes. Compared to chips, they’re nutrient-dense snacks. Include in diets for variety, but balance with whole veggies. A 2020 study linked fermented pickles to improved microbiome diversity. Enjoy daily handfuls safely. (116 words)
Can you safely pickle vegetables without canning equipment?
Absolutely, fridge pickling is safe without canning equipment for short-term storage. Use a vinegar-based brine at least 5% acidity (like white or apple cider vinegar) to create an acidic environment (pH below 4.6) that kills bacteria. Boil brine, submerge clean veggies fully, and refrigerate immediately. Avoid low-acid veggies like broccoli unless combined with vinegar-heavy recipes. Test pH strips if concerned. This method skips heat processing risks. For longer storage, learn proper canning from reliable sources like the National Center for Home Food Preservation. Common mistake: reusing brine—always make fresh. Safety first: inspect for bubbles or foam indicating fermentation gone wrong. Millions safely fridge-pickle yearly. Links to recipes ensure success. Great for small batches. (108 words)

Pickled Vegetables
🥒🥬 Crunchy homemade pickled vegetables with aromatic seeds – tangy probiotic boost lasts 1 month in fridge!
🫙🌿 Easy no-canning quick pickles customize veggies/spices – elevate sandwiches salads snacks vegan-style!
- Total Time: 24 hours 25 minutes
- Yield: 2 quarts (8 servings)
Ingredients
– 5 to 6 cups fresh raw vegetables such as cucumbers, beets, carrots, radishes, turnips, okra, green beans, asparagus, red onion, zucchini, summer squash, cauliflower florets, bell peppers, garlic scapes, fennel bulbs, or rainbow chard stems
– 1 tablespoon coriander seeds
– 2 teaspoons fennel seeds
– 1 teaspoon mustard seeds
– 6 to 10 cloves garlic, thickly sliced
– 1/2 onion, sliced
– Few sprigs fresh dill or other herbs
– Whole cloves
– Dill seeds
– Whole allspice
– Fresh ginger slices
– Fresh chilies or chili flakes
– Celery seeds
– Peppercorns
– Cumin seeds
– Star anise
– 2 cups vinegar such as white, red wine, rice wine, apple cider, or a combination
– 2 cups water
– 2 tablespoons kosher salt
– 4 to 6 tablespoons sugar or a sugar alternative
Instructions
1-First Step: Wash, trim, and slice the vegetables Start by washing all your vegetables well under cool running water. Trim off any tough ends, peel beets or carrots if needed, and slice everything into bite-size pieces that will fit easily into your jars. Thin slices work well for radishes, onions, fennel, and bell peppers, while spears or sticks are great for cucumbers, carrots, green beans, asparagus, zucchini, and summer squash. The goal is even sizing so the pickled vegetables soak up the brine at the same pace. If you are mixing softer vegetables with firmer ones, cut the firmer vegetables a little smaller so the jar stays balanced. This also helps the vegetables pack tightly without leaving too many air gaps.
2-Second Step: Pack the jars Add the sliced garlic, optional onion, and fresh herbs to the bottom of two clean quart-size mason jars. Then pack the vegetables in as tightly as you can without crushing them. A snug pack helps the brine cover the vegetables more evenly and gives you that classic pickle texture everyone loves. If you want a prettier jar, layer the colors. Try carrots next to cauliflower, red onion beside cucumbers, or beets with turnips for a jewel-toned mix. This is a great place to make the jars look festive for gifting or meal prep.
3-Third Step: Add the spices Divide the coriander seeds, fennel seeds, and mustard seeds between the jars. If you are using optional spices like whole cloves, dill seeds, allspice, ginger, chilies, celery seeds, peppercorns, cumin seeds, or star anise, sprinkle them in now. The heat from the brine will wake up the spices and give your pickled vegetables deeper flavor as they sit.
4-Fourth Step: Make the pickling liquid In a medium saucepan, combine 2 cups vinegar, 2 cups water, 2 tablespoons kosher salt, and 4 to 6 tablespoons sugar or sugar alternative. Bring the mixture to a simmer over medium heat, stirring until the salt and sugar dissolve. You do not need a hard boil. A gentle simmer is enough to blend the brine and help the flavors come together. Use a vinegar you enjoy. White vinegar gives a sharp, classic pickle taste, while apple cider vinegar adds a softer fruit note. Red wine vinegar and rice wine vinegar each bring their own personality, and a combination can be fun if you want a more layered flavor in your quick pickled vegetables.
5-Fifth Step: Pour the hot brine over the vegetables Carefully pour the hot brine into each jar, making sure the vegetables are fully covered. Leave a little space at the top of the jar so the brine can settle. If some vegetables float, press them down gently with a clean spoon or chopstick. If needed, add a little more hot water and vinegar in equal amounts to keep everything submerged. Let the jars cool on the counter for about 30 to 45 minutes before sealing. This keeps the glass from getting too hot too fast and helps the brine settle around the vegetables. Once they are cool enough to handle, add lids and move them to the refrigerator.
6-Sixth Step: Chill and wait for the flavor to build Your pickled vegetables will taste good after a few hours, but they are usually best after 24 to 48 hours in the fridge. That resting time gives the brine a chance to work its way into the vegetables and create a brighter, more balanced pickle. Softer vegetables like radishes and onions may be ready sooner, while dense carrots and beets often benefit from a full day or two. Try to wait at least overnight before digging in if you can. The flavor gets better as the vegetables sit, and the texture stays crisp when the slices are cut evenly and packed tightly.
7-Final Step: Serve and enjoy Once chilled, taste the pickled vegetables and adjust future batches if you want more sweetness, more heat, or extra garlic. Serve them with sandwiches, burgers, tacos, rice bowls, cheese boards, roasted meats, grain salads, or straight from the jar as a snack. A small forkful can brighten an entire plate. If you like easy make-ahead sides, you may also enjoy other no-cook recipes on Cookingeating.com that keep your kitchen cool and your schedule simple.
Last Step:
Please leave a rating and comment letting us know how you liked this recipe! This helps our business to thrive and continue providing free, high-quality recipes for you.Notes
🧼 Sterilize jars by boiling 10 min – prevents spoilage.
🌡️ Brine ratio key: equal vinegar-water, adjust sugar for tart/sweet.
⏰ Flavor peaks day 3; use within 1 month for max crunch.
- Prep Time: 20 minutes
- Chilling: 24 hours
- Cook Time: 5 minutes
- Category: Sides
- Method: Pickling
- Cuisine: American
- Diet: Vegan
Nutrition
- Serving Size: 1/2 cup
- Calories: 40 kcal
- Sugar: 6g
- Sodium: 500mg
- Fat: 0g
- Saturated Fat: 0g
- Unsaturated Fat: 0g
- Trans Fat: 0g
- Carbohydrates: 10g
- Fiber: 1g
- Protein: 0g
- Cholesterol: 0mg


