

Why You’ll Love This Rainbow Fudge Recipe
By Sage Martinez
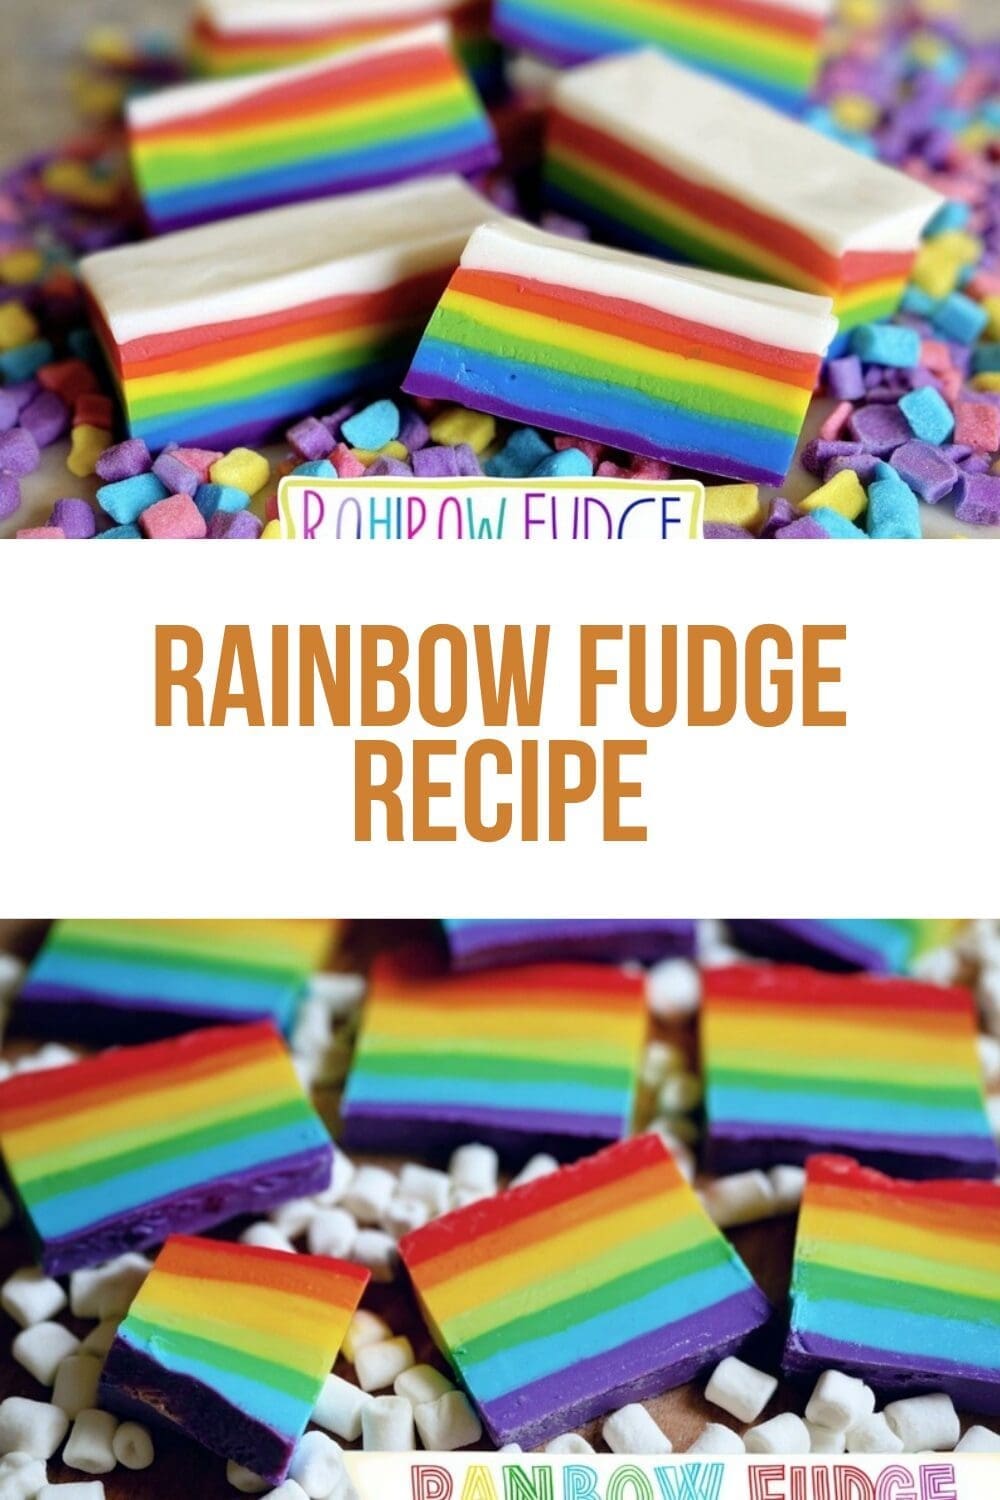
If you love bold colors, simple steps, and a no-bake sweet that practically makes itself, this Rainbow Fudge Recipe is for you. It fits busy schedules, small kitchens, and anyone who wants party-ready candy without turning on the oven. Below are four easy-to-read reasons this layered treat earns a permanent spot in your recipe box.
- Ease of preparation: The Rainbow Fudge Recipe uses simple ingredients and straightforward steps. Each layer uses just 1/2 cup white chocolate morsels and 3 tablespoons plus 1 teaspoon sweetened condensed milk, microwaved for 30 seconds and stirred until smooth. Because each layer is made one at a time and chilled for about 10 minutes, the total hands-on time is minimal and well-suited to busy parents, college students, or anyone with limited kitchen time.
- Health benefits: While this is an indulgent candy, it’s made without added baking fat or long bake times. Since it relies on a few pantry staples, you can control portion size and ingredients. The recipe notes that nutritional information is primarily based on white chocolate morsels and sweetened condensed milk; for health-conscious eaters, smaller squares and ingredient swaps (see Dietary Substitutions) make it easier to fit into a balanced week of treats.
- Versatility: The Rainbow Fudge Recipe adapts well: add 1 to 2 teaspoons of extracts (almond, vanilla, orange) or dry flavorings like freeze-dried fruit powders for variety. You can make vegan or lower-calorie versions with substitutes. The layered method also lets you flavor or color specific layers for themed events or dietary needs.
- Distinctive flavor: The base is creamy white chocolate plus sweetened condensed milk, giving a rich, sweet foundation that pairs beautifully with extracts and powdered flavorings. With careful coloring and a bit of zest or powdered fruit, this layered candy stands out both visually and on the taste buds.
Quick note: This recipe is perfect for apartment kitchens, hot days when you do not want to use the oven, or anytime you want a showy candy with minimal fuss.
Jump to:
- Why You’ll Love This Rainbow Fudge Recipe
- Essential Ingredients for Rainbow Fudge Recipe
- Special Dietary Options
- How to Prepare the Perfect Rainbow Fudge Recipe: Step-by-Step Guide
- First Step: Setup and mise en place
- Second Step: Make the first layer
- Third Step: Repeat for each layer
- Fourth Step: Final chill and remove
- Final Step: Serving and storing
- Dietary Substitutions to Customize Your Rainbow Fudge Recipe
- Protein and Main Component Alternatives
- Vegetable, Sauce, and Seasoning Modifications
- Mastering Rainbow Fudge Recipe: Advanced Tips and Variations
- Pro cooking techniques
- Flavor variations
- Presentation tips
- Make-ahead options
- How to Store Rainbow Fudge Recipe: Best Practices
- Refrigeration
- Freezing
- Reheating
- Meal prep considerations
- FAQs: Frequently Asked Questions About Rainbow Fudge Recipe
- How long should each layer cool before adding the next in rainbow fudge?
- How can I flavor rainbow fudge layers without messing up the colors?
- What causes chocolate to seize when making rainbow fudge and how to fix it?
- Can I add peanut butter to rainbow fudge layers and what amount?
- How do I store and cut rainbow fudge after it’s set?
- Rainbow Fudge Recipe
- Ingredients
- Instructions
- Last Step:
- Notes
- Nutrition
- Did you make this recipe?
Essential Ingredients for Rainbow Fudge Recipe
Below is a clear, structured ingredients list that matches the exact measurements the recipe requires. Each ingredient appears on its own line with the quantity first so it’s easy to read and to shop from.
- 3 cups white chocolate morsels, divided – Main sweet base for the fudge; divide across layers as indicated in the directions.
- 14 ounces sweetened condensed milk, divided – Adds creaminess and sweetness; portioned for each layer in the recipe.
- Food coloring (red, blue, yellow) – For coloring the layers. Use these drop amounts: purple uses 4 drops red and 4 drops blue; red uses 16 drops; orange uses 4 drops red and 4 drops yellow; other colors use 8 drops.
Special Dietary Options
- Vegan: Substitute white chocolate morsels with vegan white baking chips (measure 3 cups) and use a canned vegan condensed milk alternative or reduce coconut cream with powdered sugar to mimic sweetness and texture.
- Gluten-free: This recipe is naturally gluten-free if your white chocolate morsels are certified gluten-free. Always check labels.
- Low-calorie: Make smaller squares or try replacing some white chocolate with a lower-sugar white chocolate alternative; reduce portion size to control calories.
How to Prepare the Perfect Rainbow Fudge Recipe: Step-by-Step Guide
Follow these steps exactly to get clean, colorful layers and a silky texture. The recipe yields about six layers and works best when you prepare one color at a time and give each layer time to chill.
First Step: Setup and mise en place
Line an 8 by 8 inch glass baking dish with aluminum foil. Make sure the foil overhangs two opposite sides so you can lift the finished block out easily. Measure and divide the white chocolate morsels and the sweetened condensed milk into six equal portions ahead of time. For each layer you will use 1/2 cup white chocolate morsels and 3 tablespoons plus 1 teaspoon sweetened condensed milk.
Second Step: Make the first layer
Combine 1/2 cup white chocolate morsels and 3 tablespoons plus 1 teaspoon sweetened condensed milk in a small microwave-safe bowl. Microwave for 30 seconds, then stir until smooth. If it is not completely melted, microwave an additional 10-15 seconds and stir. Avoid overheating to prevent seizing. Add your chosen food coloring drops for the first color (for vibrant reds, you will need 16 drops; for other standard colors use 8 drops; see ingredient notes for purple and orange).
Spoon and spread the colored mixture evenly into the prepared 8×8 dish. Use an offset spatula or the back of a spoon to smooth the surface. Chill in the refrigerator for 10 minutes to let the first layer firm up just enough to support the next layer without blending.
Third Step: Repeat for each layer
Repeat the melting process for the next color: combine 1/2 cup white chocolate morsels with 3 tablespoons plus 1 teaspoon sweetened condensed milk in a small bowl, microwave 30 seconds, stir until silky, add the food coloring for the color you want, then spread evenly over the chilled layer. Chill 10 minutes before adding the next one.
Continue this process for six layers total. Because each layer uses the same base, you can easily change the flavor of a specific layer by adding 1-2 teaspoons of extract (vanilla, almond, orange) or 1-2 tablespoons of powdered freeze-dried fruit. For color-safe flavor additions, prefer dry extracts and powders rather than fruit purees.
Fourth Step: Final chill and remove
After the sixth layer is poured and smoothed, refrigerate the entire pan for at least 2-3 hours until fully set. When firm, lift the block out by the foil overhang and peel away the foil. Place on a cutting board and cut into squares with a sharp knife. For cleaner cuts, let the fudge sit at room temperature 5-10 minutes or dip the knife in hot water, wipe it dry, and slice.
Final Step: Serving and storing
Arrange squares on a platter or pack into an airtight container. The recipe suggests storing at room temperature for up to two weeks, but for best texture and food safety in warm environments, refrigerate or keep in a cool spot.
Timing summary:
- Microwaving per layer: about 30 seconds (plus stirring).
- Chill per layer: 10 minutes.
- Total active plus chill time for six layers: about 1 to 1.5 hours; add extra time for final set if chilling longer.
Tip: Prepare one layer at a time to avoid overheating and to ensure each stripe stays distinct and tidy.

Dietary Substitutions to Customize Your Rainbow Fudge Recipe
Protein and Main Component Alternatives
The main components here are white chocolate morsels and sweetened condensed milk. If you need to adapt these for dietary reasons, here are reliable swaps that keep texture and flavor balanced.
- Vegan white chocolate chips: Replace the 3 cups of white chocolate morsels with 3 cups of vegan white chocolate chips. Use a vegan condensed milk alternative (many brands exist) or make a quick version with coconut milk reduced with sweetener until thick. Expect slight flavor shifts toward coconut.
- Lower-sugar: Look for reduced-sugar white chocolate chips. Because the base is very sweet, reducing portion size or making smaller squares may be the simplest approach to cut sugars.
- Dairy-free condensed milk: Use canned coconut condensed milk or store-bought dairy-free sweetened condensed milk; measure 14 ounces total and divide per layer as written.
Vegetable, Sauce, and Seasoning Modifications
While fudge does not usually use vegetables or sauces, you can tweak seasoning and powdered additions to adjust flavor without upsetting color or texture.
- Extracts: Add 1 to 2 teaspoons of clear extracts like vanilla, almond, or orange into the melted mixture before coloring to avoid adding liquid that could thin or discolor the layer.
- Freeze-dried fruit powders: Add 1 to 2 tablespoons of powdered freeze-dried fruit for bold, color-safe flavor. These powders keep layers dry and vibrant while adding real fruit taste.
- Spices and zest: Finely grated citrus peel or a pinch of ground cinnamon can add a sophisticated note to one color layer without changing consistency.
Mastering Rainbow Fudge Recipe: Advanced Tips and Variations
Once you have the basic Rainbow Fudge Recipe down, try these tips and creative ideas to take it up a notch. These suggestions help with texture, presentation, and flavor balance.
Pro cooking techniques
- Control heat carefully: Melt white chocolate morsels in short microwave bursts (20-30 seconds) at medium power, stirring thoroughly between intervals. Overheating causes chocolate to seize; if that happens, add 1-2 teaspoons of neutral oil and stir to rescue it.
- Use room temperature condensed milk: Cold liquid can cool the melted chocolate too abruptly; bring the condensed milk to room temperature for smoother emulsions.
- Spread evenly: Use an offset spatula or the bottom of a small, flat measuring cup to smooth each layer for clean stripes.
Flavor variations
- Nutty twist: Stir 2-3 tablespoons of smooth peanut butter into one layer for a peanut-flavored stripe. Keep in mind peanut butter can tint the layer tan, so use it in less vibrant colors like yellow or as a bottom layer.
- Berry bursts: Add 1-2 tablespoons of freeze-dried strawberry or raspberry powder to the pink/red layer for authentic fruit notes without adding moisture.
- Citrus pop: Add 1 teaspoon of finely grated lemon or orange zest to the yellow layer for a bright finish.
Presentation tips
- Cut uniform squares: Aim for 1 to 1.5 inch squares for party trays. For clean cuts, use a hot knife (dip in hot water, wipe dry before each cut).
- Garnish ideas: Top certain squares with a pinch of colorful sanding sugar, edible glitter, or crushed freeze-dried fruit to match the layer color.
Make-ahead options
- Prep layers in advance: You can prepare all melted mixtures and place them in separate covered bowls in the fridge for up to 24 hours before assembling. Warm gently before pouring.
- Batch freezing: Cut the fudge into squares and freeze in single layers separated by parchment up to one month; thaw in the fridge before serving.
For other no-oven treats and simple desserts that follow a similar assembly method, check out this Peach Cobbler Dump Cake recipe that also keeps the kitchen cool: Peach cobbler dump cake recipe.
How to Store Rainbow Fudge Recipe: Best Practices
Proper storage keeps your layered candy looking bright and tasting fresh. Use the guidelines below to store safely and keep texture intact.
Refrigeration
Store fudge in an airtight container at room temperature for up to two weeks as the original directions suggest. In warm environments, refrigeration is safer: place in an airtight container with parchment between layers and refrigerate. Chilled fudge holds shape well but can firm up quite a bit; allow 5-10 minutes at room temperature before serving for a softer bite.
Freezing
For longer storage, freeze fudge squares in a sealed container or freezer bag for up to one month. Use parchment between layers to prevent sticking. Thaw in the refrigerator overnight and bring to room temperature briefly before serving.
Reheating
Avoid reheating fudge directly. If you want softer slices, let them sit at room temperature for a few minutes or pop the whole container out for 10 minutes. If your chocolate is too firm due to cold storage for dipping or coating, briefly microwave a few squares at 5-8 second bursts to soften.
Meal prep considerations
This is a great make-ahead candy for parties: prepare several days in advance and store in an airtight container. Line containers with parchment and separate layers of fudge with parchment for easy serving. If you plan to ship or gift, choose cool weather or insulated packaging to avoid melting in transit.
FAQs: Frequently Asked Questions About Rainbow Fudge Recipe
How long should each layer cool before adding the next in rainbow fudge?
In a rainbow fudge recipe, cool each layer in the fridge for about 10 minutes before pouring the next one. This short chilling time lets the previous layer firm up just enough to hold its shape and color without blending into the layer above. Start by lining an 8×8-inch pan with parchment paper for easy removal. Melt white chocolate chips with sweetened condensed milk over low heat or in the microwave in 30-second bursts, stirring until smooth. Divide into bowls, add gel food coloring for vibrant rainbow hues (red, orange, yellow, green, blue, purple), and pour one color at a time. After the final layer, refrigerate the whole pan for 2-3 hours until fully set. This method prevents layers from merging and gives clean, distinct stripes. Total prep and set time is around 4 hours. (92 words)
How can I flavor rainbow fudge layers without messing up the colors?
Flavor each rainbow fudge layer using dry or clear extracts that won’t alter the vibrant colors. Mix 1-2 teaspoons of vanilla, almond, or orange extract into the sweetened condensed milk and melted white chocolate base before adding gel coloring. For bolder tastes, stir in 1-2 tablespoons of powdered freeze-dried fruit (like strawberries for pink or blueberries for blue), finely grated citrus zest, or ground spices such as cinnamon. Avoid wet ingredients like fruit purees or peanut butter, as they can muddy colors—peanut butter turns layers brownish. Test small batches first. Example: vanilla for red/orange, citrus for yellow/green, berry powder for blue/purple. This keeps flavors distinct per layer while maintaining bright rainbow visuals. Store in an airtight container in the fridge for up to 2 weeks. (118 words)
What causes chocolate to seize when making rainbow fudge and how to fix it?
Chocolate seizes—turning grainy or clumpy—in rainbow fudge if overheated before mixing with sweetened condensed milk. This happens from high microwave power or direct high stove heat, causing the chocolate to exceed 110°F and lose its smooth emulsion. Prevention: Melt white chocolate chips gently in 20-30 second microwave intervals at 50% power, stirring well each time, or use a double boiler on low simmer. If it seizes, don’t panic—add 1-2 teaspoons of neutral oil (like vegetable or coconut) and stir vigorously over low heat to rescue it. Always add room-temperature sweetened condensed milk last. For best results, use high-quality white chocolate. This ensures silky layers for your rainbow fudge. Yields about 36 pieces. (112 words)
Can I add peanut butter to rainbow fudge layers and what amount?
Yes, you can add peanut butter to one or two rainbow fudge layers for nutty flavor, but use 2-3 tablespoons of smooth, natural peanut butter per batch to avoid overpowering the sweetness or drastically changing colors—it may tint layers tan or brown, so reserve for less vibrant ones like yellow. Stir it into the melted white chocolate and sweetened condensed milk mixture after dividing for colors. Microwave-safe tip: Warm peanut butter slightly first for easy blending. For color-safe alternative, try peanut butter extract (1 tsp). Cut fudge into 1-inch squares after full 3-hour chill. Pairs well with a yellow layer mimicking PB&J vibes. Keeps fresh in fridge 1-2 weeks or freeze up to 1 month in portions. (108 words)
How do I store and cut rainbow fudge after it’s set?
Once your rainbow fudge is fully chilled (3-4 hours total in fridge), store it in an airtight container lined with parchment between layers to prevent sticking—lasts 2 weeks in the fridge or 1 month frozen. To cut clean slices, remove from the 8×8 pan using overhanging parchment, let sit 10 minutes at room temp for easier slicing, then use a sharp, hot knife (dip in hot water, wipe dry). Aim for 1-1.5 inch squares—recipe makes 25-36 pieces. Avoid room temp storage over 2 hours to prevent melting. Pro tip: Serve on a platter with rainbow sprinkles for parties. Nutrition per piece: ~120 calories, 7g fat, 15g sugar. Links to vanilla fudge variations for more ideas. (114 words)

Rainbow Fudge Recipe
🌈 Colorful, layered fudge that’s as beautiful to look at as it is delicious to eat
🍫 Simple no-bake candy treat that’s perfect for parties, holidays, and special occasions
- Total Time: 1 hour 18 minutes
- Yield: 64 small squares 1x
Ingredients
3 cups white chocolate morsels Main sweet base for the fudge
14 ounces sweetened condensed milk Adds creaminess and sweetness
Food coloring (red, blue, yellow) For coloring the layers
Instructions
1-First Step: Setup and mise en place Line an 8 by 8 inch glass baking dish with aluminum foil. Make sure the foil overhangs two opposite sides so you can lift the finished block out easily. Measure and divide the white chocolate morsels and the sweetened condensed milk into six equal portions ahead of time. For each layer you will use 1/2 cup white chocolate morsels and 3 tablespoons plus 1 teaspoon sweetened condensed milk.
2-Second Step: Make the first layer Combine 1/2 cup white chocolate morsels and 3 tablespoons plus 1 teaspoon sweetened condensed milk in a small microwave-safe bowl. Microwave for 30 seconds, then stir until smooth. If it is not completely melted, microwave an additional 10-15 seconds and stir. Avoid overheating to prevent seizing. Add your chosen food coloring drops for the first color (for vibrant reds, you will need 16 drops; for other standard colors use 8 drops; see ingredient notes for purple and orange). Spoon and spread the colored mixture evenly into the prepared 8×8 dish. Use an offset spatula or the back of a spoon to smooth the surface. Chill in the refrigerator for 10 minutes to let the first layer firm up just enough to support the next layer without blending.
3-Third Step: Repeat for each layer Repeat the melting process for the next color: combine 1/2 cup white chocolate morsels with 3 tablespoons plus 1 teaspoon sweetened condensed milk in a small bowl, microwave 30 seconds, stir until silky, add the food coloring for the color you want, then spread evenly over the chilled layer. Chill 10 minutes before adding the next one. Continue this process for six layers total. Because each layer uses the same base, you can easily change the flavor of a specific layer by adding 1-2 teaspoons of extract (vanilla, almond, orange) or 1-2 tablespoons of powdered freeze-dried fruit. For color-safe flavor additions, prefer dry extracts and powders rather than fruit purees.
4-Fourth Step: Final chill and remove After the sixth layer is poured and smoothed, refrigerate the entire pan for at least 2-3 hours until fully set. When firm, lift the block out by the foil overhang and peel away the foil. Place on a cutting board and cut into squares with a sharp knife. For cleaner cuts, let the fudge sit at room temperature 5-10 minutes or dip the knife in hot water, wipe it dry, and slice.
5-Final Step: Serving and storing Arrange squares on a platter or pack into an airtight container. The recipe suggests storing at room temperature for up to two weeks, but for best texture and food safety in warm environments, refrigerate or keep in a cool spot.
Last Step:
Please leave a rating and comment letting us know how you liked this recipe! This helps our business to thrive and continue providing free, high-quality recipes for you.Notes
🌈 Prepare one layer at a time to avoid overheating and ensure clean color separation
🍫 Avoid overheating chocolate to prevent seizing – microwave in short intervals and stir thoroughly
⏰ Let each layer cool 10 minutes in fridge before adding the next layer for distinct layers
- Prep Time: 15 minutes
- Chilling time: 1 hour
- Cook Time: 3 minutes
- Category: Dessert
- Method: No-Bake
- Cuisine: American
- Diet: Vegetarian
Nutrition
- Serving Size: 1 square
- Calories: 120
- Sugar: 14 g
- Sodium: 35 mg
- Fat: 6 g
- Saturated Fat: 4 g
- Unsaturated Fat: 1.5 g
- Trans Fat: 0.5 g
- Carbohydrates: 15 g
- Fiber: 0.2 g
- Protein: 1 g
- Cholesterol: 5 mg


