

Why You’ll Love This Raspberry Thumbprint Cookies
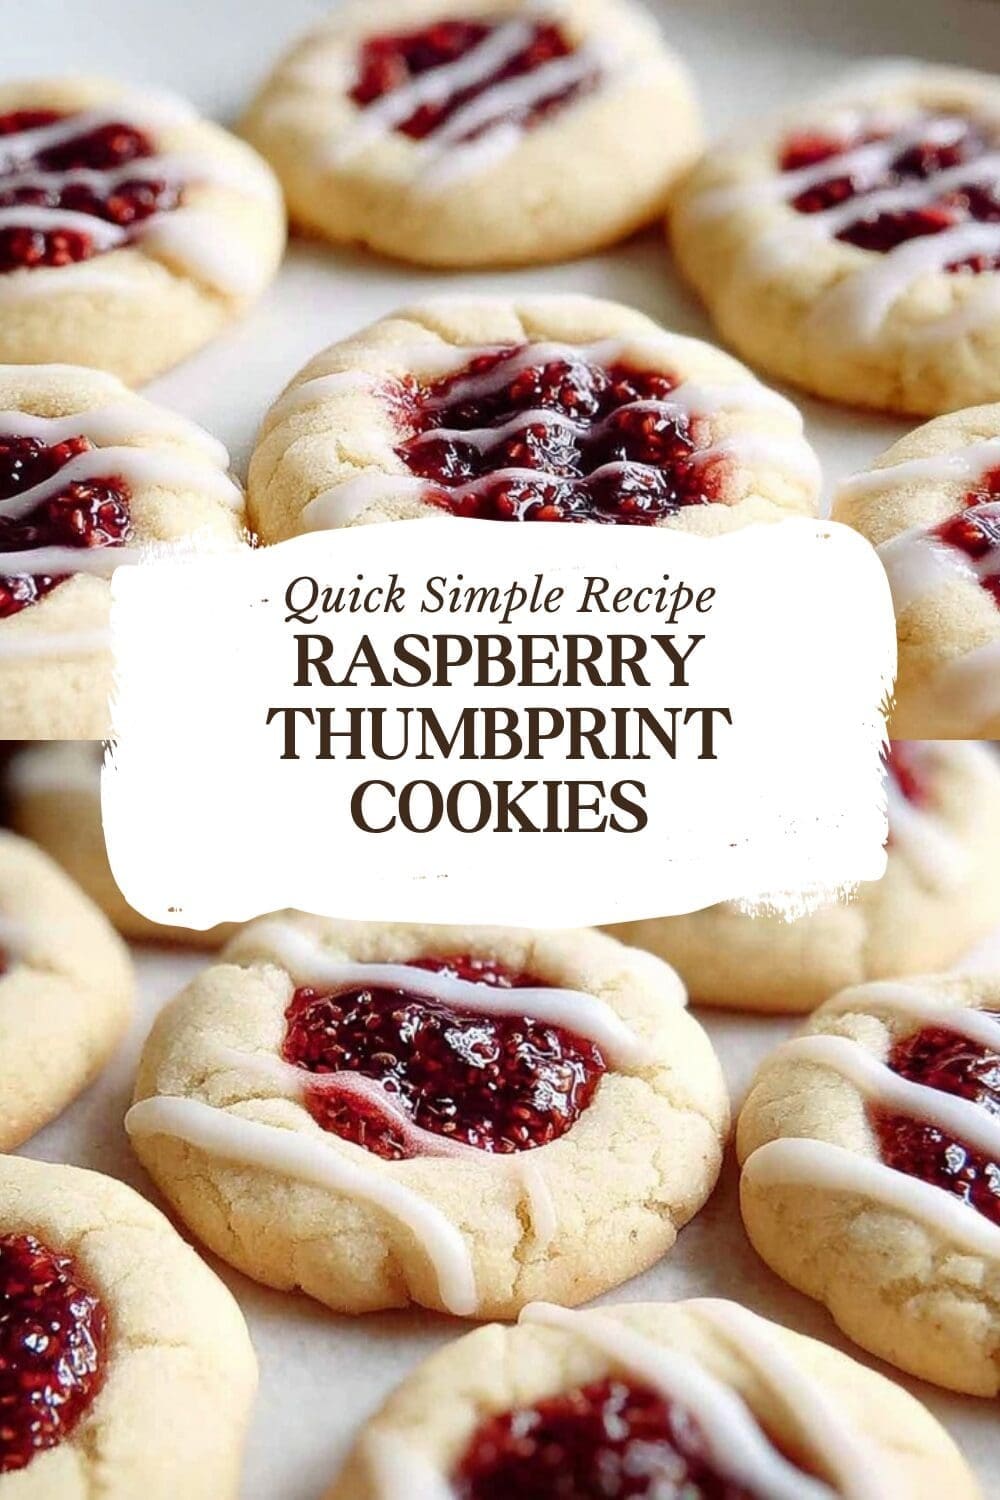
Raspberry Thumbprint Cookies are a classic, simple cookie that packs big flavor with very little fuss. If you love buttery shortbread textures paired with a bright pop of fruit, this recipe is for you. It uses everyday ingredients, takes about 25 minutes from start to finish, and makes a beautiful cookie that works for snacking, gifting, or holiday trays.
- Ease of preparation: This recipe is straightforward. With soft butter, a couple of egg yolks, and a bit of flour, you can mix the dough in one bowl and have cookies in the oven in under 15 minutes. The process is forgiving, which makes it great for beginners and busy home cooks.
- Health benefits: While these are indulgent treats, they can fit into a balanced diet. Raspberries or other fruit jams add a touch of natural fruit flavor, and the cookies are easy to portion so you can enjoy a sweet bite without overdoing it. See the Nutrition Facts table later for per-cookie details.
- Versatility: Swap jams, extracts, or even flours to suit dietary needs. The basic dough adapts well to gluten-free flours, vegan swaps, or lighter jam choices.
- Distinctive flavor: The contrast of tender, buttery dough with bright raspberry jam is what makes this cookie stand out. A hint of vanilla, almond extract, or lemon zest lifts the flavor even more.
Jump to:
- Why You’ll Love This Raspberry Thumbprint Cookies
- Essential Ingredients for Raspberry Thumbprint Cookies
- Special Dietary Options
- How to Prepare the Perfect Raspberry Thumbprint Cookies: Step-by-Step Guide
- First Step: Prep and mise en place
- Second Step: Cream the butter and sugar
- Third Step: Add the egg yolks and flavor
- Fourth Step: Mix in dry ingredients
- Fifth Step: Portion the dough
- Sixth Step: Create the thumbprint and fill
- Seventh Step: Bake
- Final Step: Cool and finish
- Dietary Substitutions to Customize Your Raspberry Thumbprint Cookies
- Protein and Main Component Alternatives
- Vegetable, Sauce, and Seasoning Modifications
- Mastering Raspberry Thumbprint Cookies: Advanced Tips and Variations
- Pro cooking techniques
- Flavor variations
- Presentation tips
- Make-ahead options
- How to Store Raspberry Thumbprint Cookies: Best Practices
- Refrigeration
- Freezing
- Reheating
- Meal prep considerations
- Nutrition Facts
- Tips and Tricks
- FAQs: Frequently Asked Questions About Raspberry Thumbprint Cookies
- How do you store raspberry thumbprint cookies?
- Can you freeze raspberry thumbprint cookie dough?
- Can you bake raspberry thumbprint cookies from frozen dough?
- What jam can you use in raspberry thumbprint cookies?
- What are raspberry thumbprint cookies also called?
- Raspberry Thumbprint Cookies
- Ingredients
- Instructions
- Last Step:
- Notes
- Nutrition
- Did you make this recipe?
Essential Ingredients for Raspberry Thumbprint Cookies
Below is the complete, structured ingredient list for this recipe. Each ingredient appears on its own line with the exact measurement first to make shopping and prep easy.
- 1 cup softened butter (2 sticks) – provides the rich, tender base and buttery flavor of the dough
- 2/3 cup white granulated sugar – sweetens and helps create a light crumb
- 2 egg yolks – add richness and help bind the dough while keeping cookies tender
- 1 teaspoon vanilla extract (1 tsp almond extract or lemon zest can be used as alternatives) – gives a warm aromatic note; alternate extracts change the cookie character
- 1/2 teaspoon salt (kosher salt recommended) – balances sweetness and boosts flavor
- 2 1/3 cups all-purpose flour – forms the structure and gives the shortbread-like texture
- 1/2 cup raspberry jam or any favorite jam flavor like apricot, strawberry, peach, or cranberry – fills the thumbprint and provides the bright fruit center
Special Dietary Options
- Vegan: Replace 1 cup softened butter with 1 cup plant-based butter and swap the 2 egg yolks for a vegan egg replacer (for example, 1/4 cup applesauce plus 1 tablespoon ground flaxseed mixed with 3 tablespoons water per egg yolk can work). Use a vegan-friendly jam.
- Gluten-free: Use a 1-to-1 gluten-free all-purpose flour blend in place of the 2 1/3 cups all-purpose flour. Add 1/4 teaspoon xanthan gum if your blend does not already include it to help with structure.
- Low-calorie: Reduce sugar slightly to 1/2 cup and look for a reduced-sugar or light jam for the centers. Note that altering sugar will change texture slightly, making cookies less tender.
How to Prepare the Perfect Raspberry Thumbprint Cookies: Step-by-Step Guide
This full walkthrough follows the classic method and adds timing and tips so you can get the best results. Read the whole section before you begin so you have everything ready.
First Step: Prep and mise en place
Preheat the oven to 350°F and line two baking sheets with parchment paper. Measure out all ingredients and bring the butter to room temperature so it blends smoothly with the sugar. Separate the eggs and reserve the whites for another use if you like; this recipe only calls for the yolks.
Second Step: Cream the butter and sugar
Using a stand mixer fitted with the paddle or a hand mixer, cream 1 cup softened butter (2 sticks) with 2/3 cup white granulated sugar. Beat on medium speed until the mixture is pale, light, and fluffy, about 2 to 3 minutes. Scrape the bowl once or twice to get an even texture.
Third Step: Add the egg yolks and flavor
Add the 2 egg yolks one at a time, beating briefly after each addition so they incorporate smoothly. Stir in 1 teaspoon vanilla extract (or swap with 1 tsp almond extract or a little lemon zest for a different profile). Mixing gently keeps the dough tender.
Fourth Step: Mix in dry ingredients
Gradually add 1/2 teaspoon salt (kosher salt recommended) and 2 1/3 cups all-purpose flour. Add the flour in two or three additions, mixing on low until just combined. Don’t overmix; stop when you see no streaks of flour. The dough will be soft but should hold its shape when scooped.
Fifth Step: Portion the dough
Using a small cookie scoop or a tablespoon, form the dough into even-sized balls. Place them about 2 inches apart on the prepared baking sheets to leave room for slight spreading. If the dough seems sticky, chill it for 10 minutes to make scooping easier.
Sixth Step: Create the thumbprint and fill
Press an indent in the center of each dough ball with your thumb, taking care not to press through to the bottom. The indent should be deep enough to hold jam but not so deep that the dough breaks. Spoon about 1 teaspoon of raspberry jam into each indentation. You can use other jams like apricot, strawberry, peach, or cranberry if you want variation.
Seventh Step: Bake
Bake in the preheated 350°F oven for 12 to 15 minutes, or until the bottoms are lightly browned. Watch closely in the last few minutes so the jam does not overbubble and the cookie edges do not darken. Rotate the sheets halfway if your oven bakes unevenly.
Final Step: Cool and finish
Remove the baking sheets from the oven and let the cookies cool on the sheets for 10 minutes. This short rest helps them set so the jam and dough don’t slide. Transfer cookies to a wire rack to cool completely. Store in an airtight container or serve at room temperature.
Tip: If you want a little sparkle, dust cooled cookies lightly with powdered sugar just before serving for a pretty finish.

Dietary Substitutions to Customize Your Raspberry Thumbprint Cookies
Protein and Main Component Alternatives
Although these cookies are not a high-protein recipe, there are simple ways to adjust the main components to match dietary needs while preserving texture.
- Vegan butter and egg replacers: Use plant-based butter sticks at a 1:1 ratio for the 1 cup softened butter. Replace 2 egg yolks with commercial vegan egg replacers or a flax-applesauce blend. Keep in mind that vegan fats can change mouthfeel slightly but will still produce a tender cookie.
- Gluten-free flours: Swap the 2 1/3 cups all-purpose flour with a 1:1 gluten-free blend. If your blend lacks binders, add 1/4 teaspoon xanthan gum to help cookies hold together. Almond flour alone will not give the same structure unless combined with a binder and more sugar.
- Lower fat options: For a lighter bite, reduce butter by 2 tablespoons and add 1 tablespoon plain Greek yogurt to maintain moisture. This changes flavor slightly but can reduce calories per cookie.
Vegetable, Sauce, and Seasoning Modifications
Changing flavor elements like extracts and jam lets you follow seasons or personal tastes.
- Jam swaps: Swap the 1/2 cup raspberry jam for apricot, strawberry, peach, or cranberry to match seasonal fruit and pairing needs. Seedless jams give smoother centers.
- Extracts and zest: Substitute 1 teaspoon vanilla extract with 1 tsp almond extract or add 1 teaspoon finely grated lemon zest for a citrus lift. A light almond extract makes the cookie taste slightly nutty and pairs well with apricot or peach jams.
- Spice additions: Try a pinch of cinnamon or cardamom for warm spice notes. Keep spices light so they don’t overpower the jam.
Mastering Raspberry Thumbprint Cookies: Advanced Tips and Variations
Use these techniques and flavor twists to take a reliable cookie into something special for gifts, parties, or bake sales.
Pro cooking techniques
- Chill for cleaner shapes: If you prefer perfectly round cookies, chill the scooped dough for 20 to 30 minutes before pressing the indent. Cold dough holds shape better and results in neater thumbprints.
- Uniform scooping: Use a small cookie scoop for even sizes. Even cookies bake uniformly, which keeps timing predictable.
- Prevent jam overflow: Spoon Jam into the indentation just before baking. Overfilling causes jam to spill onto the sheet. Use about 1 teaspoon per cookie; for smaller cookies, reduce to 1/2 teaspoon.
Flavor variations
- Nutty centers: After filling with jam, press a toasted almond sliver or a pistachio half on top for texture and visual appeal.
- Chocolate twist: Swap half the jam with a small dollop of chocolate ganache for a jam-ganache combo that is rich and satisfying.
- Filled with curd: Use lemon or orange curd instead of jam for a bright, tangy filling that pairs well with almond extract in the dough.
Presentation tips
- Arrange cookies in concentric circles on a platter and dust with powdered sugar for a festive look.
- Place each cookie in a paper muffin cup for gifting to keep jam from sticking and to make presentation tidy.
- Use small piping bags to fill indents neatly when serving to a crowd.
Make-ahead options
- Freeze scooped and indented dough balls on a sheet, then transfer to freezer bags for up to 3 months. When ready to bake, place frozen balls on a baking sheet, fill with jam, and bake adding a couple of minutes to the time.
- Bake ahead: Cookies store well at room temperature for up to one week in an airtight container. For longer storage, refrigerate or freeze baked cookies, layering with parchment to prevent sticking.
How to Store Raspberry Thumbprint Cookies: Best Practices
Proper storage keeps cookies tasting fresh and keeps jam centers intact. Below are reliable methods for short- and long-term storage plus reheating guidance.
Refrigeration
- Store cookies in an airtight container at room temperature for up to one week. If you live in a humid climate, refrigeration helps keep cookies crisp and prevents jam from softening the dough.
- Place parchment between layers to prevent jam from sticking or smearing. For gifting or travel, wrap cookies individually in parchment.
Freezing
- Freeze dough balls on a sheet until solid, then transfer to a freezer-safe bag and store for up to 3 months. Fill indents with jam right before baking from frozen.
- To freeze baked cookies, arrange them in a single layer on a baking sheet, freeze until solid, then stack with parchment between layers in a freezer container. Thaw at room temperature when needed.
Reheating
- To refresh refrigerated or frozen-baked cookies, warm in a 300°F oven for 5 to 8 minutes. This revives the texture without melting the jam too much. Watch carefully so jam does not bubble over.
- A quick 8 to 10 second zap in the microwave softens chilled cookies for immediate serving, but this can make them slightly softer than oven-warmed cookies.
Meal prep considerations
These cookies are ideal for batch baking. Freeze dough to bake on demand, or bake a large batch and freeze the baked cookies to pull out a few at a time. When packing lunches or snack boxes, keep jam-side up and separate layers with parchment paper.
Nutrition Facts
| Nutrient | Per Cookie |
|---|---|
| Calories | 190 kcal |
| Carbohydrates | 24 g |
| Protein | 2 g |
| Fat | 10 g |
| Saturated Fat | 6 g |
| Polyunsaturated Fat | 0.5 g |
| Monounsaturated Fat | 3 g |
| Trans Fat | 0.4 g |
| Cholesterol | 44 mg |
| Sodium | 135 mg |
| Potassium | 27 mg |
| Fiber | 0.5 g |
| Sugar | 11 g |
| Vitamin A | 310 IU |
| Vitamin C | 1 mg |
| Calcium | 9 mg |
| Iron | 1 mg |
Tips and Tricks
- Store cookies in an airtight container at room temperature for up to one week, or refrigerate for longer freshness.
- Freeze dough balls on a cookie sheet, thumbprint each, cover with plastic wrap and freeze until solid. Store in a freezer bag. When ready to bake, remove from freezer, place on a baking sheet, fill with jam and bake adding a few extra minutes.
- Substitutions for jam include apricot, strawberry, peach, or cranberry for seasonal variety.
- Use salted butter left at room temperature for softening; if using unsalted butter, add a pinch of salt.
- Egg whites saved from this recipe can be used for other recipes like meringues.
- Different extracts and lemon zest can be added to the dough for flavor variations.
FAQs: Frequently Asked Questions About Raspberry Thumbprint Cookies
How do you store raspberry thumbprint cookies?
Store raspberry thumbprint cookies in an airtight container at room temperature for up to one week. For longer freshness, place them in the refrigerator, where they will stay good for another week. Avoid stacking them directly to prevent the jam fillings from sticking or smearing. If you live in a humid climate, refrigeration is best to keep the cookies crisp and the raspberry jam from softening the dough. Always let them cool completely before storing to avoid condensation. For gifting or travel, wrap individually in parchment paper inside the container. This method keeps the buttery texture intact and the vibrant raspberry flavor fresh.
Can you freeze raspberry thumbprint cookie dough?
Yes, freezing raspberry thumbprint cookie dough is simple and convenient. Scoop the dough into 1-inch balls on a parchment-lined baking sheet, press your thumb gently into the center of each to create an indent, and freeze until solid, about 2 hours. Transfer the frozen balls to a freezer-safe Ziploc bag, removing excess air, and store for up to 3 months. When ready to bake, place directly on a baking sheet—no thawing needed. Fill the indents with raspberry jam, then bake at 350°F for 12-15 minutes, adding 1-2 extra minutes for the frozen dough. This preserves the fresh-baked taste without waste.
Can you bake raspberry thumbprint cookies from frozen dough?
Absolutely, baking raspberry thumbprint cookies straight from the freezer works perfectly. After freezing scooped dough balls with thumb indents as described, arrange them 2 inches apart on a lined baking sheet. Spoon 1/2 teaspoon of raspberry jam into each indent right before baking—no need to thaw. Bake in a preheated 350°F oven for 14-16 minutes until edges are lightly golden. The cookies will hold their shape, with the jam bubbling slightly. Cool on the sheet for 5 minutes, then transfer to a wire rack. This method saves time and ensures consistent results, ideal for holiday prep or spontaneous baking.
What jam can you use in raspberry thumbprint cookies?
While raspberry jam is classic for its tangy-sweet balance with the buttery dough, you can easily swap it for other flavors to suit your taste. Try strawberry for a brighter fruit note, apricot for a milder tartness, or cranberry for a festive tart kick. Use seedless jams to avoid texture issues, and about 1/2 teaspoon per cookie. For a homemade twist, mix jam with a bit of lemon zest. Always fill indents just before baking to prevent overflow. Experimenting keeps the cookies versatile for different seasons—strawberry in summer, cranberry at holidays—while maintaining the signature thumbprint look and soft center.
What are raspberry thumbprint cookies also called?
Raspberry thumbprint cookies go by several names depending on the region or variation. They’re commonly known as butterballs for their rich, buttery dough, or jam drops due to the jam-filled centers. In Sweden, they’re called “hallongrotta,” meaning “raspberry cave,” reflecting the indented, jam-filled hollow. These aliases highlight their global appeal and simple, customizable nature. No matter the name, the recipe stays the same: shortbread-like dough baked with fruit preserves. Search for these terms to find similar recipes, but raspberry filling gives them a distinct, vibrant flavor that pairs perfectly with the cookie’s crumbly texture.

Raspberry Thumbprint Cookies
🍪 Beautiful buttery cookies with a sweet raspberry center that melt in your mouth
🎨 Perfect for holidays and special occasions, these impressive cookies look as good as they taste
- Total Time: 25 minutes
- Yield: About 36 cookies 1x
Ingredients
1 cup softened butter provides the rich, tender base and buttery flavor of the dough
2/3 cup white granulated sugar sweetens and helps create a light crumb
2 egg yolks add richness and help bind the dough while keeping cookies tender
1 teaspoon vanilla extract gives a warm aromatic note; alternate extracts change the cookie character
1/2 teaspoon salt balances sweetness and boosts flavor
2 1/3 cups all-purpose flour forms the structure and gives the shortbread-like texture
1/2 cup raspberry jam or any favorite jam flavor like apricot, strawberry, peach, or cranberry fills the thumbprint and provides the bright fruit center
Instructions
1-First Step: Prep and mise en place Preheat the oven to 350°F and line two baking sheets with parchment paper. Measure out all ingredients and bring the butter to room temperature so it blends smoothly with the sugar. Separate the eggs and reserve the whites for another use if you like; this recipe only calls for the yolks.
2-Second Step: Cream the butter and sugar Using a stand mixer fitted with the paddle or a hand mixer, cream 1 cup softened butter (2 sticks) with 2/3 cup white granulated sugar. Beat on medium speed until the mixture is pale, light, and fluffy, about 2 to 3 minutes. Scrape the bowl once or twice to get an even texture.
3-Third Step: Add the egg yolks and flavor Add the 2 egg yolks one at a time, beating briefly after each addition so they incorporate smoothly. Stir in 1 teaspoon vanilla extract (or swap with 1 tsp almond extract or a little lemon zest for a different profile). Mixing gently keeps the dough tender.
4-Fourth Step: Mix in dry ingredients Gradually add 1/2 teaspoon salt (kosher salt recommended) and 2 1/3 cups all-purpose flour. Add the flour in two or three additions, mixing on low until just combined. Don’t overmix; stop when you see no streaks of flour. The dough will be soft but should hold its shape when scooped.
5-Fifth Step: Portion the dough Using a small cookie scoop or a tablespoon, form the dough into even-sized balls. Place them about 2 inches apart on the prepared baking sheets to leave room for slight spreading. If the dough seems sticky, chill it for 10 minutes to make scooping easier.
6-Sixth Step: Create the thumbprint and fill Press an indent in the center of each dough ball with your thumb, taking care not to press through to the bottom. The indent should be deep enough to hold jam but not so deep that the dough breaks. Spoon about 1 teaspoon of raspberry jam into each indentation. You can use other jams like apricot, strawberry, peach, or cranberry if you want variation.
7-Seventh Step: Bake Bake in the preheated 350°F oven for 12 to 15 minutes, or until the bottoms are lightly browned. Watch closely in the last few minutes so the jam does not overbubble and the cookie edges do not darken. Rotate the sheets halfway if your oven bakes unevenly.
8-Final Step: Cool and finish Remove the baking sheets from the oven and let the cookies cool on the sheets for 10 minutes. This short rest helps them set so the jam and dough don’t slide. Transfer cookies to a wire rack to cool completely. Store in an airtight container or serve at room temperature.
Last Step:
Please leave a rating and comment letting us know how you liked this recipe! This helps our business to thrive and continue providing free, high-quality recipes for you.Notes
🍯 Use room temperature butter and eggs for a smoother dough that holds its shape better during baking
🍓 Don’t overfill the thumbprints with jam – too much can cause the cookies to spread and become soggy
❄️ Chill the dough for 30 minutes before baking if your kitchen is warm to help cookies maintain their shape
- Prep Time: 10 minutes
- Cook Time: 15 minutes
- Category: Dessert
- Method: Baking
- Cuisine: American
- Diet: Vegetarian
Nutrition
- Serving Size: 1 cookie
- Calories: 190
- Sugar: 11 g
- Sodium: 135 mg
- Fat: 10 g
- Saturated Fat: 6 g
- Unsaturated Fat: 3.5 g
- Trans Fat: 0.4 g
- Carbohydrates: 24 g
- Fiber: 0.5 g
- Protein: 2 g
- Cholesterol: 44 mg


