

Why You’ll Love This refrigerator pickles
Refrigerator pickles are becoming a staple in home kitchens for several compelling reasons. These quick and easy pickles deliver exceptional flavor without the complexity of traditional canning methods. Here’s why you’ll fall in love with this simple yet satisfying recipe:
- Ease of preparation: Making refrigerator pickles requires minimal effort and no special canning equipment. With just 15 minutes of active prep time and zero cooking, you can create delicious pickles that will impress your family and friends. The straightforward process involves creating a simple brine, fresh cucumbers, and aromatic seasonings perfect for busy weeknights or when you want a quick culinary project.
- Health benefits: These refrigerator pickles offer numerous wellness advantages. Cucumbers provide hydration and essential nutrients, while the fermentation-friendly environment can support gut health. Additionally, by making your own pickles, you control the sodium and sugar content, allowing for a healthier alternative to store-bought versions. The raw garlic and fresh dill also contribute antioxidant properties, making this recipe as nourishing as it is delicious.
- Versatility: This refrigerator pickle recipe naturally accommodates various dietary preferences. It’s inherently vegan and gluten-free, making it suitable for diverse eating plans. You can easily adjust the ingredients to align with specific dietary needs reduce sugar for low-sugar diets, increase or decrease salt content, or experiment with different vegetables to match your nutritional goals.
- Distinctive flavor: Unlike store-bought pickles often loaded with preservatives and artificial flavors, homemade refrigerator pickles offer a fresh, vibrant taste that truly stands out. The combination of crisp Kirby cucumbers, aromatic dill, pungent garlic, and carefully balanced brine creates a complex flavor profile that brightens up any meal. These pickles deliver the perfect balance of sour, salty, and slightly sweet notes with subtle spiciness from the red pepper flakes.
With refrigerator pickles, you get all the satisfaction of homemade preserves without the hassle of traditional canning. It’s a simple way to preserve the bounty of summer cucumbers while adding a flavorful punch to sandwiches, burgers, salads, and snacks year-round.
Jump to:
- Why You’ll Love This refrigerator pickles
- Essential Ingredients for refrigerator pickles
- Main Ingredients:
- Special Dietary Options:
- How to Prepare the Perfect refrigerator pickles: Step-by-Step Guide
- First Step: Prepare the Brine
- Second Step: Prepare the Pickling Jars
- Third Step: Pack the Jars with Ingredients
- Fourth Step: Add the Brine and Seal
- Final Step: Refrigerate and Wait
- Dietary Substitutions to Customize Your refrigerator pickles
- Cucumber Varieties
- Salt Options
- Herb and Seasoning Variations
- Mastering refrigerator pickles: Advanced Tips and Variations
- Pro Cooking Techniques
- Flavor Variations
- Presentation Tips
- Make-Ahead Options
- How to Store refrigerator pickles: Best Practices
- Refrigeration
- Handling and Serving
- Meal Prep Considerations
- FAQs: Frequently Asked Questions About refrigerator pickles
- Can refrigerator pickles be canned for long-term storage?
- How should I store refrigerator pickles to keep them fresh?
- Can I reuse the pickle brine for another batch?
- How long do refrigerator pickles typically last?
- What types of cucumbers work best for making refrigerator pickles?
- refrigerator pickles
- Ingredients
- Instructions
- Last Step:
- Notes
- Nutrition
- Did you make this recipe?
Essential Ingredients for refrigerator pickles
Creating delicious refrigerator pickles requires just a few simple ingredients that come together beautifully. Here’s everything you’ll need:
Main Ingredients:
- 1¼ cups distilled white vinegar (5% acidity) – Provides the acidic foundation for the brine, preserving the cucumbers while giving them their characteristic tang
- 3 tablespoons kosher salt – Essential for flavor and preservation; kosher salt dissolves easily and lacks the additives found in table salt
- 2 tablespoons sugar – Balances the acidity of the vinegar and enhances the overall flavor profile
- 2 cups cold water – Dilutes the brine to the perfect strength and helps crisp the cucumbers
- 1¾ to 2 pounds Kirby cucumbers (about 6), cut into halves or spears – The ideal variety for pickling due to their firm texture and thin skin
- 2 tablespoons coriander seeds – Adds a subtle citrus and floral note that complements the other spices
- 6 large garlic cloves (peeled and halved) – Imparts a distinct pungent flavor that develops during refrigeration
- 1 teaspoon mustard seeds – Contributes a mild heat and tanginess to the pickle profile
- ¼ teaspoon red pepper flakes – Provides a gentle heat that balances bright flavors of the brine
- 16 dill sprigs – Gives the pickles their classic flavor and aroma
- Optional: Dried dill can substitute for fresh dill sprigs if fresh isn’t available
Special Dietary Options:
- Vegan: All ingredients in this refrigerator pickle recipe are naturally plant-based, making it perfect for vegan diets. Discover more vegan no-cook recipes on our site.
- Gluten-free: This recipe contains no gluten-containing ingredients, making it safe for those with gluten sensitivities or celiac disease.
- Low-calorie: With only 2 tablespoons of sugar divided across multiple servings, these refrigerator pickles are a low-calorie way to add flavor to meals without compromising your dietary goals.
tip: The quality of your cucumbers will directly impact the final texture of your refrigerator pickles. For best results, choose firm, fresh Kirby cucumbers with no soft spots. They should feel heavy for their size and have bright green skin.
How to Prepare the Perfect refrigerator pickles: Step-by-Step Guide
Making crisp and flavorful refrigerator pickles is surprisingly simple when you follow these detailed steps. With just a little preparation and patience, you’ll be enjoying homemade pickles that rival any store-bought version.
First Step: Prepare the Brine
Begin by combining 1¼ cups distilled white vinegar, 3 tablespoons of kosher salt, and 2 tablespoons of sugar in a non-reactive saucepan. Non-reactive means using a pan made of stainless steel, glass, ceramic, or Teflon-coated material to prevent any metallic flavors from transferring to your brine. Place the saucepan over high heat and whisk continuously until the salt and sugar have completely dissolved. This typically takes just 2-3 minutes.
Once dissolved, carefully transfer the hot liquid to a heatproof bowl. Gradually whisk in 2 cups of cold water. The addition of cold water helps bring the brine to the right temperature more quickly. Place the bowl in the refrigerator to chill the brine while you prepare your cucumbers and spices. Chilling the brine before using it will help ensure your pickles stay crisp and fresh-tasting.
Second Step: Prepare the Pickling Jars
While the brine chills, thoroughly wash two 1-quart glass jars with hot, soapy water and rinse well. Ensuring your jars are completely clean is crucial for safe pickling. You can also sterilize them by pouring boiling water into the jars and letting them sit for a minute before emptying and drying.
Next, prepare your cucumbers. Wash and dry 1¾ to 2 pounds of Kirby cucumbers (about 6 medium cucumbers) thoroughly. Trim off the ends and cut them into halves or spears, depending on your preference. The key is cutting them to a size that will fit easily into your jars and allow the brine to penetrate all surfaces.
Third Step: Pack the Jars with Ingredients
Take your clean, dry jars and begin packing them with the cucumber spears or halves. Pack them tightly but without crushing them. The cucumbers should fit snuggly in the jars, which will help them stay submerged in the brine later.
Evenly distribute the flavorings between the two jars: 2 tablespoons of coriander seeds, 6 large garlic cloves (peeled and halved), 1 teaspoon of mustard seeds, ¼ teaspoon of red pepper flakes, and 16 dill sprigs (about 8 per jar).
Try to layer some of these seasonings between the cucumbers as well as on top to ensure the flavors distribute evenly throughout the pickles.
Here’s a helpful table to visualize the distribution of ingredients:
| Ingredient | Total Amount> | Per Jar (Approximate) |
|---|---|---|
| Kirby cucumbers | 1¾ to 2 pounds | ¾ to 1 pound |
| Coriander seeds | 2 tablespoons | 1 tablespoon |
| Garlic cloves (halved) | 6 cloves | 3 cloves |
| Mustard seeds | 1 teaspoon | ½ teaspoon |
| Red pepper flakes | ¼ teaspoon | ⅛ teaspoon |
| Dill sprigs | 16 sprigs | 8 sprigs |
Fourth Step: Add the Brine and Seal
Once your brine has chilled and your jars are packed with cucumbers and seasonings, carefully pour the chilled brine over the cucumbers, filling each jar to the top. If necessary, add extra cold water to ensure the cucumbers are completely submerged in the liquid. This step is crucial as any exposed parts of the cucumbers won’t pickle properly and may spoil.
Use a clean spoon or your (clean) fingers to gently press down on the cucumbers, releasing any air bubbles and ensuring they remain submerged beneath the brine. You might notice the cucumbers floating to the top, which is normal. Simply press them down again before sealing.
Final Step: Refrigerate and Wait
Seal the jars securely with their lids. Give each jar a gentle shake to distribute the seasonings throughout the brine. Place the jars in the refrigerator and let them sit for at least 24 hours before serving. While you can taste your refrigerator pickles after just a few hours, they won’t have developed their full flavor potential yet.
The magic happens during this refrigeration period as the cucumbers gradually absorb the flavors of the brine and spices. After 24 hours, you’ll have crisp, tangy refrigerator pickles with a perfect balance of sour, salty, and herbal notes. The pickles will continue to develop flavor over the next few days, reaching their peak around day 3-5.
Remember that refrigerator pickles continue to maintain their quality for up to one month when stored properly in the refrigerator. Always use clean utensils when serving to prevent contamination and ensure they remain fresh for as long as possible.

Dietary Substitutions to Customize Your refrigerator pickles
One of the greatest benefits of making your own refrigerator pickles is the ability to customize them to suit your taste preferences and dietary needs. Here are some simple substitutions and variations you can try:
Cucumber Varieties
While Kirby or pickling cucumbers are ideal for maximum crispness, you can experiment with other varieties:
- Persian cucumbers make an excellent substitute and will yield similarly crisp results
- English cucumbers can be used if that’s what you have available, though they might be slightly less firm than Kirby cucumbers
- Avoid standard slicing cucumbers when possible, as their higher water content often results in soggy pickles
Salt Options
The type of salt you use significantly impacts the final flavor and texture of your refrigerator pickles:
- Kosher salt is recommended for its pure flavor and easy dissolving properties
- Fine sea salt is a great alternative with similar results to kosher salt
- Coarse sea salt can be used, but you may need to adjust the quantity slightly as it has less salt per volume
- Avoid iodized table salt, which can make the brine cloudy and impart a metallic taste
Herb and Seasoning Variations
Don’t be afraid to get creative with your seasonings:
- If fresh dill isn’t available, dried dill can be used as a substitute (use about 1 tablespoon of dried dill per jar)
- Try adding other herbs like basil, chives, or thyme for different flavor profiles
- Experiment with additional spices such as celery seed, black peppercorns, or bay leaves
- For spicy refrigerator pickles, add sliced jalapeño, serrano, or Thai chiles to the jars
- To create sweet pickles, increase the sugar to ¼ cup or add a natural sweetener like agave nectar, and consider adding thinly sliced sweet onion for a bread-and-butter style pickle
Remember to keep track of your favorite variations! I like to use masking tape on the jar to note the ingredients and date I made each batch. This helps me remember which combinations work best for next time.
These simple substitutions allow you to make refrigerator pickles that perfectly match your dietary needs and flavor preferences while still maintaining the simple, no-cook approach that makes this recipe so appealing.
Mastering refrigerator pickles: Advanced Tips and Variations
Once you’ve mastered the basic refrigerator pickle recipe, you can elevate your pickling game with these advanced techniques and creative variations that will take your homemade pickles to the next level.
Pro Cooking Techniques
The quality of your cookware significantly impacts the final taste of your refrigerator pickles. Always use non-reactive containers for preparing and storing your pickles. Reactive materials like aluminum or uncoated cast iron can impart metallic flavors and discolor your brine. Glass, stainless steel, ceramic, or food-grade plastic containers are ideal choices.
For extra-crisp refrigerator pickles, try this restaurant technique: soak your cucumber spears in ice water for 1-2 hours before pickling. This helps firm up the cucumbers by plumping their cells with water, resulting in a crunchier final texture. Pat them completely dry before adding to jars to avoid diluting your brine.
Flavor Variations
Beyond the basic seasoning, here are some exciting flavor combinations to try:
- Bread and Butter Style: Increase sugar to ¼ cup, add 1 sliced sweet onion and ½ teaspoon turmeric to each jar
- Spicy Garlic Dill: Double the garlic and red pepper flakes, and add 1 teaspoon of crushed red pepper to each jar
- Asian-inspired: Replace dill with cilantro and sesame seeds; add 1 tablespoon of rice vinegar and 1 teaspoon of tamari to the brine
- Mediterranean Style: Add Kalamata olives, sun-dried tomatoes, and oregano to the jars along with the cucumbers
- Indian-spiced: Include mustard seeds, cumin seeds, fenugreek seeds, and a pinch of turmeric in each jar
Presentation Tips
Beautiful refrigerator pickles make excellent gifts. Choose jars with attractive shapes and add personalized labels with the date and flavor variety. For a special touch, tie a small sprig of fresh dill or other herbs to the jar with twine or ribbon. Layering colorful ingredients like red pepper flakes, mustard seeds, and fresh herbs creates an appealing visual effect through the glass.
Make-Ahead Options
Refrigerator pickles are perfect for meal prep, but you can extend their versatility even further. Consider making “pickle kits” as gifts: layer the dry spices in the bottom of a decorative jar, include sealed bags of the brine ingredients, and attach a recipe card with instructions. When ready to use, simply add fresh cucumbers and the prepared brine.
For parties or gatherings, prepare your refrigerator pickles 3-5 days in advance to allow the flavors to fully develop. You can also create a pickle bar with multiple varieties using these flavor variations, offering guests different options to complement their meals.
The brine can be reused to make additional batches before discarding. Simply strain and refrigerate the used brine, then freshen it with 25% new vinegar, salt, and sugar when making your next batch of refrigerator pickles.
How to Store refrigerator pickles: Best Practices
Proper storage is essential for maintaining the quality, flavor, and safety of your homemade refrigerator pickles. Follow these guidelines to ensure your pickles stay delicious and safe to eat for as long as possible.
Refrigeration
Refrigerator pickles must be stored in the refrigerator at all times, even before opening. The cold temperature slows bacterial growth and helps preserve the crispness of the cucumbers. Keep your pickles in clean, airtight glass jars with secure lids to prevent contamination and maintain proper sealing. Always place your jars in the main body of the refrigerator rather than the door, where temperatures fluctuate more significantly.
For optimal food safety and quality, consume your refrigerator pickles within one month of preparation. While some home cooks report success storing them for up to 2-3 weeks longer, the flavor and texture will gradually decline over time, and the risk of spoilage increases.
Handling and Serving
Always use clean utensils when removing pickles from the jar. Introducing bacteria from dirty forks or fingers can significantly reduce shelf life and potentially lead to food safety issues. Never return leftover pickles to the jar once they’ve been on a serving plate, as this can introduce contaminants.
If you notice any signs of spoilage such as fizzing, cloudiness, mold, or off odors, discard the entire batch immediately. When in doubt, it’s always safer to throw out questionable pickles than risk foodborne illness.
Meal Prep Considerations
Refrigerator pickles are excellent for meal prep due to their extended refrigerator life and versatility. Consider making larger batches during your weekly meal prep to have on hand for quick additions to lunches and dinners throughout the week. They pair particularly well with sandwiches, salads, grain bowls, and charcuterie boards. Check out our meal prep solutions for more ideas.
For optimal meal planning, prepare multiple jars with different flavor variations to keep your meals interesting and exciting. Remember to rotate your pickle supply, using older batches first and tracking preparation dates with labels on each jar.
These simple storage practices will help you enjoy your homemade refrigerator pickles at their best quality while ensuring they remain safe to eat throughout their refrigerated lifespan.
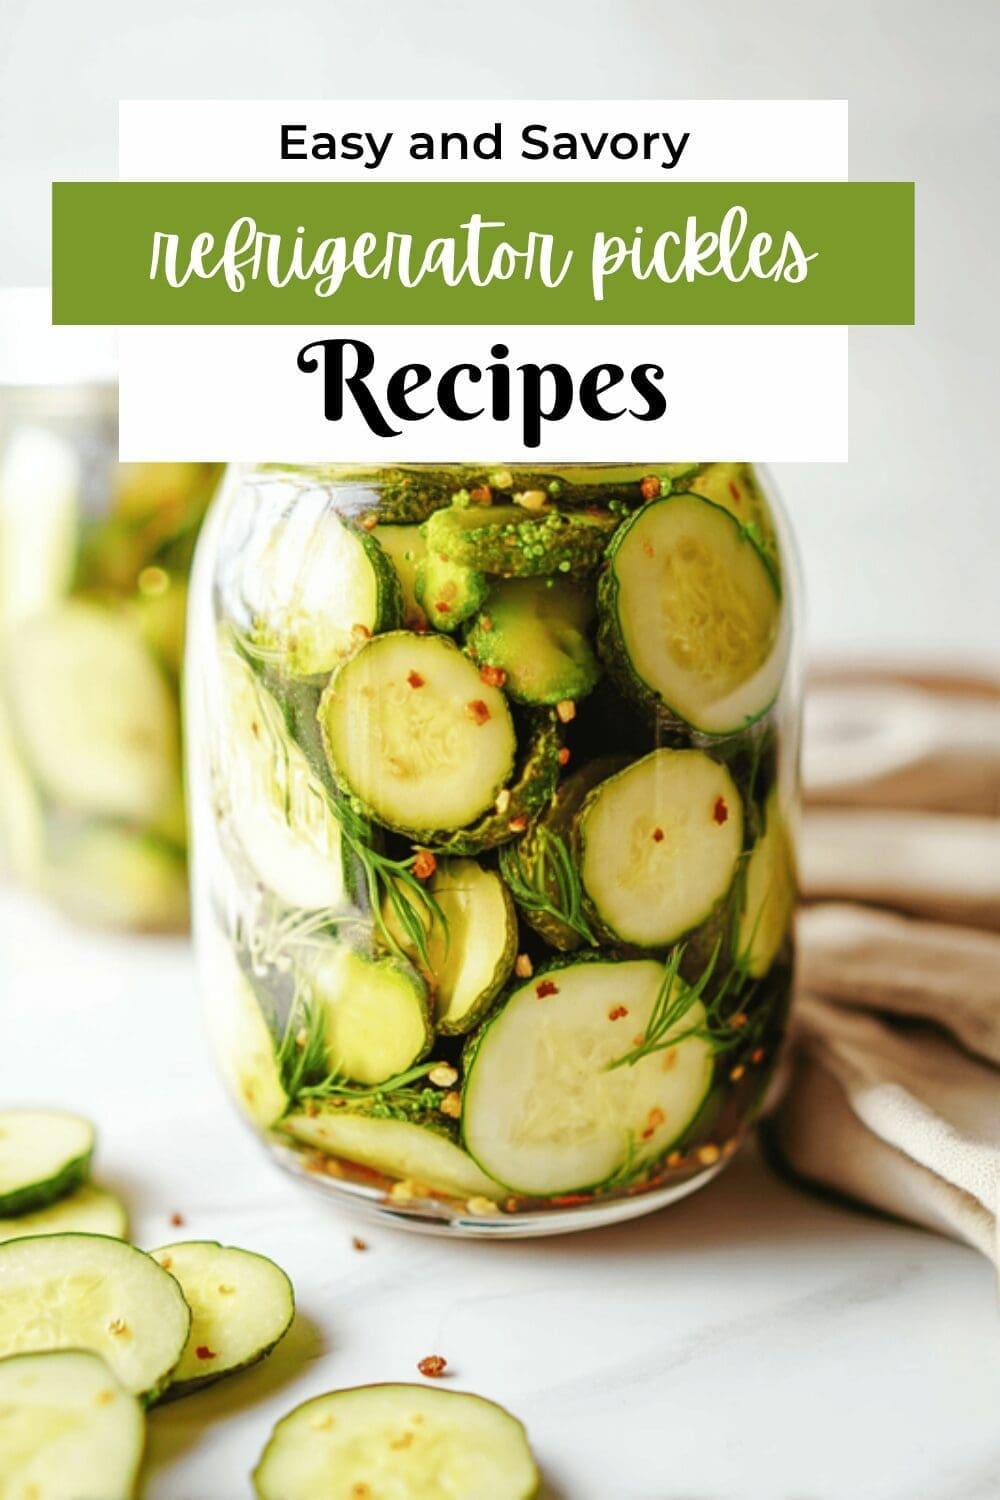
FAQs: Frequently Asked Questions About refrigerator pickles
Can refrigerator pickles be canned for long-term storage?
No, refrigerator pickles are specifically made for short-term storage and are not suitable for canning. They are not processed in a hot water bath or pressure canner, so they must be kept in the refrigerator and consumed within a few weeks to maintain safety and quality.
How should I store refrigerator pickles to keep them fresh?
Store refrigerator pickles in a clean, airtight jar in the refrigerator. Keeping them chilled slows bacterial growth and helps preserve their crispness and flavor. Always use clean utensils to remove pickles to avoid contamination.
Can I reuse the pickle brine for another batch?
It’s safest to use fresh brine for each batch of refrigerator pickles. Reusing brine can introduce bacteria and alter the taste and texture of your pickles, potentially causing spoilage or unsafe food.
How long do refrigerator pickles typically last?
For best quality and safety, consume refrigerator pickles within 1 to 2 weeks. While some keep them up to 3 weeks, it’s important to watch for any off smells, changes in texture, or mold, and always use clean utensils when serving.
What types of cucumbers work best for making refrigerator pickles?
Firm, small to medium-sized pickling cucumbers are ideal for refrigerator pickles because they stay crisp and absorb flavors well. Avoid cucumbers that are overly large or have soft spots, as these can result in soggy or less flavorful pickles.

refrigerator pickles
🥒 Crisp, refreshing homemade pickles with perfect balance of tang and spice that elevate any dish
🍸 Light and guilt-free skinny margaritas provide the perfect zesty complement without heavy calories
- Total Time: 24 hours 15 minutes
- Yield: 2 quarts pickles + 2 margaritas
Ingredients
– 1¼ cups distilled white vinegar Provides the acidic foundation for the brine
– 3 tablespoons kosher salt Essential for flavor and preservation
– 2 tablespoons sugar Balances the acidity of the vinegar
– 2 cups cold water Dilutes the brine to the perfect strength
– 1¾ to 2 pounds Kirby cucumbers The ideal variety for pickling
– 2 tablespoons coriander seeds Adds a subtle citrus and floral note
– 6 large garlic cloves Imparts a distinct pungent flavor
– 1 teaspoon mustard seeds Contributes a mild heat and tanginess
– ¼ teaspoon red pepper flakes Provides a gentle heat
– 16 dill sprigs Gives the pickles their classic flavor
– Dried dill substitute for fresh dill sprigs
Instructions
1-First Step: Prepare the Brine Begin by combining 1¼ cups distilled white vinegar, 3 tablespoons of kosher salt, and 2 tablespoons of sugar in a non-reactive saucepan. Non-reactive means using a pan made of stainless steel, glass, ceramic, or Teflon-coated material to prevent any metallic flavors from transferring to your brine. Place the saucepan over high heat and whisk continuously until the salt and sugar have completely dissolved. This typically takes just 2-3 minutes. Once dissolved, carefully transfer the hot liquid to a heatproof bowl. Gradually whisk in 2 cups of cold water. The addition of cold water helps bring the brine to the right temperature more quickly. Place the bowl in the refrigerator to chill the brine while you prepare your cucumbers and spices. Chilling the brine before using it will help ensure your pickles stay crisp and fresh-tasting.
2-Second Step: Prepare the Pickling Jars While the brine chills, thoroughly wash two 1-quart glass jars with hot, soapy water and rinse well. Ensuring your jars are completely clean is crucial for safe pickling. You can also sterilize them by pouring boiling water into the jars and letting them sit for a minute before emptying and drying. Next, prepare your cucumbers. Wash and dry 1¾ to 2 pounds of Kirby cucumbers (about 6 medium cucumbers) thoroughly. Trim off the ends and cut them into halves or spears, depending on your preference. The key is cutting them to a size that will fit easily into your jars and allow the brine to penetrate all surfaces.
3-Third Step: Pack the Jars with Ingredients Take your clean, dry jars and begin packing them with the cucumber spears or halves. Pack them tightly but without crushing them. The cucumbers should fit snuggly in the jars, which will help them stay submerged in the brine later. Evenly distribute the flavorings between the two jars: 2 tablespoons of coriander seeds, 6 large garlic cloves (peeled and halved), 1 teaspoon of mustard seeds, ¼ teaspoon of red pepper flakes, and 16 dill sprigs (about 8 per jar). Try to layer some of these seasonings between the cucumbers as well as on top to ensure the flavors distribute evenly throughout the pickles.
4-Fourth Step: Add the Brine and Seal Once your brine has chilled and your jars are packed with cucumbers and seasonings, carefully pour the chilled brine over the cucumbers, filling each jar to the top. If necessary, add extra cold water to ensure the cucumbers are completely submerged in the liquid. This step is crucial as any exposed parts of the cucumbers won’t pickle properly and may spoil. Use a clean spoon or your (clean) fingers to gently press down on the cucumbers, releasing any air bubbles and ensuring they remain submerged beneath the brine. You might notice the cucumbers floating to the top, which is normal. Simply press them down again before sealing.
5-Final Step: Refrigerate and Wait Seal the jars securely with their lids. Give each jar a gentle shake to distribute the seasonings throughout the brine. Place the jars in the refrigerator and let them sit for at least 24 hours before serving. While you can taste your refrigerator pickles after just a few hours, they won’t have developed their full flavor potential yet. The magic happens during this refrigeration period as the cucumbers gradually absorb the flavors of the brine and spices. After 24 hours, you’ll have crisp, tangy refrigerator pickles with a perfect balance of sour, salty, and herbal notes. The pickles will continue to develop flavor over the next few days, reaching their peak around day 3-5. Remember that refrigerator pickles continue to maintain their quality for up to one month when stored properly in the refrigerator. Always use clean utensils when serving to prevent contamination and ensure they remain fresh for as long as possible.
Last Step:
Please leave a rating and comment letting us know how you liked this recipe! This helps our business to thrive and continue providing free, high-quality recipes for you.Notes
🥒 Use only Kirby or pickling cucumbers for maximum crispness – slicing cucumbers will result in soggy pickles
🍸 Always use freshly squeezed lime juice for the best flavor in your margaritas – bottled juice doesn’t compare
🧊 For extra-crisp pickles, soak the cucumbers in ice water for 30 minutes before pickling to remove excess moisture
- Prep Time: 15 minutes
- Refrigeration time: 24 hours
- Category: Appetizers
- Method: Refrigerator Pickling
- Cuisine: American
- Diet: Low Calorie
Nutrition
- Serving Size: 1 serving pickles + 1 margarita
- Calories: 145
- Sugar: 12
- Sodium: 890
- Fat: 0
- Saturated Fat: 0
- Unsaturated Fat: 0
- Trans Fat: 0
- Carbohydrates: 15
- Fiber: 1
- Protein: 1
- Cholesterol: 0


