

Why You’ll Love This Salad Dressing
Making your own salad dressing at home completely transforms your meals while saving you money and reducing pantry clutter. Here’s why this simple vinaigrette recipe will become your new kitchen staple: * Ease of preparation: This homemade salad dressing comes together in just 2-5 minutes with basic ingredients you likely already have in your pantry. No special equipment needed just a bowl and whisk or a simple jar with a lid for shaking. It’s faster than making a cup of coffee! * Health benefits: Unlike many store-bought dressings loaded with preservatives, added sugars, and unhealthy fats, this healthy salad dressing recipe contains only wholesome ingredients. You control exactly what goes into it, making it perfect for those watching their sodium intake or avoiding processed additives. With just 94 calories per serving, it also fits well into most weight management plans. * Versatility: This salad dressing recipe serves as a fantastic base that can be adapted to countless flavor profiles and dietary needs. Whether you prefer Italian dressing, want to experiment with ranch dressing variations, or need a caesar dressing alternative, this simple formula can be customized to your preferences. It works beautifully with vegan, gluten-free, and low-calorie modifications. * Distinctive flavor: The bright, fresh taste of homemade dressing simply can’t compare to bottled versions. The emulsification of quality olive oil with acidic components creates a silky texture that clings perfectly to greens. The balance of tangy, savory, and herbal notes makes every salad bite more satisfying and delicious. This homemade dressing isn’t just delicious it’s also nutritionally superior to many store-bought alternatives. Here’s the nutritional breakdown:| Nutrient> | Amount Per Serving |
|---|---|
| Calories | 94 |
| Carbohydrates | 1g |
| Protein | 1g |
| Fat | 11g |
| Saturated Fat | 1g |
| Sodium | 160mg |
| Sugar | 1g |
| Iron | 1mg |
One of the greatest advantages of making your own salad dressing is complete control over ingredients. You can adjust everything from the salt content to the oil type based on your health goals and taste preferences.For more healthy no-cook meal ideas, check out our refreshing summer salad recipes that pair perfectly with this dressing.
Jump to:
- Why You’ll Love This Salad Dressing
- Essential Ingredients for Salad Dressing
- Main Ingredients:
- Optional Additions:
- Special Dietary Options:
- How to Prepare the Perfect Salad Dressing: Step-by-Step Guide
- First Step: Gather Your Ingredients and Tools
- Second Step: Combine the Base Ingredients
- Third Step: Whisk or Shake the Seasoning Base
- Fourth Step: Add the Oil and Emulsify
- Final Step: Taste, Adjust, and Use
- Dietary Substitutions to Customize Your Salad Dressing
- Protein and Main Component Alternatives
- Vegetable, Sauce, and Seasoning Modifications
- Mastering Salad Dressing: Advanced Tips and Variations
- Pro Cooking Techniques
- Flavor Variations
- Presentation Tips
- Make-Ahead Options
- How to Store Salad Dressing: Best Practices
- Refrigeration
- Freezing
- Reheating
- Meal Prep Considerations
- FAQs: Frequently Asked Questions About Salad Dressing
- What types of vinegar work best for making salad dressing?
- How can I prepare garlic to add flavor to my salad dressing without leaving chunks?
- How do I adjust the acidity and sweetness in homemade salad dressings?
- Should I use fresh or dried herbs in my salad dressing, and how much?
- How can I store homemade salad dressing, especially if I want to make a large batch?
- salad dressing
- Ingredients
- Instructions
- Last Step:
- Notes
- Nutrition
- Did you make this recipe?
Essential Ingredients for Salad Dressing
Creating the perfect salad dressing starts with quality ingredients. Here’s exactly what you’ll need:Main Ingredients:
* 1 tablespoon vinegar (e.g., cider, red wine, balsamic, apple cider) or lemon juice * 3 tablespoons extra virgin olive oil (or neutral oil) * ½ teaspoon Dijon mustard * ½ teaspoon fine sea salt * ½ teaspoon black pepperOptional Additions:
* ½ 1 small garlic clove (pressed or smashed) or ¼ ½ teaspoon garlic powder * 1 teaspoon honey, maple syrup, or ¼ teaspoon sugar (for sweetness) * 1 teaspoon finely chopped fresh herbs (e.g., parsley, thyme) or ½ teaspoon dried herbs * Pinch of red pepper flakes (for heat) * 1 teaspoon lemon zest (if using lemon juice)Special Dietary Options:
Vegan: This recipe is naturally vegan as written. Ensure your mustard choice contains no honey if following a strict vegan diet. Gluten-free: Most Dijon mustards are gluten-free, but always check labels to be certain. All other ingredients are naturally gluten-free. Low-calorie: Reduce the oil to 2 tablespoons and increase vinegar to 2 tablespoons for a lighter version. Alternatively, replace half the oil with water or vegetable broth. When shopping for quality ingredients for your dressings, I recommend checking out this guide to pantry essentials for healthy eating.How to Prepare the Perfect Salad Dressing: Step-by-Step Guide
Creating the ideal homemade salad dressing is surprisingly simple when you follow these steps. This method works for any variation you want to try, from classic vinaigrette to more creative dressings.First Step: Gather Your Ingredients and Tools
Before you begin, assemble all your ingredients and equipment. You’ll need measuring spoons, either a small bowl and whisk or a jar with a tight-fitting lid, and your selected ingredients. Having everything ready makes the process smooth and takes just a couple of minutes from start to finish. This step is especially important if you’re adding optional ingredients like fresh herbs or garlic. Mince your herbs finely so they distribute evenly throughout the dressing. If using fresh garlic, either press it through a garlic press or smash it with the side of your knife to release its oils.Second Step: Combine the Base Ingredients
Start with your acidic components and seasonings before adding the oil. This technique helps with emulsification and flavor distribution. In your bowl or jar, add 1 tablespoon of vinegar (or lemon juice), ½ teaspoon Dijon mustard, ½ teaspoon fine sea salt, and ½ teaspoon black pepper. If you’re using any of the optional additions like garlic powder, dried herbs, or sweetener, add them now. For fresh garlic, press one small clove directly into the mixture. If you prefer a milder garlic flavor, smash the clove and add it whole you’ll remove it before serving.Third Step: Whisk or Shake the Seasoning Base
If using a bowl, whisk the ingredients together for about 15 seconds until the salt dissolves. If using a jar, secure the lid and shake vigorously for 10-15 seconds. This initial mixing helps dissolve the seasonings and begins to incorporate the mustard, which will act as your emulsifier. At this point, you might notice the mustard thickening slightly that’s exactly what you want! This reaction between the mustard and the acidic component creates the foundation that will help bind oil and vinegar together in a stable emulsion.Fourth Step: Add the Oil and Emulsify
Slowly drizzle in 3 tablespoons of extra virgin olive oil while continuously whisking. If using the jar method, pour in all the oil at once. For the bowl method, adding the oil slowly while whisking creates a more stable emulsion, though with this simple dressing recipe, either method works well. Continue whisking for about 30 seconds until the mixture thickens slightly and becomes opaque. In the jar, shake vigorously for another 20-30 seconds. You’ll know it’s ready when the dressing has a unified appearance rather than separated oil and vinegar components. The mustard should be completely dissolved, and the dressing should coat the back of a spoon.Final Step: Taste, Adjust, and Use
Before using, taste your dressing and adjust any seasonings as needed. If it’s too acidic, add a bit more oil or a small amount of sweetener. If it’s not tangy enough, add a splash more vinegar. This is your chance to customize the flavor profile exactly to your liking. The dressing can be used immediately, which is when it has the best emulsification and flavor combination. If you prefer, you can store it in the refrigerator for up to a week just remember to remove it 10 minutes before using, as olive oil solidifies when cold. Give it a good whisk or shake before serving if any separation occurs.
Dietary Substitutions to Customize Your Salad Dressing
The beauty of making your own salad dressing at home is the ability to customize it for various dietary needs and preferences. Here are some simple substitutions to help you adapt this recipe.Protein and Main Component Alternatives
For those seeking higher protein content in their diet, you can easily modify this dressing. Consider adding 1 tablespoon of nutritional yeast for a cheesy flavor with additional protein and B vitamins. Alternatively, blend in 2 tablespoons of soft tofu for a creamy texture boost without dairy. If you’re following a ketogenic diet, replace the small amount of sweetener with a keto-friendly alternative like stevia or monk fruit sweetener. The standard recipe is already keto-friendly with its high-quality fat content from olive oil, but avoiding sweeteners altogether keeps the carbohydrate count at its absolute minimum. For those monitoring fat intake, you can create a lighter version by reducing the oil to half and adding water or vegetable broth to maintain volume. While this will change the traditional vinaigrette profile, it still produces a flavorful result that coats greens effectively.Vegetable, Sauce, and Seasoning Modifications
The versatility of this salad dressing extends to numerous vegetable-based modifications. For a creamy texture without dairy, blend in ½ of a ripe avocado until smooth. This creates a rich, satisfying dressing packed with healthy fats and a beautiful green color. If you’re avoiding mustard or simply don’t have it on hand, you can substitute with ¼ teaspoon of mayonnaise or Greek yogurt. Both contain emulsifying properties that will help bind the dressing. For a completely different flavor profile, try adding 1 tablespoon of miso paste for an umami-rich Japanese-inspired dressing. For those who prefer Italian dressing with herbs, increase the dried herbs to 1 teaspoon total and add ¼ teaspoon each of dried oregano and basil. To transform this into a simple ranch dressing, reduce the vinegar to 1 teaspoon, add 1 tablespoon of Greek yogurt, ½ teaspoon garlic powder, and ¼ teaspoon onion powder.Mastering Salad Dressing: Advanced Tips and Variations
Once you’ve mastered the basic homemade salad dressing technique, you can elevate your creations with these professional tips and creative variations that will make your salads stand out.Pro Cooking Techniques
The secret to restaurant-quality vinaigrettes lies in the emulsion process. For the most stable emulsion, ensure all ingredients are at room temperature before mixing. Cold ingredients can cause the oil to solidify slightly, preventing proper binding with the vinegar. For an ultra-smooth dressing, consider using an immersion blender or regular blender. This technique breaks down the oil molecules more thoroughly than hand-whisking, resulting in a creamier texture that holds together for hours without separation. This is especially useful when making dressings with tougher ingredients like garlic or onion. Another professional technique is to create an infusion by gently heating your vinegar with aromatics like shallots, peppercorns, or herbs before cooling and combining with oil. This method extracts deeper flavors and creates a more complex, sophisticated dressing.Flavor Variations
Transform your basic dressing into exciting flavor profiles with these simple additions: * Asian-inspired: Replace vinegar with rice vinegar, use sesame oil instead of half the olive oil, add 1 teaspoon grated ginger and 1 teaspoon tamari. * Creamy herb: Blend in 2 tablespoons Greek yogurt and 1 tablespoon each of finely chopped dill, chives, and parsley. * Sweet balsamic: Use balsamic vinegar as your acid and add 1 teaspoon fig jam or date syrup for a rich, complex flavor perfect for spinach salads. * Citrus burst: Use fresh lemon or lime juice as your acid and add 1 teaspoon of the corresponding zest plus a small handful of finely chopped cilantro. * Smoky southwest: Add ½ teaspoon cumin, ¼ teaspoon chipotle powder, and 1 minced clove of garlic to the basic recipe.Presentation Tips
The visual appeal of your salad starts with how the dressing appears. For professional-looking salads, consider the plating method. Instead of tossing the entire salad with dressing, serve it on the side in a small, attractive cruet or drizzle it in a spiral pattern over the top of plated ingredients. When serving guests, create an “undressed” salad bar with various greens, vegetables, and toppings, then offer two or three different dressing variations in labeled bottles. This allows everyone to customize their meal and makes for a more interactive dining experience. For special occasions, layer different colored dressings in a clear glass bottle or cruet. The contrasting layers look striking on the table for example, try a red beet-based dressing layered with a green herb dressing.Make-Ahead Options
Streamline your meal prep by making multiple salad dressing varieties at once. The basic formula can be multiplied easily simply maintain the 3:1 oil-to-acid ratio. Prepare a week’s worth of dressings in different flavors in small, labeled jars. Consider creating a “dressing concentrate” by mixing all ingredients except oil. Store in the refrigerator for up to several weeks, then add oil and shake when ready to use. This space-saving method is perfect for small kitchens. For fresh herb dressings, freeze chopped herbs in ice cube trays with a bit of water or oil. When ready to make dressing, simply pop out an herb cube and continue with the standard recipe. This preserves the fresh flavor of herbs and makes meal prep even quicker.How to Store Salad Dressing: Best Practices
Proper storage ensures your homemade dressings remain fresh, flavorful, and safe to eat. These guidelines will help you maximize the shelf life and quality of your creations.Refrigeration
Most homemade salad dressings containing fresh ingredients should be stored in the refrigerator. Glass bottles with tight-fitting lids or Mason jars work best for storage, as they don’t absorb odors or stains and maintain freshness. For vinaigrettes made with vinegar, expect a refrigeration shelf life of several weeks. Dressings made with lemon juice typically last about 1 week. If your dressing contains fresh garlic or fresh herbs, use within 3-4 days for best flavor and safety, as these ingredients can develop off-flavors or even pose food safety concerns over time. Always label your dressings with the date made and ingredients used. This simple habit helps you track freshness and identify allergy information quickly when needed.Freezing
While not all dressings freeze well due to ingredient separation, some can be successfully frozen for longer storage. Oil-based dressings without dairy freeze reasonably well, though expect some separation that will require thorough shaking after thawing. To freeze dressings, leave some headspace in the container to allow for expansion during freezing. Consider freezing in ice cube trays for single-serving portions that can be thawed as needed. Once frozen, transfer the cubes to a freezer bag for space-efficient storage. Most frozen dressings maintain quality for about 2-3 months. Thaw overnight in the refrigerator rather than at room temperature to maintain food safety. Never refreeze dressings once thawed.Reheating
For oil-based dressings that have solidified in the refrigerator, “reheating” simply means bringing them back to room temperature. Remove the dressing from the fridge about 10-15 minutes before using. For faster warming, place the container in a bowl of warm water for a few minutes. Avoid using microwaves or direct heat for olive oil-based dressings, as high temperatures can compromise the delicate flavors and nutritional benefits of extra virgin olive oil. If your dressing has separated, simply shake or whisk vigorously to re-emulsify. For more food storage safety tips, I recommend reviewing guidelines from food safety experts to ensure your homemade creations stay fresh and safe.Meal Prep Considerations
For efficient meal prep, consider making multiple batches of different dressings simultaneously. Prepare a basic vinaigrette and divide it into smaller containers before adding different flavorings to each one. This approach saves time while providing variety throughout your week. Store dressings in portion-sized containers that match your typical salad serving size. This practice not only helps with portion control but also minimizes repeated temperature changes that can affect quality. Glass bottles with pour spouts make both storage and serving convenient.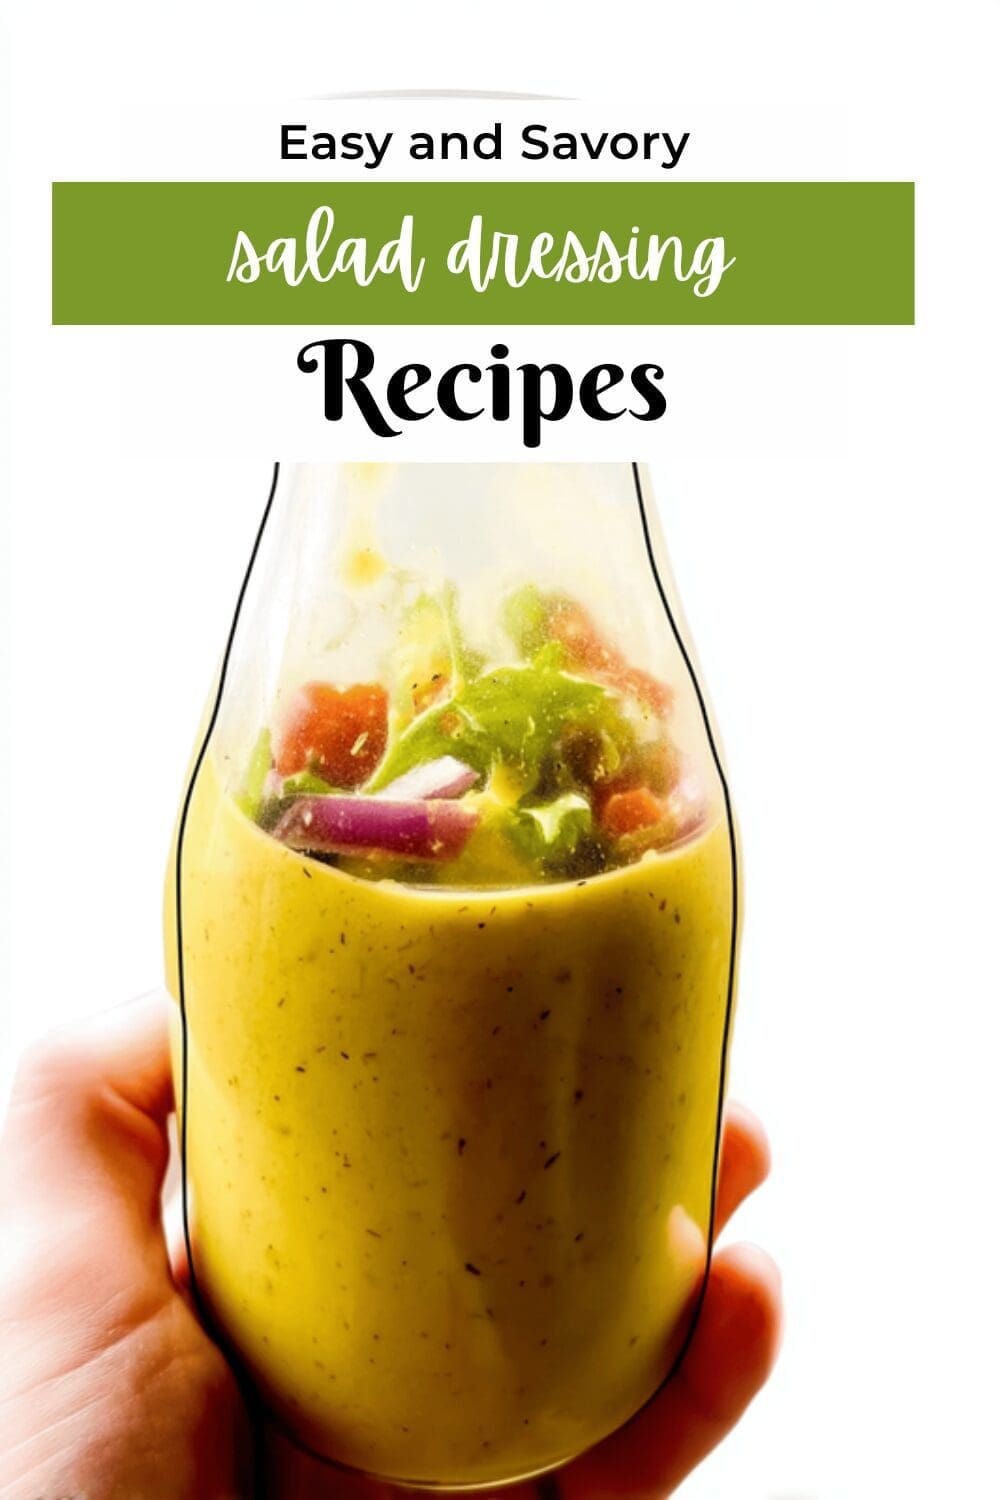
FAQs: Frequently Asked Questions About Salad Dressing
What types of vinegar work best for making salad dressing?
You can choose from a variety of vinegars such as apple cider vinegar, balsamic, red or white wine vinegar, sherry vinegar, champagne vinegar, plain white vinegar, or rice vinegar. Apple cider vinegar is popular for its mild flavor and health benefits, while balsamic brings a sweeter, richer taste. Selecting vinegar depends on the flavor profile you want; for lighter dressings, try white wine or rice vinegar, and for deeper flavors, go for balsamic or sherry vinegar.
How can I prepare garlic to add flavor to my salad dressing without leaving chunks?
To infuse garlic flavor without getting bits in your dressing, press half a clove of garlic through a garlic crusher directly into the dressing jar. Alternatively, you can smash the clove with the side of a knife and let it steep in the dressing for about 20 minutes, then remove it. This method gives a mild garlic aroma and taste without the texture of minced garlic.
How do I adjust the acidity and sweetness in homemade salad dressings?
If your dressing tastes too tangy or acidic, add more oil or balance it with a small amount of sugar or honey to mellow the sharpness. If it lacks acidity, increase the vinegar or lemon juice slowly, tasting as you go. Adjusting these elements gradually helps you find the right balance between tartness and sweetness that suits your preference.
Should I use fresh or dried herbs in my salad dressing, and how much?
Fresh herbs like parsley, dill, or chives work well for delicate flavors, so you can add them more generously. Use smaller amounts of strong herbs such as sage, thyme, or rosemary because their flavors are intense. If using dried herbs, options like oregano, thyme, or mixed Italian herbs impart concentrated flavor; use about one-third the amount you would for fresh herbs since dried herbs are more potent.
How can I store homemade salad dressing, especially if I want to make a large batch?
You can make large quantities by multiplying the ingredients and store the dressing in the refrigerator for up to several weeks. Shake well before each use to recombine the ingredients. Avoid adding fresh garlic or fresh herbs if storing long-term, as garlic’s flavor fades after 3 days and fresh herbs may brown or spoil quickly. For longer storage, use dried herbs and add fresh ingredients just before serving.

salad dressing
🥗 Wholesome, customizable homemade dressings transform ordinary salads into restaurant-quality meals without preservatives or hidden sugars
🌿 Quick and versatile recipes using pantry staples make healthy eating effortless and delicious every day of the week
- Total Time: 2-5 minutes
- Yield: Makes enough for 4 generous salads (approximately ½ cup total)
Ingredients
1 tablespoon vinegar or lemon juice
3 tablespoons extra virgin olive oil or neutral oil
½ teaspoon Dijon mustard
½ teaspoon fine sea salt
½ teaspoon black pepper
1 small garlic clove or ½ teaspoon garlic powder
1 teaspoon honey, maple syrup, or ¼ teaspoon sugar for sweetness
1 teaspoon finely chopped fresh herbs or ½ teaspoon dried herbs
Pinch of red pepper flakes for heat
1 teaspoon lemon zest
Instructions
1-First Step: Gather Your Ingredients and Tools Before you begin, assemble all your ingredients and equipment. You’ll need measuring spoons, either a small bowl and whisk or a jar with a tight-fitting lid, and your selected ingredients. Having everything ready makes the process smooth and takes just a couple of minutes from start to finish. This step is especially important if you’re adding optional ingredients like fresh herbs or garlic. Mince your herbs finely so they distribute evenly throughout the dressing. If using fresh garlic, either press it through a garlic press or smash it with the side of your knife to release its oils.
2-Second Step: Combine the Base Ingredients Start with your acidic components and seasonings before adding the oil. This technique helps with emulsification and flavor distribution. In your bowl or jar, add 1 tablespoon of vinegar (or lemon juice), ½ teaspoon Dijon mustard, ½ teaspoon fine sea salt, and ½ teaspoon black pepper. If you’re using any of the optional additions like garlic powder, dried herbs, or sweetener, add them now. For fresh garlic, press one small clove directly into the mixture. If you prefer a milder garlic flavor, smash the clove and add it whole you’ll remove it before serving.
3-Third Step: Whisk or Shake the Seasoning Base If using a bowl, whisk the ingredients together for about 15 seconds until the salt dissolves. If using a jar, secure the lid and shake vigorously for 10-15 seconds. This initial mixing helps dissolve the seasonings and begins to incorporate the mustard, which will act as your emulsifier. At this point, you might notice the mustard thickening slightly that’s exactly what you want! This reaction between the mustard and the acidic component creates the foundation that will help bind oil and vinegar together in a stable emulsion.
4-Fourth Step: Add the Oil and Emulsify Slowly drizzle in 3 tablespoons of extra virgin olive oil while continuously whisking. If using the jar method, pour in all the oil at once. For the bowl method, adding the oil slowly while whisking creates a more stable emulsion, though with this simple dressing recipe, either method works well. Continue whisking for about 30 seconds until the mixture thickens slightly and becomes opaque. In the jar, shake vigorously for another 20-30 seconds. You’ll know it’s ready when the dressing has a unified appearance rather than separated oil and vinegar components. The mustard should be completely dissolved, and the dressing should coat the back of a spoon.
5-Final Step: Taste, Adjust, and Use Before using, taste your dressing and adjust any seasonings as needed. If it’s too acidic, add a bit more oil or a small amount of sweetener. If it’s not tangy enough, add a splash more vinegar. This is your chance to customize the flavor profile exactly to your liking. The dressing can be used immediately, which is when it has the best emulsification and flavor combination. If you prefer, you can store it in the refrigerator for up to a week just remember to remove it 10 minutes before using, as olive oil solidifies when cold. Give it a good whisk or shake before serving if any separation occurs.
Last Step:
Please leave a rating and comment letting us know how you liked this recipe! This helps our business to thrive and continue providing free, high-quality recipes for you.Notes
🧊 Store dressings with lemon juice for up to 1 week in the refrigerator, or several weeks with vinegar-based recipes
🌱 For creamy variations, blend in ½ avocado or ¼ cup Greek yogurt instead of some oil for added nutrients
🔥 Balance flavors by adjusting ingredients gradually – add oil or sweetener if too tangy, more vinegar/lemon if not tangy enough
- Prep Time: 2-5 minutes
- Category: Condiments
- Method: No-cook
- Cuisine: International
- Diet: Vegetarian, Vegan (without honey), Gluten-free, Dairy-free
Nutrition
- Serving Size: 2 tablespoons
- Calories: 94
- Sugar: 1
- Sodium: 160
- Fat: 11
- Saturated Fat: 1
- Unsaturated Fat: 9
- Trans Fat: 0
- Carbohydrates: 1
- Fiber: 0
- Protein: 1
- Cholesterol: 0


