

Salted Dark Chocolate Kit Kat Bars
If you love chocolate and want a crunchy treat without the gluten, this homemade version is even better than the store bought bar.
These salted dark chocolate Kit Kat bars are built from three simple parts: crispy wafer cookies, a dark chocolate filling, and a dark chocolate coating, finished with a pinch of sea salt on top of every single bar.

The DIY method is an easy way to recreate the classic candy bar at home, and the whole thing starts with a bowl of almond flour and a rolling pin. No tempering machine, no special molds, and no candy thermometer required. Just a thin sheet of cookie dough, a stack of three wafers, and a quick dip in melted chocolate.
Jump to:
- Salted Dark Chocolate Kit Kat Bars
- WHY I MADE THIS KIT KAT BAR RECIPE
- MY HEALTHY CHOCOLATE KIT KAT BAR RECIPE
- Wafer Cookies
- Chocolate Filling
- Chocolate Coating
- GLUTEN FREE KIT KAT BAR KEY INGREDIENTS
- Wafer Cookies
- Chocolate Filling & Chocolate Coating
- HOW LONG DO THESE KIT KAT BARS TAKE TO MAKE?
- HOW TO STORE THESE CLASSIC KIT KAT BARS?
- FAQs
- Can I use a different flour instead of almond flour in the wafer cookies?
- How do you get a smooth chocolate coating on homemade Kit Kat bars?
- How long do homemade Kit Kat bars last and what is the best way to store them?
- Can these homemade Kit Kat bars be made dairy-free or vegan?
- Homemade Kit Kat Bars
- Ingredients
- Instructions
- Last Step:
- Did you make this recipe?
WHY I MADE THIS KIT KAT BAR RECIPE
Kit Kat bars have been my favorite chocolate bar for as long as I can remember. The snap is the whole point for me, that clean crack when you break a piece off, and the layers of crisp wafer hiding underneath. So when I started baking gluten free desserts at home, this was the bar I wanted to rebuild first.
I shared a green tea Kit Kat bar recipe here a while back, and the response was lovely. But the most common request that came back was simple: can you make a classic chocolate version? Readers wanted the original, the one that tastes like the bar from the checkout aisle, just made with ingredients they feel good about.
So this is that recipe. Each cookie bar is dipped in a dark chocolate coating and sprinkled with sea salt, and the bars are gluten free and made with almond flour, maple syrup, and coconut oil. That is the whole wafer right there. No wheat flour, no refined white sugar, and no mystery shortening.
The texture is what surprised me most. Coconut oil gives the wafers their crunch and snap, so when you bite into a finished bar you get the same snappy, crunchy texture as a traditional Kit Kat. It does not taste like a compromise. It tastes like a candy bar.
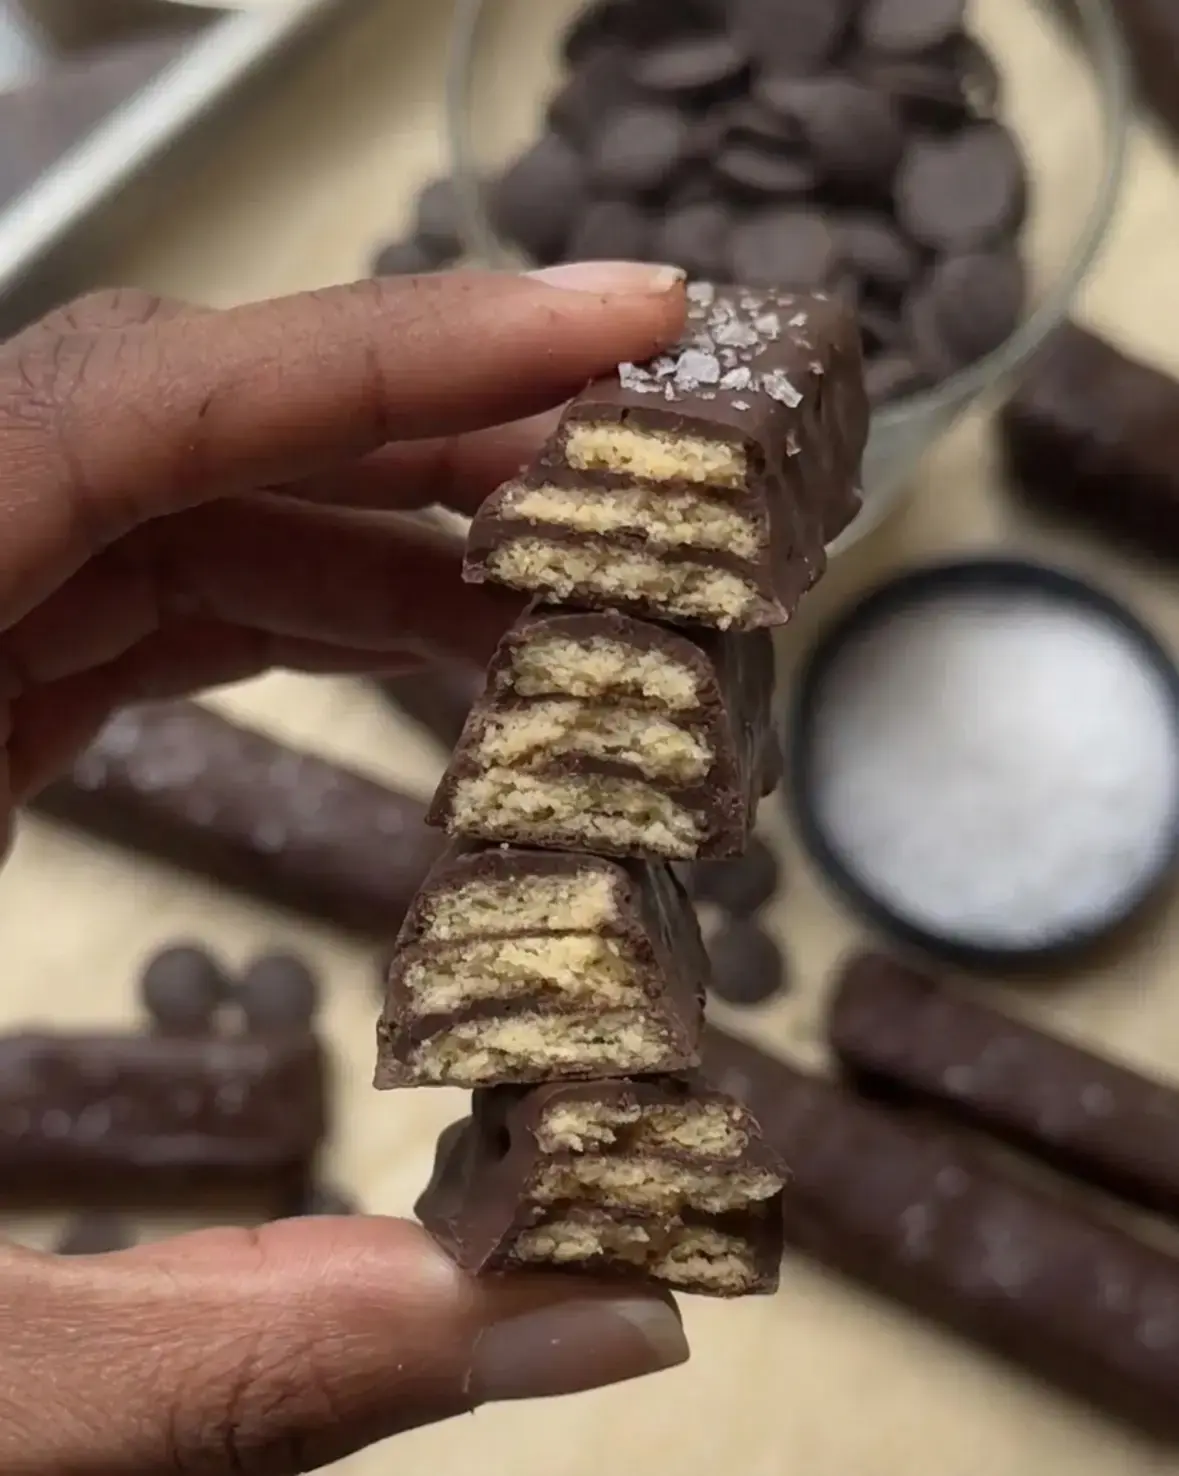
For the chocolate, the recipe used 72% dark chocolate chips, which keeps the flavor rich with a slightly bitter edge that balances the maple syrup in the wafer. If you prefer something sweeter, milk chocolate, bittersweet chocolate, or refined sugar free chocolate chips may be used instead. All three work, and the method does not change at all.
- Gluten free wafers made from almond flour instead of wheat flour.
- Maple syrup for sweetness and moisture in the cookie dough.
- Coconut oil for that crisp, snappy bite.
- Dark chocolate inside and out, with sea salt on top of every bar.
If you have ever been disappointed by a homemade candy bar that turned out soft and cakey, this one is different. The wafers bake until the edges are lightly golden and the tops are firm, and they cool completely on the baking sheet before anything gets stacked. That firm, dry texture is what keeps the bars crisp after dipping.
I also love that the finished bars hold up so well in the fridge, which means I can make a batch on a Sunday and have a little chocolate something waiting all week long. My kids call them the snapping bars, which is about the highest praise I can imagine.
One note before you start: the dough is sticky. That is normal, and it is exactly what you want. Sticky dough rolls thin without cracking, and thin dough bakes into the crisp, layered wafer that makes these bars feel like the real thing.
MY HEALTHY CHOCOLATE KIT KAT BAR RECIPE
The complete recipe with all measurements and instructions is in the recipe card at the bottom of this post. Here is a quick overview of how the bars come together, step by step, so you know exactly what to expect before you start measuring.
You will make the wafer cookies first, then the chocolate filling, then the chocolate coating. Three stages, one finished bar. The filling glues three wafers into a single stack, and the coating seals the whole thing so it snaps when you break it in half.
Wafer Cookies
Preheat the oven to 350 F. In a medium bowl, mix together all of the wafer cookie ingredients: 1 1/4 cups almond flour, 2 tablespoons maple syrup, 3 tablespoons melted coconut oil, 1 teaspoon vanilla, 1/4 teaspoon baking soda, and a pinch of salt.
Stir until a dough forms. The dough will be a bit sticky, but it should hold form into a ball.
Lay a sheet of parchment paper on top of the counter and place the dough ball on top. Cover it with a second sheet of parchment paper so the dough is sandwiched between the two sheets.
Using a rolling pin, roll the dough out into a rectangle until it is about 1/8 inch thick. The dough should be thin, but not so thin that it breaks. Peel off the top sheet of parchment paper.
Use a sharp knife or a pizza cutter to cut the dough into rectangles about 4 inches by 1/2 inch. I ended up with 33 cookies. Keeping the dough on the parchment paper, transfer it to the baking sheet and bake for about 8 to 10 minutes, until the edges are lightly golden.
While the cookies are still warm, use the knife or pizza cutter to carefully recut them and separate them on the baking sheet. Cool the cookies completely on the baking sheet, then divide them into groups of three.
Chocolate Filling
Melt 1 cup of dark chocolate chips according to the package instructions. This may mean melting them in the microwave or using a double boiler. Either method works, so just keep the heat gentle and stir until the chocolate is completely smooth.
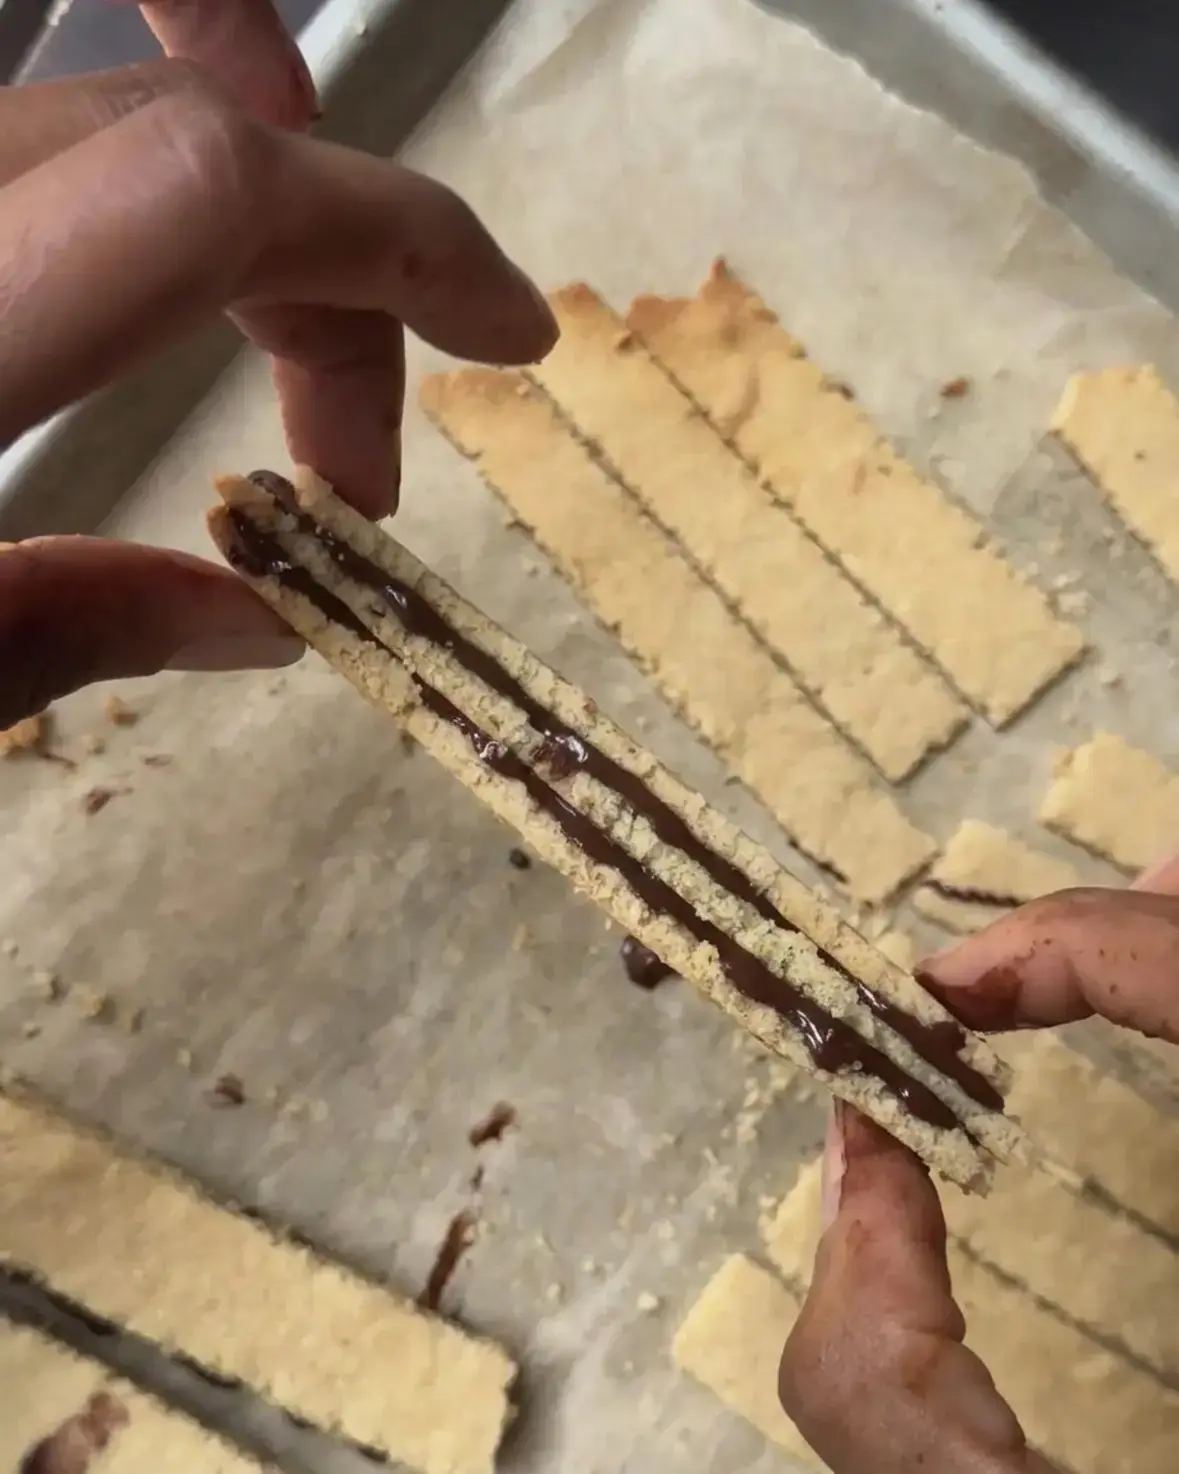
Transfer the melted chocolate to a piping bag fitted with a flat tip, or simply use a spoon. Spread the chocolate on top of 2 of the 3 cookies in each group. Stack the cookies so that the third cookie, the one with no filling, is on top. That clean top wafer becomes the crisp lid of the finished bar.
Repeat with the remaining groups of cookies, then place the stacked bars in the fridge for 30 minutes to harden. Do not skip this chill. Firm filling is what lets you dip the bars later without the layers sliding apart.
Chocolate Coating
For the coating, melt 1 cup of dark chocolate chips with 1 teaspoon of coconut oil, again following the package instructions. The coconut oil helps the chocolate melt evenly and gives it a smooth, glossy consistency that coats cleanly.
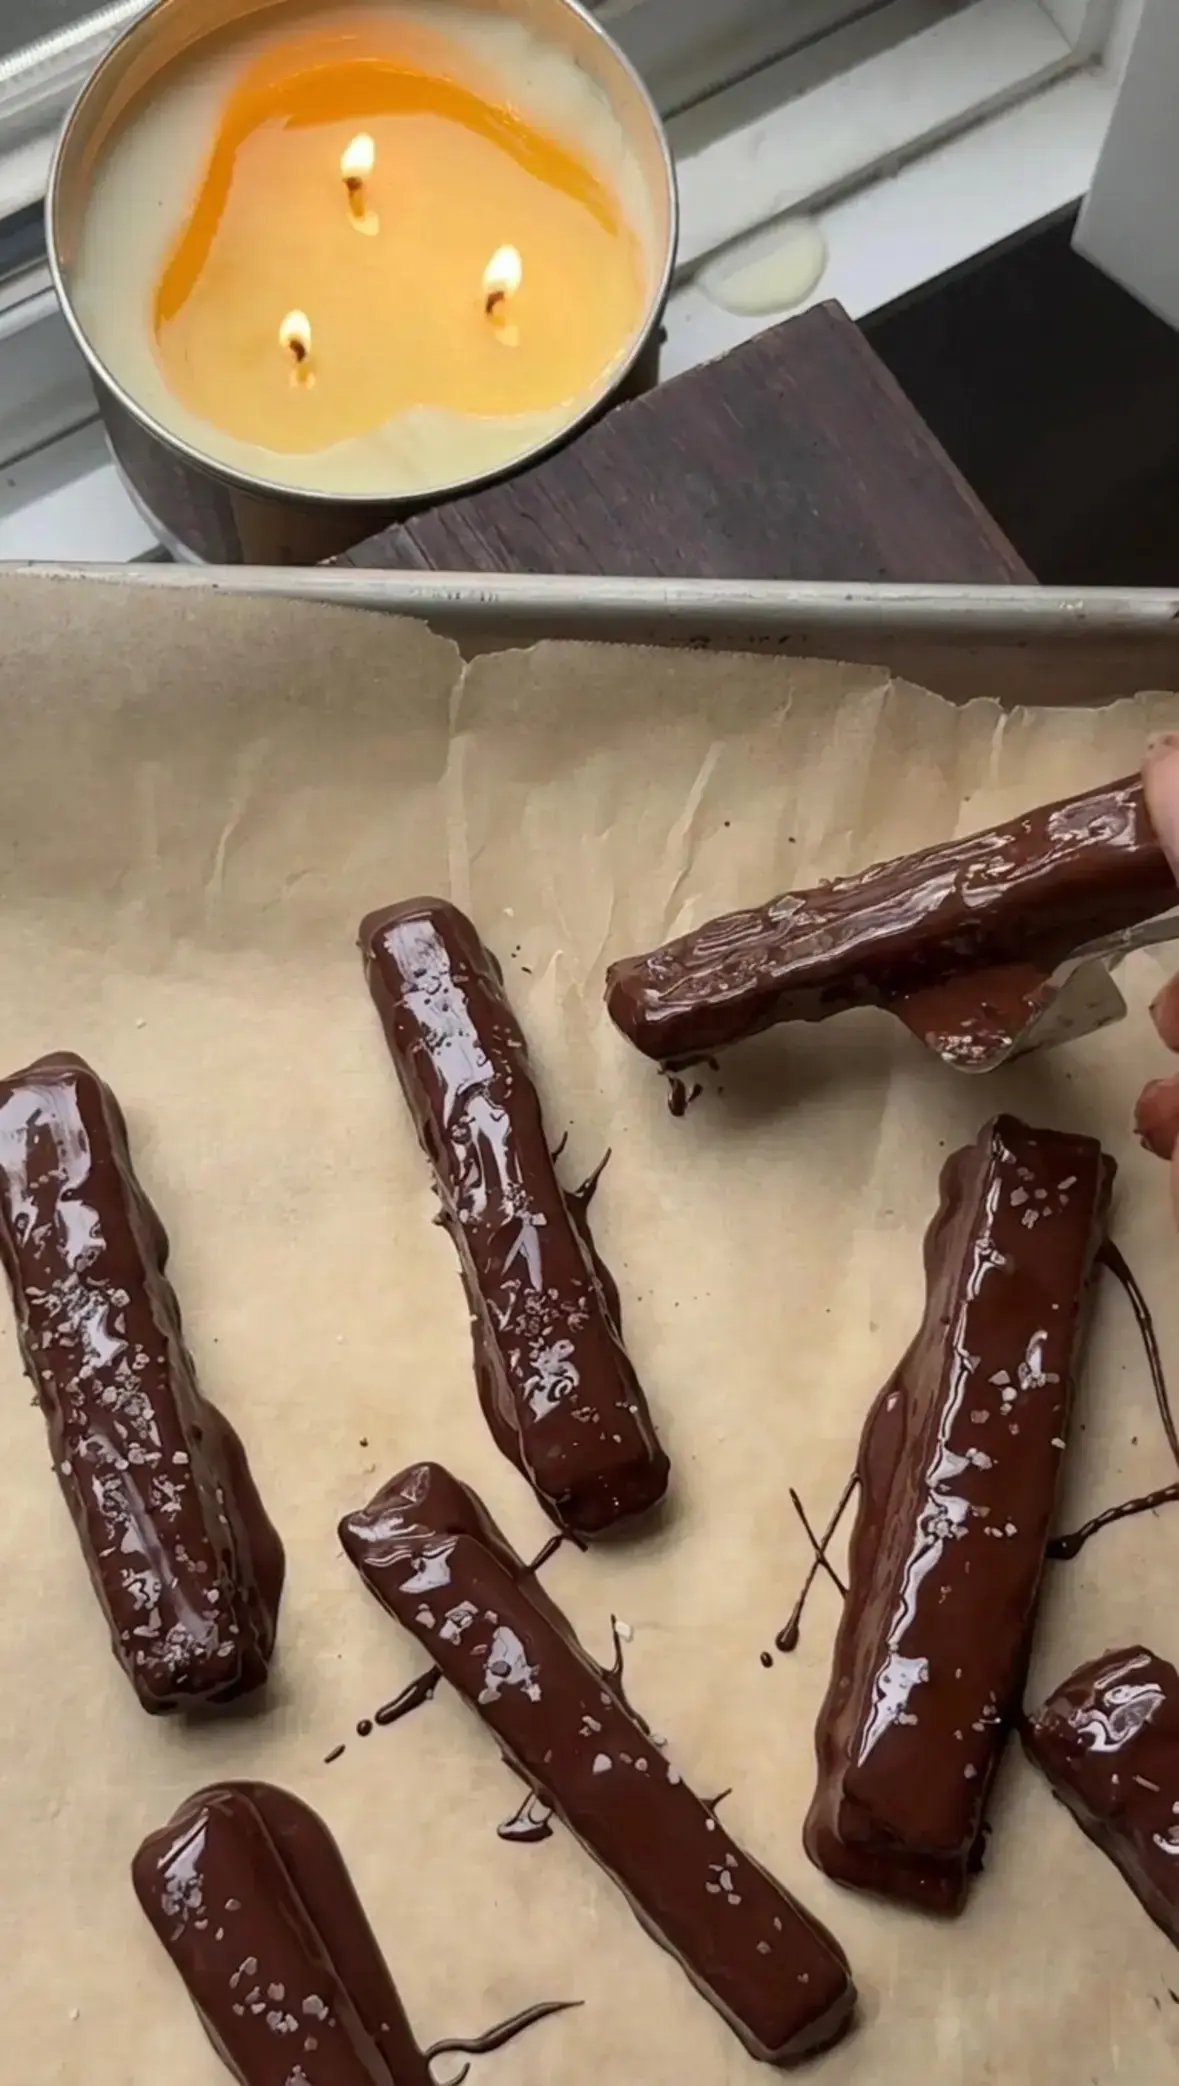
Dip each bar into the chocolate coating, using a fork to turn it so that it is coated on all sides. Lift the bar with the fork, let the excess chocolate drip back into the bowl, and return the Kit Kat bar to the parchment paper. Repeat with the remaining bars.
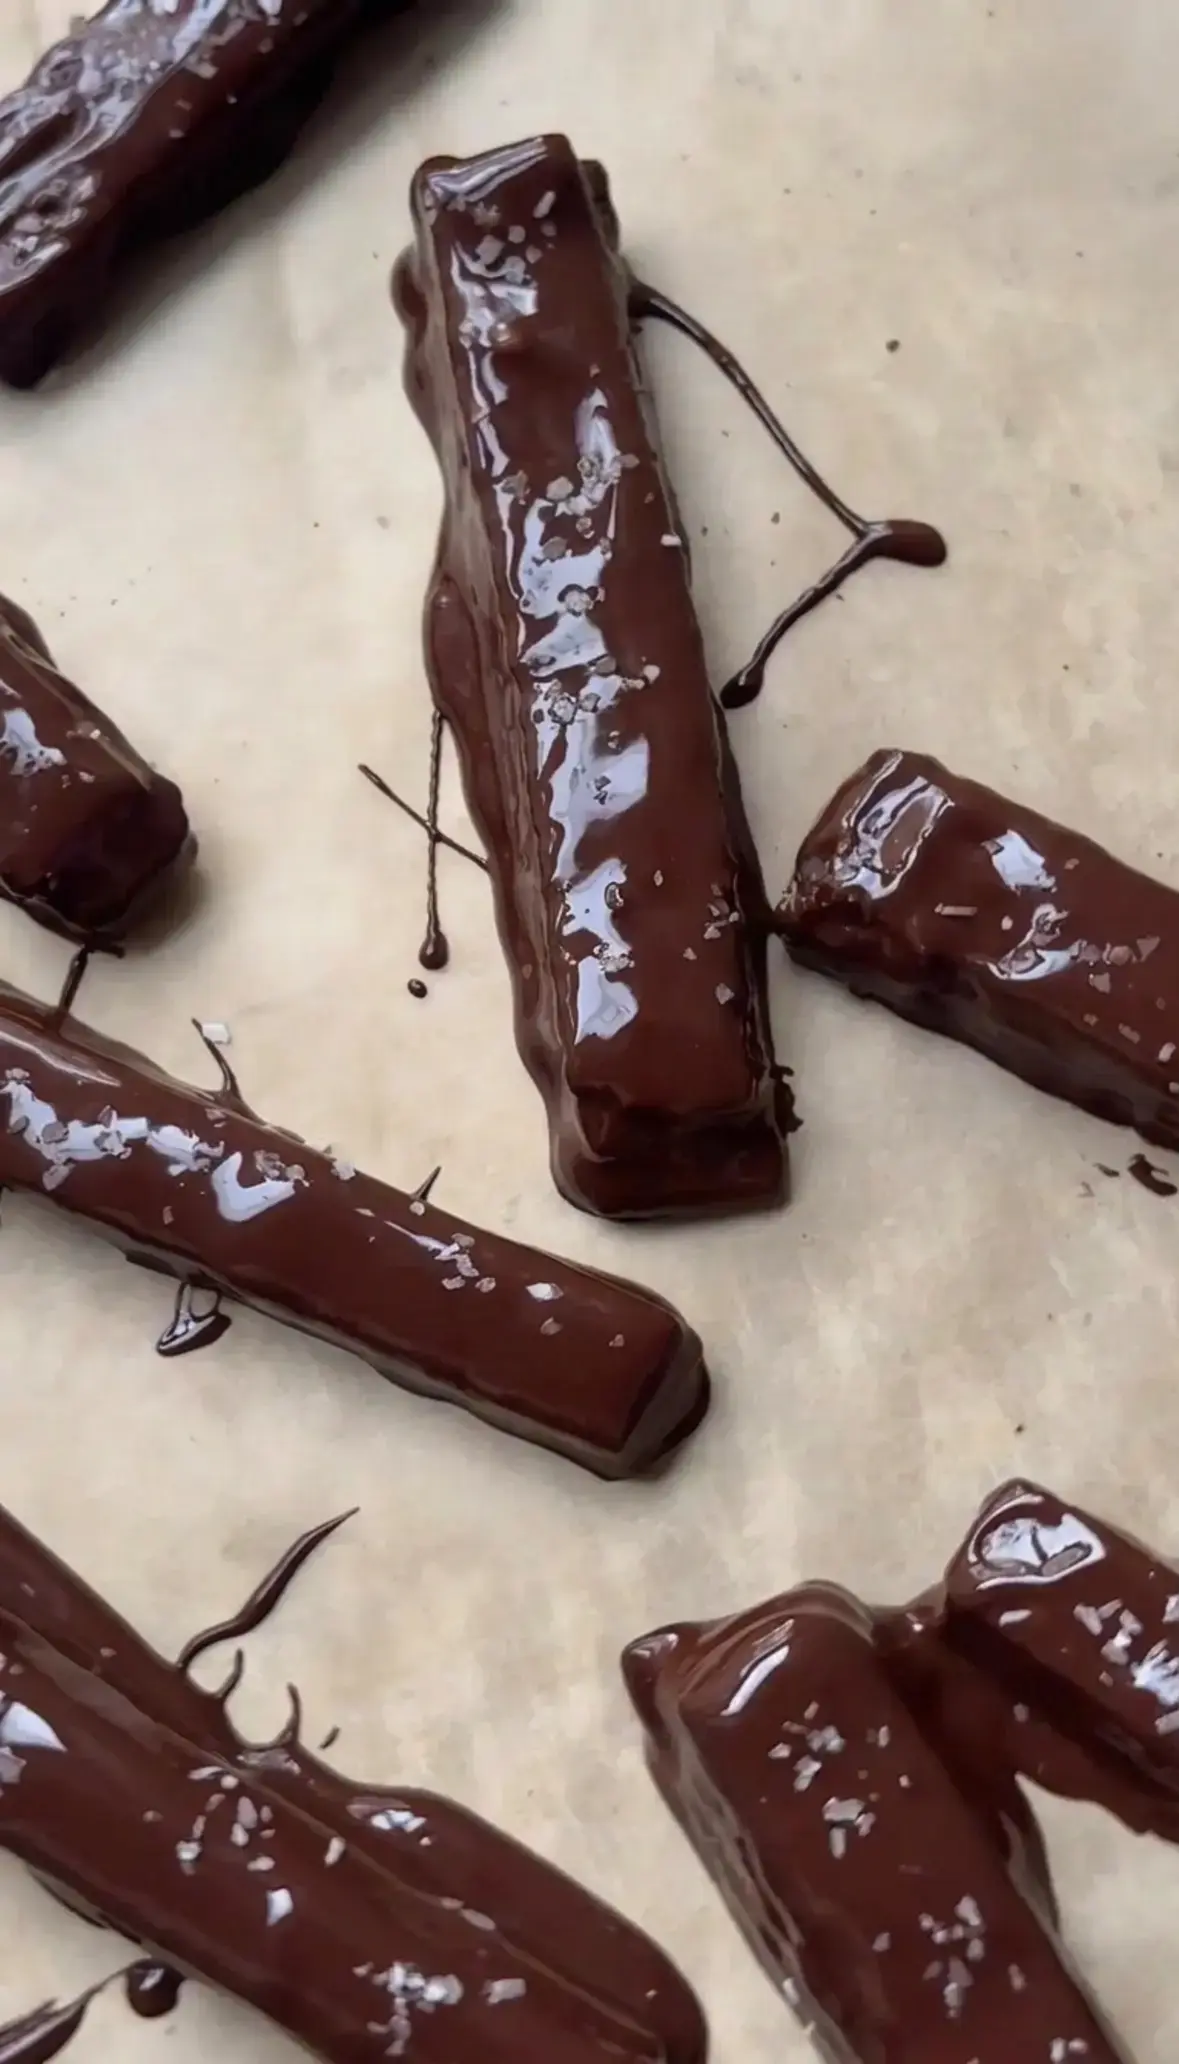
Sprinkle each bar with a pinch of sea salt while the coating is still wet, then place the Kit Kat bars in the fridge for about 15 minutes, or until the coating has set.
GLUTEN FREE KIT KAT BAR KEY INGREDIENTS
The full ingredients list for these DIY Kit Kat bars is in the recipe card below. Here is a closer look at the key ingredients and what each one actually does for the finished bar.
Wafer Cookies
Almond flour is the base of the gluten free Kit Kat wafer cookies. It is versatile and well suited to gluten free baking, and it bakes into a fine, crisp wafer rather than a crumbly one. If you need a swap, oat flour can be used instead of almond flour.
Maple syrup adds a touch of sweetness and, just as importantly, moisture to the cookie dough. Without it, almond flour dough would be dry and would crack as you roll it out.
Coconut oil provides the crunch and snap that makes these bars feel like traditional Kit Kat bars. Melted coconut oil also makes the dough supple enough to roll paper thin. Softened butter can substitute for the coconut oil in the wafer cookies if that is what you have on hand.
Chocolate Filling & Chocolate Coating
The chocolate filling and the chocolate coating both use 72% dark chocolate chips, 1 cup for the filling and 1 cup for the coating. Substitutions for the chocolate chips include milk chocolate, bittersweet chocolate, or refined sugar free chocolate chips, so you can tune the sweetness to your taste.
Coconut oil goes into the coating to help the chocolate melt and to give it a smooth, even consistency. Without it, the coating can look thick and streaky instead of glossy.
HOW LONG DO THESE KIT KAT BARS TAKE TO MAKE?
Making gluten free Kit Kat bars at home takes a few easy stages. Here is how the time breaks down:
- Making the Kit Kat bar cookies: 15 minutes
- Baking the cookies: 10 minutes
- Preparing the chocolate coating: 10 minutes
- Piping and dipping the cookies: 20 minutes
In total, the recipe takes about an hour to make, not including rest time. The recipe card lists a prep time of 45 minutes, a cook time of 10 minutes, and a total time of 55 minutes, which lines up closely with that breakdown.
Remember the two chilling stages, because they add time that is not counted in the active work. The stacked bars need about 30 minutes in the fridge to harden, and the finished bars need about 15 minutes more for the coating to set.
Plan for roughly an hour and a half from the moment you start measuring to the moment you can bite into a finished bar.
HOW TO STORE THESE CLASSIC KIT KAT BARS?
Store leftovers in an airtight container for up to a week.
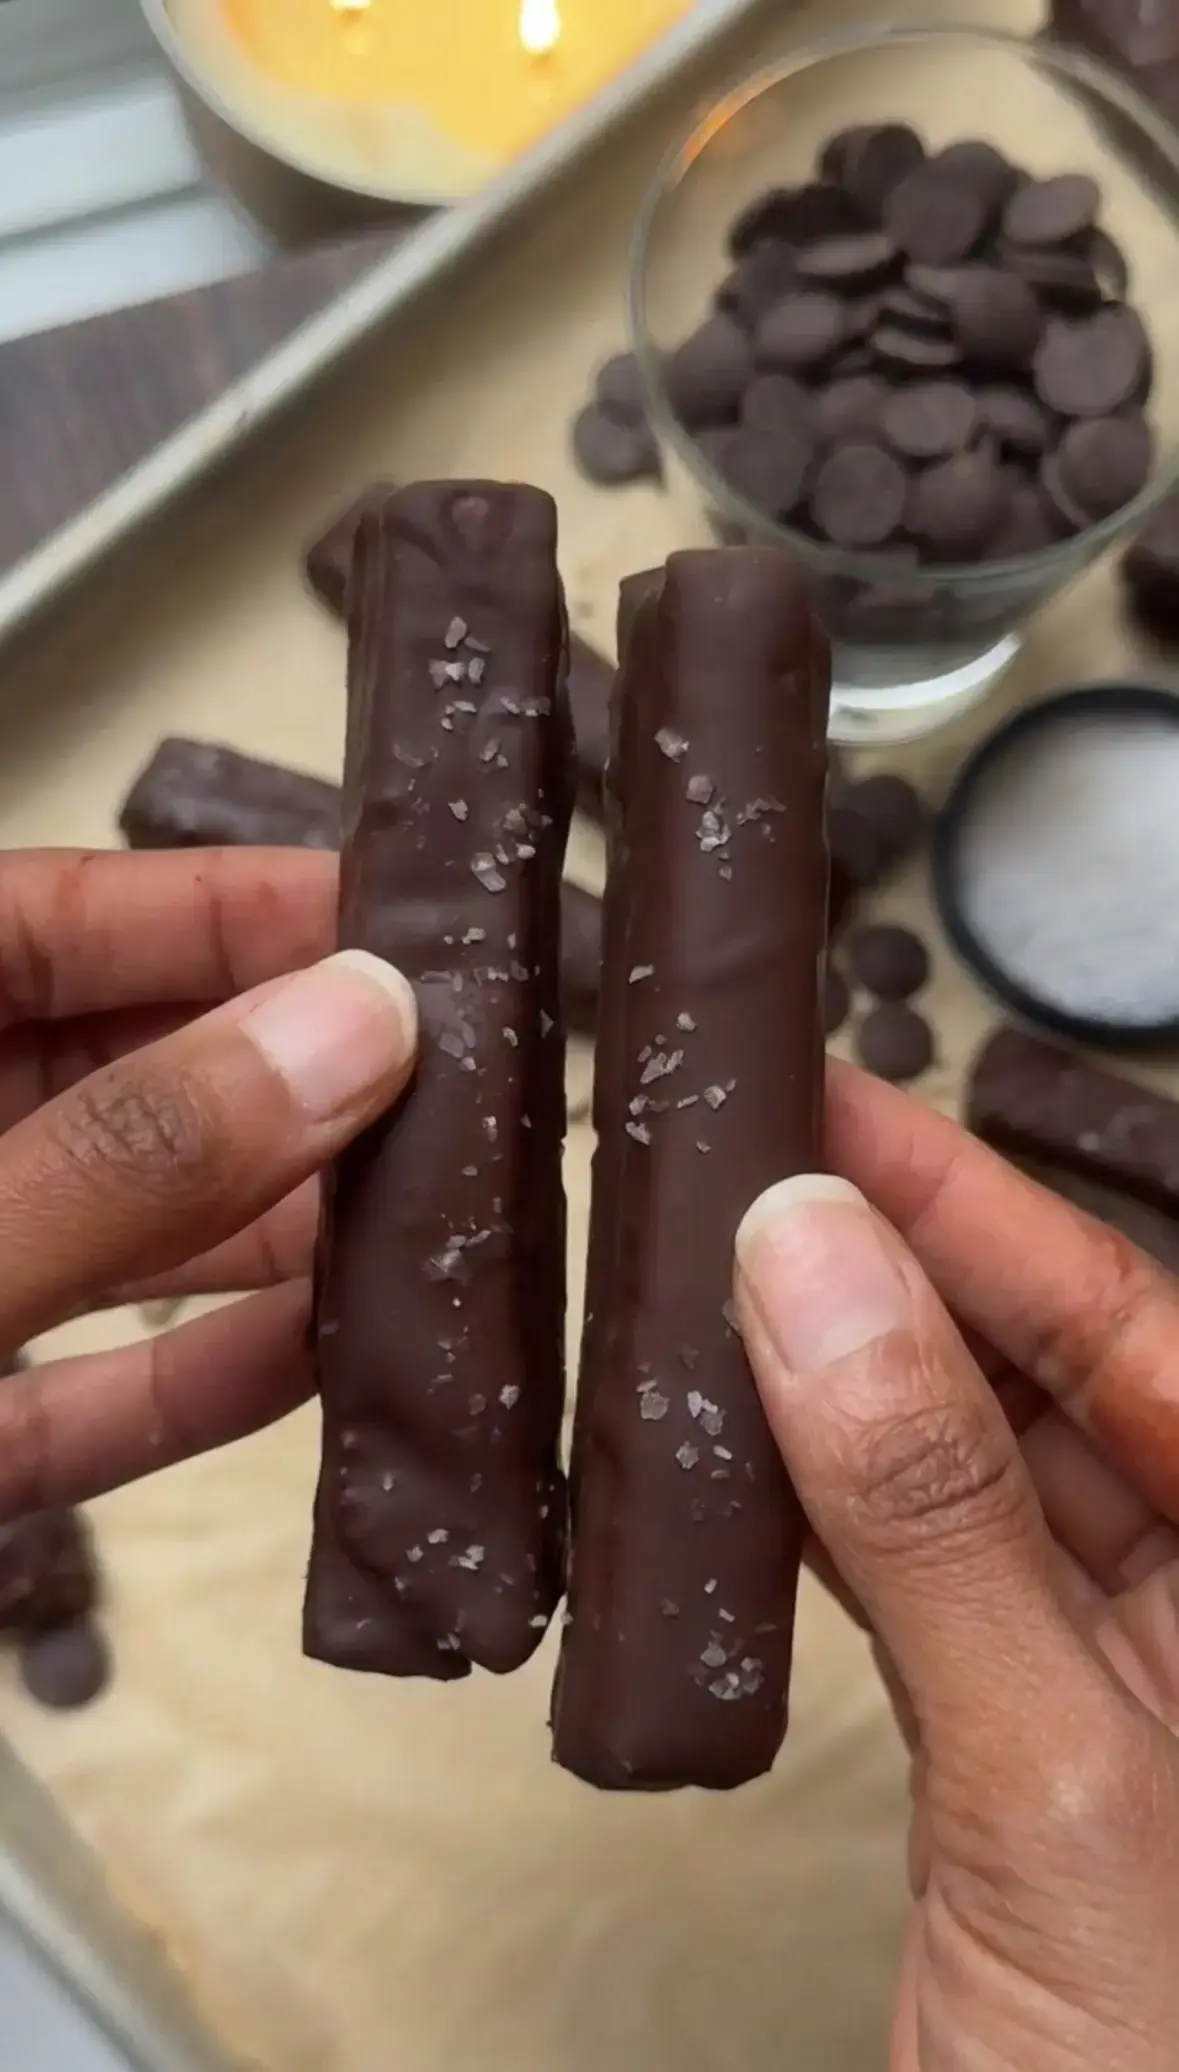
Keeping the container sealed matters, because moisture in the fridge is what softens crisp wafers. For longer storage, the bars can also be kept in the freezer in an airtight container for up to a month.
FAQs
Can I use a different flour instead of almond flour in the wafer cookies?
Yes, oat flour can be used as a direct 1-to-1 substitution for almond flour in the wafer cookie recipe. This makes the bars nut-free while keeping them gluten-free if you use certified gluten-free oat flour. The texture will be slightly different but the bars will still be crisp.
How do you get a smooth chocolate coating on homemade Kit Kat bars?
Make sure the melted chocolate and coconut oil mixture is completely smooth before dipping. Use a fork to lift each bar and gently tap it on the side of the bowl to let excess coating drip off. If the mixture starts to thicken while you work, gently rewarm it to keep it fluid for a polished finish.
How long do homemade Kit Kat bars last and what is the best way to store them?
Store the finished bars in an airtight container in the refrigerator, where they will stay fresh for up to one week. For longer storage, you can freeze the bars for up to a month. Keeping them in a sealed container is crucial to prevent moisture from softening the crisp wafer cookies.
Can these homemade Kit Kat bars be made dairy-free or vegan?
Yes, they can easily be made dairy-free or vegan. The wafer cookies are naturally plant-based since they use coconut oil and maple syrup instead of butter and honey. Simply substitute the dark chocolate chips used for the filling and coating with your favorite dairy-free dark chocolate chips.

Homemade Kit Kat Bars
Salted Dark Chocolate Kit Kat Bars If you love chocolate and want a crunchy treat without the gluten, this homemade version is even better than the store bought bar. These salted dark chocolate Kit Kat bars are built from three simple parts: crispy wafer cookies, a dark chocolate filling, and a dark chocolate coating, finished with a pinch of sea salt on top of every single bar.
- Total Time: 55 min
- Yield: 11 Kit Kat bars 1x
Ingredients
Wafer Cookies
1 1/4 c almond flour
2 tbsp maple syrup
3 tbsp coconut oil, melted
1 tsp vanilla
1/4 tsp baking soda
salt
Chocolate Filling
1 c dark chocolate chips
Chocolate Coating
1 c dark chocolate chips
1 tsp coconut oil
sea salt, for sprinkling
Instructions
Wafer Cookies
1-Preheat oven to 350 F: Preheat oven to 350 F.
2-In a medium bowl, mix together all: In a medium bowl, mix together all of the Wafer Cookie ingredients until a dough forms. The dough will be a bit sticky, but it should hold form into a ball.
3-Lay a sheet of parchment paper on: Lay a sheet of parchment paper on top of the counter, and place the dough ball on top. Place another sheet of parchment paper on top of the dough so that it’s sandwiched between two sheets of paper.
4-Using a rolling pin, roll the dough: Using a rolling pin, roll the dough out into a rectangle until it is about 1/8″ thick. The dough should be thin, but not so thin that it breaks.
5-Peel off the top sheet of parchment: Peel off the top sheet of parchment paper.
6-Use a sharp knife or pizza cutter: Use a sharp knife or pizza cutter to cut the dough into rectangles about 4″ x 1/2″. Check out the video to get an idea of sizing. I ended up with 33 cookies.
7-Keeping the dough on the parchment paper,: Keeping the dough on the parchment paper, transfer it to the baking sheet and bake for about 8-10 minutes, until the edges are lightly golden.
8-While the cookies are still warm, use: While the cookies are still warm, use the knife or pizza cutter to carefully recut the cookies and separate them on the baking sheet. Cool the cookies completely on the baking sheet.
9-Divide the cookies into groups of three: Divide the cookies into groups of three.
Chocolate Filling
10-Melt the dark chocolate chips according to: Melt the dark chocolate chips according to the package instructions-this may mean melting them in the microwave or using a double boiler.
11-Transfer the melted chocolate to a piping: Transfer the melted chocolate to a piping bag fitted with a flat tip, or use a spoon to spread the chocolate on top of 2 of the 3 cookies in each group. Stack the cookies so that the the 3rd cookie is the one with no filling on top. Check out the video for visual instruction.
12-Repeat with the remaining groups of cookies: Repeat with the remaining groups of cookies.
13-Place in the fridge for 30 minutes: Place in the fridge for 30 minutes to harden.
Chocolate Coating
14-Melt the dark chocolate chips according to: Melt the dark chocolate chips according to the package instructions-this may mean melting them in the microwave or using a double boiler.
15-Dip each bar into the chocolate coating,: Dip each bar into the chocolate coating, using a fork to turn it so that it’s coated on all sides. Return the Kit Kat bar to the parchment paper. Repeat with the remaining bars.
16-Sprinkle each bar with a pinch of: Sprinkle each bar with a pinch of sea salt.
17-Place the Kit Kat bars in the: Place the Kit Kat bars in the fridge for about 15 minutes, or until the coating has set.
18-Store leftovers in an airtight container for: Store leftovers in an airtight container for up to a week.
Last Step:
Please leave a rating and comment letting us know how you liked this recipe! This helps our business to thrive and continue providing free, high-quality recipes for you.- Prep Time: 45 min
- Cook Time: 10 min
- Method: bake


