

Why You’ll Love This Summer Berry Icebox Cake
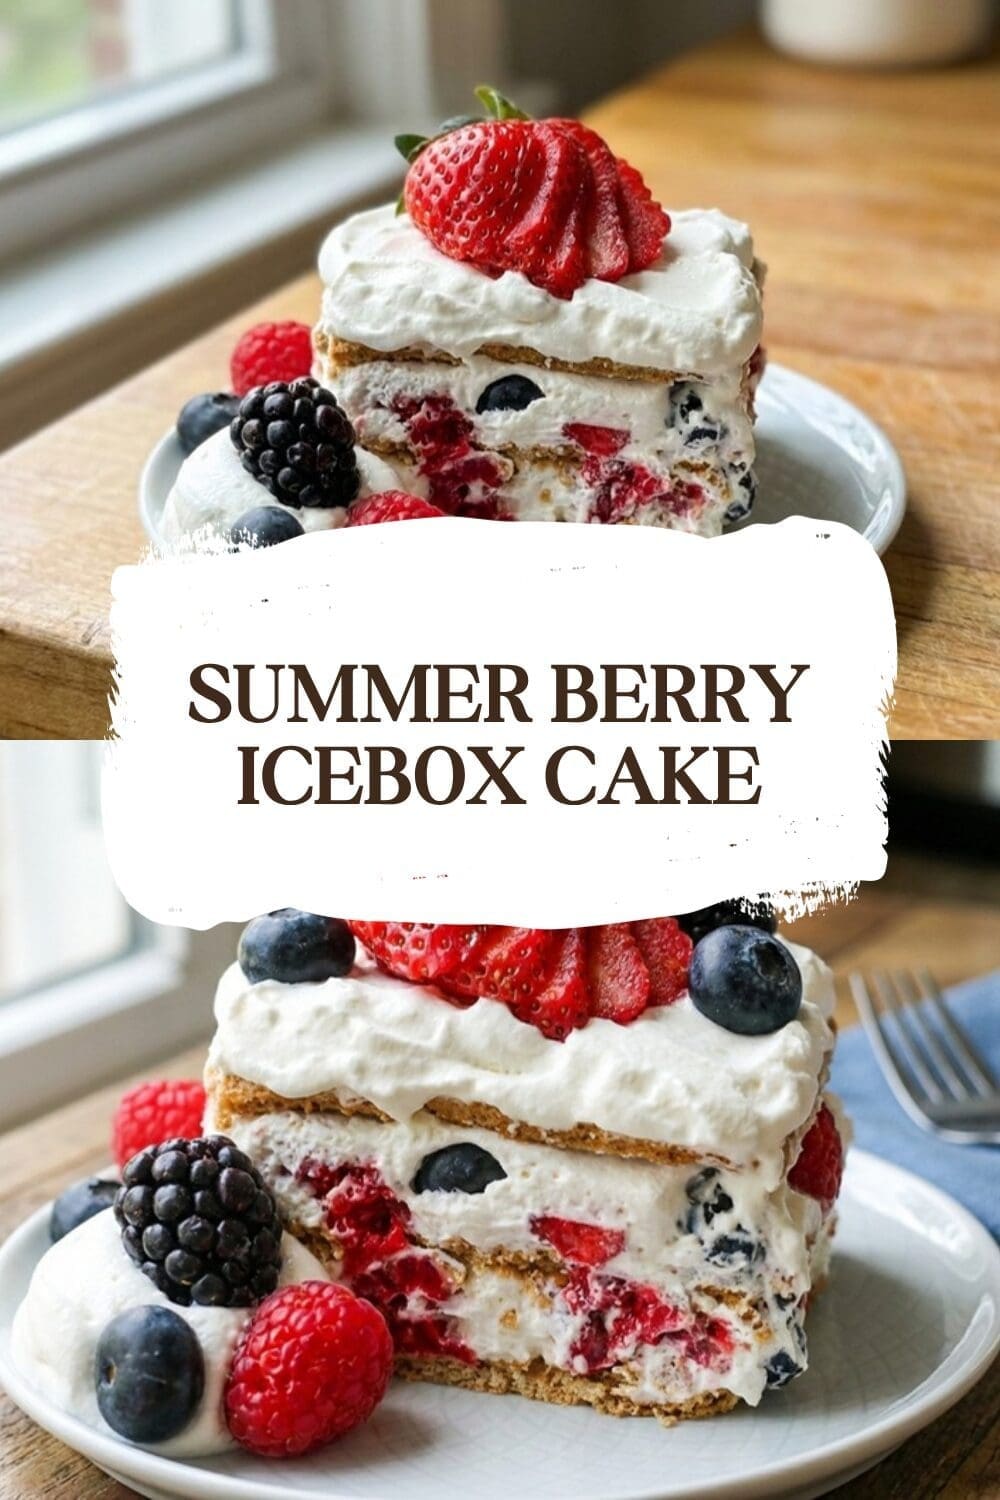
If you’re looking for a no-fuss summer dessert that stays cool and tastes like summer in every bite, the Summer Berry Icebox Cake is a perfect pick. This no bake cake blends creamy vanilla pudding, soft graham cracker layers, and bright fresh berries for a dessert that looks special but takes almost no active time to make. It’s one of those recipes that friends and family ask for again and again.
- Ease of preparation: You can assemble this Summer Berry Icebox Cake in about 15 minutes of active prep time. No oven, no timer, just mixing, layering, and chilling so it’s ideal for busy parents, students, and anyone short on kitchen time.
- Health benefits: Fresh strawberries and blueberries add vitamin C, fiber, and antioxidants to a dessert that still feels indulgent. Berries are heart-healthy and pair well with lighter dairy options if you want to cut calories.
- Versatility: This recipe adapts easily to different diets and seasons. Swap graham crackers for gluten-free versions, use a dairy-free whipped topping, or make it lighter with reduced-fat pudding and whipped cream.
- Distinctive flavor: The contrast of sweet vanilla pudding, tangy berries, and the slightly nutty graham cracker layers creates a refreshing, balanced taste that feels distinctly summery.
For more summer no-bake ideas you might like a fruity dump cake that also needs minimal effort, like this peach cobbler version. Try it as an alternate potluck dessert when you want something just as simple but different in flavor: peach cobbler dump cake.
Jump to:
- Why You’ll Love This Summer Berry Icebox Cake
- Essential Ingredients for Summer Berry Icebox Cake
- Special Dietary Options
- How to Prepare the Perfect Summer Berry Icebox Cake: Step-by-Step Guide
- Dietary Substitutions to Customize Your Summer Berry Icebox Cake
- Protein and Main Component Alternatives
- Vegetable, Sauce, and Seasoning Modifications
- Mastering Summer Berry Icebox Cake: Advanced Tips and Variations
- Pro cooking techniques
- Flavor variations
- Presentation tips
- Make-ahead options
- How to Store Summer Berry Icebox Cake: Best Practices
- Refrigeration
- Freezing
- Reheating
- Meal prep considerations
- FAQs: Frequently Asked Questions About Summer Berry Icebox Cake
- What size pan do I need for summer berry icebox cake?
- How do I make the pudding smooth without lumps for berry icebox cake?
- Can I substitute graham crackers in summer berry icebox cake?
- Can I freeze summer berry icebox cake instead of refrigerating?
- Why is my berry icebox cake mushy and how do I fix it?
- Summer Berry Icebox Cake
- Ingredients
- Instructions
- Last Step:
- Notes
- Nutrition
- Did you make this recipe?
Essential Ingredients for Summer Berry Icebox Cake
Below is a clear, structured list of every ingredient you need for the recipe, followed by short explanations of why each item matters.
- 19 ounces graham crackers – Provide the cake-like layers that soften as they absorb the pudding and fruit juices.
- 8 ounces cream cheese, softened – Gives the pudding mixture body and a rich, tangy balance to the sweet vanilla pudding.
- Two 3.4-ounce packages vanilla instant pudding – Creates the sweet, creamy layers that set around the crackers and berries.
- 2 1/2 cups cold milk – Hydrates the pudding mix so it sets properly; adjust slightly if mixture is too thin.
- 12 ounces whipped topping or homemade whipped cream – Lightens the filling and adds fluffy texture; reserve 1/2 cup to coat the pan bottom.
- 3 cups fresh strawberries, sliced – Fresh strawberries add juiciness, color, and bright flavor.
- 1 1/2 cups fresh blueberries – Small berries tuck between layers and offer concentrated sweetness and color contrast.
- 2 ounces white chocolate chips – Melted and drizzled over the top for a pretty, sweet finish.
Special Dietary Options
- Vegan: Use dairy-free cream cheese, plant-based whipped topping, and a boxed vegan vanilla pudding or make a cornstarch-thickened vanilla cream with almond milk. Replace graham crackers with vegan-certified graham-style crackers.
- Gluten-free: Swap 19 ounces of regular graham crackers for a gluten-free graham-style cracker of equivalent weight. Check labels for cross-contamination if needed.
- Low-calorie: Use reduced-fat cream cheese, low-fat or skim milk, and a lighter whipped topping. Reduce the white chocolate or skip it for fewer calories.
How to Prepare the Perfect Summer Berry Icebox Cake: Step-by-Step Guide
This step-by-step section walks you through everything from mise en place to the final drizzle. Follow the sequence listed and you’ll get soft, cake-like layers without turning on your oven. The total time is about 4 hours 15 minutes including chilling.
First Step: Prep your ingredients and tools. Take the 8 ounces of cream cheese out of the fridge to soften. Rinse and slice 3 cups fresh strawberries and measure 1 1/2 cups fresh blueberries. Open the two 3.4-ounce boxes of vanilla instant pudding and measure 2 1/2 cups cold milk. Set out a 9×13-inch pan and have a mixer or food processor ready.
Second Step: Make the pudding-cream cheese base. In a large mixing bowl, beat the softened cream cheese with the two dry pudding mixes using a hand mixer until they’re blended and smooth. Gradually beat in the 2 1/2 cups cold milk; beat on low until combined, then on medium for about 1-2 minutes so the pudding begins to thicken.
Third Step: Fold in the whipped topping. Gently stir in 12 ounces of whipped topping or homemade whipped cream, keeping 1/2 cup reserved. Use a rubber spatula and fold so you keep the mixture light and airy. Avoid overmixing after adding whipped topping or it will deflate.
Fourth Step: Coat the pan. Spread a thin layer of the reserved 1/2 cup whipped topping on the bottom of a 9×13-inch pan to help the first graham cracker layer stick and prevent sliding. This little step makes assembly neater and keeps the bottom from getting too soggy in the center.
Fifth Step: Start assembling the layers. Place 5 graham crackers across the center of the pan, then add 2 more broken to fit around the edges, until one layer covers the pan width. Press gently to form an even base.
Sixth Step: Add pudding and berries. Spread a layer of the pudding mixture evenly over the graham crackers. Sprinkle about half the blueberries and a portion of the sliced strawberries across the pudding. The fruit adds moisture and sweetness that the crackers will soak up and turn cakey.
Seventh Step: Repeat the layers. Add another graham cracker layer, spread more pudding mixture, and top with the remaining berries. Finish with a third graham cracker layer and the final portion of pudding and berries so you have three full layers of crackers, pudding, and fruit in total.
| Layer | Contents | Notes |
|---|---|---|
| 1 | Graham crackers + pudding + berries | Start with 5 across center, 2 broken to fit edges |
| 2 | Graham crackers + pudding + berries | Repeat to build cake-like thickness |
| 3 | Graham crackers + pudding + berries | Finish with pudding layer and reserve whipped topping |
Eighth Step: Chill. Cover the pan loosely with plastic wrap and refrigerate for at least 4 hours but preferably overnight. During this time the graham crackers soak up moisture from the pudding and fruit and soften into cake-like layers. If you’re short on time, chill at least 4 hours; longer chilling improves texture.
Ninth Step: Melt white chocolate chips and finish. Right before serving, melt the 2 ounces white chocolate chips following package directions and drizzle over the top. This warm white chocolate will create a pretty, slightly glossy finish that contrasts the berries.
Final Step: Slice and serve. Using a sharp knife, slice into squares. If the cake was chilled well, you’ll get clean slices. Serve chilled and keep leftovers refrigerated. If you plan to transport it to a picnic, keep it in a cooler so it stays firm.
Tip: Let cream cheese come to room temperature before mixing for a lump-free pudding base. A quick pulse in a food processor also helps make a silky filling.

Dietary Substitutions to Customize Your Summer Berry Icebox Cake
Protein and Main Component Alternatives
While this recipe centers on cream cheese and instant pudding, you can make swaps to match dietary needs or what’s in your pantry. Below are friendly swaps that keep the texture and flavor similar.
- Dairy-free creaminess: Replace cream cheese with a dairy-free cream cheese for a vegan version, and use coconut-based or almond-based whipped topping. Pick a vegan vanilla pudding mix or make a cornstarch-thickened vanilla custard with plant milk.
- Lower-dairy option: Use light cream cheese and low-fat whipped topping to reduce calories while keeping a creamy mouthfeel.
- Greek yogurt twist: For a tangier but still creamy filling, substitute half the cream cheese with full-fat Greek yogurt, beaten until smooth. This increases protein and brings a brighter flavor.
- Gluten-free base: Use gluten-free graham-style crackers in the same 19-ounce total amount so layers remain consistent in thickness and soaking time.
Vegetable, Sauce, and Seasoning Modifications
This dessert isn’t vegetable-forward, but you can play with sauces and small flavor touches to change the profile.
- Fruit swaps: Substitute blackberries, raspberries, or thinly sliced peaches for some of the berries, keeping the total fruit volume similar (about 4 1/2 cups combined).
- Citrus boost: Add a teaspoon of lemon zest to the pudding mixture for brightness that pairs well with berries and white chocolate.
- Fruity sauce: Make a quick berry compote on the stovetop if you want a slightly saucier layer, then cool it before layering. Keep portions small so crackers still absorb properly.
- Sweetness adjustments: If berries are overly sweet, add a squeeze of lemon juice to balance. If they’re too tart, sprinkle a tablespoon of sugar over sliced strawberries and let them macerate briefly before layering.
Mastering Summer Berry Icebox Cake: Advanced Tips and Variations
Once you’ve made the basic Summer Berry Icebox Cake, try these tips and variations to refine texture, flavor, and presentation. Each subsection adds a small technique or idea that makes a big difference.
Pro cooking techniques
- Use a food processor or blender to beat the cream cheese, pudding mixes, and milk together for a completely lump-free filling. Pulse first, then blend on low while slowly adding milk.
- Press each graham cracker layer gently with the back of a spoon so the pudding distributes evenly and there are no air pockets between layers.
- Chill uncovered for the first 30 minutes to let the top set and then cover to prevent odor absorption in the fridge.
Flavor variations
- Chocolate berry: Swap vanilla pudding for chocolate pudding and add chocolate chips between layers for a richer version.
- Citrus-vanilla: Stir 1 teaspoon lemon or orange zest into the pudding mixture for a bright, zesty kick.
- Tropical twist: Replace some berries with thinly sliced mango or pineapple to create a summery tropical take.
Presentation tips
- Arrange berries on top in rows or a flag pattern for patriotic summer events. The bright red and blue look festive and appetizing.
- Drizzle the melted white chocolate just before serving so it keeps its shape and doesn’t melt into the whipped top too quickly.
- Use fresh mint sprigs or a light dusting of powdered sugar for an elegant final touch.
Make-ahead options
- Assemble the cake up to 24 hours ahead and refrigerate. The flavors meld and the texture improves overnight.
- For longer storage, freeze tightly wrapped for up to 2 weeks and thaw in the fridge overnight before serving. Pat berries dry before freezing to reduce excess moisture.
When reading about similar no-bake ideas and inspiration, this classic version on Cakes Cottage has a nice visual guide: + $(‘AI Agent’).item.json.output.Anchor1 +. For the health side of berries and why they’re a great choice, see this overview on heart-healthy benefits: + $(‘AI Agent’).item.json.output.Anchor2 +.
How to Store Summer Berry Icebox Cake: Best Practices
Proper storage keeps your Summer Berry Icebox Cake fresh and sliceable. Below are clear methods for short and longer term keeping, plus tips for moving or prepping ahead.
Refrigeration
Cover the pan loosely with plastic wrap or an airtight lid once the top has set. Keep refrigerated and eat within 3-4 days for best texture and flavor. The cake does not hold well at room temperature for long periods because dairy and whipped topping soften. If serving outdoors, keep it in a cooler until you’re ready to slice.
Freezing
Freezing works if you want to make the cake ahead. Freeze uncovered for 30 minutes to firm up for easier slicing, then wrap tightly with plastic wrap and foil and store up to 2 weeks. Thaw in the fridge overnight before serving. Pat berries dry before freezing to limit extra moisture.
Reheating
This is a chilled dessert, so reheating is not recommended. If the cake is too firm from freezing, let it sit in the refrigerator until it softens slightly. Avoid room temperature for more than 1-2 hours, as dairy can separate and the cake will become soggy if left out.
Meal prep considerations
Make the pudding mixture and slice berries the day before to save time. Store pudding in an airtight container and assemble the day of serving for peak freshness, or fully assemble the day before for the best texture. For potlucks, transport in a cooler and melt the white chocolate right before serving so it looks fresh.
FAQs: Frequently Asked Questions About Summer Berry Icebox Cake
What size pan do I need for summer berry icebox cake?
Use a 9×13-inch baking dish or pan for this summer berry icebox cake recipe. It provides the perfect size for layering graham crackers, pudding mixture, berries, and whipped topping without overflowing. Glass or metal pans both work well—glass keeps the cake chilled evenly in the fridge. Before starting, reserve ½ cup of Cool Whip to spread on the bottom, which helps the first layer of graham crackers stick and prevents sogginess. This size serves 12-16 people generously. If you have a smaller crowd, halve the recipe and use an 8×8-inch pan, adjusting layers accordingly. Prep time is about 20 minutes plus 4-6 hours chilling. (78 words)
How do I make the pudding smooth without lumps for berry icebox cake?
Start with softened cream cheese beaten until creamy in a large bowl using a hand mixer. Add one 3.4-ounce box of vanilla instant pudding mix and beat on low until combined. Gradually pour in 1½ cups cold milk while mixing on medium speed for 2 minutes until smooth. Repeat with the second pudding box and remaining milk. For extra smoothness, use room-temperature ingredients and a blender: pulse cream cheese first, then slowly add pudding and milk. Avoid overmixing after adding whipped topping. This method ensures a lump-free filling that sets perfectly with fresh berries like strawberries, blueberries, and raspberries. Chill for at least 4 hours. (102 words)
Can I substitute graham crackers in summer berry icebox cake?
Yes, swap regular graham crackers for vanilla wafers, chocolate wafers, or thin slices of pound cake in your summer berry icebox cake—they soften similarly when soaked in pudding. Use the same quantity: about 1 full box (around 40 sheets) for a 9×13 pan. Regular graham crackers turn white inside from pudding absorption, mimicking cake layers. Avoid overly crisp cookies like Oreos, as they don’t soften well. For gluten-free, try gluten-free graham-style crackers. Test a small batch first. These subs keep the no-bake ease and pair great with mixed summer berries. Full recipe uses two 3.4-oz vanilla pudding boxes. (98 words)
Can I freeze summer berry icebox cake instead of refrigerating?
Absolutely, freezing works well for summer berry icebox cake. Assemble as directed, then freeze uncovered for 30 minutes until firm for easy slicing, or freeze fully wrapped for up to 2 weeks. Thaw in the fridge overnight before serving—it softens back to creamy texture without sogginess. Avoid room temperature for long; it wilts after 1-2 hours due to dairy. For potlucks, transport chilled in a cooler. Drizzle white chocolate topping right before serving to prevent melting. This method suits make-ahead prep, yielding 12 servings. Pro tip: pat berries dry to reduce excess moisture during freezing. (92 words)
Why is my berry icebox cake mushy and how do I fix it?
A mushy summer berry icebox cake often comes from excess milk, juicy fruit, or insufficient chilling. Fix by reducing milk to 2½ cups total (instead of 3), patting berries dry with paper towels, and using full graham cracker layers without gaps. Chill at least 6 hours or overnight. If too liquidy, too much fruit juice is likely—drain strawberries and blueberries well. Sugar-free pudding can turn gluey, so stick to regular instant vanilla. For cream cheese allergies, sub full-fat Greek yogurt (beat smooth first). Next time, taste-test pudding thickness before layering. Serves 12-16 perfectly firm. (96 words)

Summer Berry Icebox Cake
🍓 Create a refreshing no-bake dessert that’s perfect for hot summer days with layers of creamy pudding, fresh berries, and soft graham crackers
- Total Time: 4 hours 15 minutes
- Yield: 12 servings 1x
Ingredients
19 ounces graham crackers for cake-like layers
8 ounces cream cheese for rich, tangy balance
Two 3.4-ounce packages vanilla instant pudding for sweet, creamy layers
2 1/2 cups cold milk to hydrate the pudding mix
12 ounces whipped topping for fluffy texture
3 cups fresh strawberries for juiciness, color, and flavor
1 1/2 cups fresh blueberries for sweetness and color contrast
2 ounces white chocolate chips for sweet finish
Instructions
1-First Step: Prep your ingredients and tools. Take the 8 ounces of cream cheese out of the fridge to soften. Rinse and slice 3 cups fresh strawberries and measure 1 1/2 cups fresh blueberries. Open the two 3.4-ounce boxes of vanilla instant pudding and measure 2 1/2 cups cold milk. Set out a 9×13-inch pan and have a mixer or food processor ready.
2-Second Step: Make the pudding-cream cheese base. In a large mixing bowl, beat the softened cream cheese with the two dry pudding mixes using a hand mixer until they’re blended and smooth. Gradually beat in the 2 1/2 cups cold milk; beat on low until combined, then on medium for about 1-2 minutes so the pudding begins to thicken.
3-Third Step: Fold in the whipped topping. Gently stir in 12 ounces of whipped topping or homemade whipped cream, keeping 1/2 cup reserved. Use a rubber spatula and fold so you keep the mixture light and airy. Avoid overmixing after adding whipped topping or it will deflate.
4-Fourth Step: Coat the pan. Spread a thin layer of the reserved 1/2 cup whipped topping on the bottom of a 9×13-inch pan to help the first graham cracker layer stick and prevent sliding. This little step makes assembly neater and keeps the bottom from getting too soggy in the center.
5-Fifth Step: Start assembling the layers. Place 5 graham crackers across the center of the pan, then add 2 more broken to fit around the edges, until one layer covers the pan width. Press gently to form an even base.
6-Sixth Step: Add pudding and berries. Spread a layer of the pudding mixture evenly over the graham crackers. Sprinkle about half the blueberries and a portion of the sliced strawberries across the pudding. The fruit adds moisture and sweetness that the crackers will soak up and turn cakey.
7-Seventh Step: Repeat the layers. Add another graham cracker layer, spread more pudding mixture, and top with the remaining berries. Finish with a third graham cracker layer and the final portion of pudding and berries so you have three full layers of crackers, pudding, and fruit in total.
8-Eighth Step: Chill. Cover the pan loosely with plastic wrap and refrigerate for at least 4 hours but preferably overnight. During this time the graham crackers soak up moisture from the pudding and fruit and soften into cake-like layers. If you’re short on time, chill at least 4 hours; longer chilling improves texture.
9-Ninth Step: Melt white chocolate chips and finish. Right before serving, melt the 2 ounces white chocolate chips following package directions and drizzle over the top. This warm white chocolate will create a pretty, slightly glossy finish that contrasts the berries.
10-Final Step: Slice and serve. Using a sharp knife, slice into squares. If the cake was chilled well, you’ll get clean slices. Serve chilled and keep leftovers refrigerated. If you plan to transport it to a picnic, keep it in a cooler so it stays firm.
Last Step:
Please leave a rating and comment letting us know how you liked this recipe! This helps our business to thrive and continue providing free, high-quality recipes for you.Notes
🍓 Use fresh strawberries and blueberries to give a colorful, summery look and the best flavor
- Prep Time: undefined
- Refrigeration time: 4 hours or overnight
- Cook Time: 0 minutes
- Category: Dessert
- Method: No Bake
- Cuisine: American
- Diet: Vegetarian
Nutrition
- Serving Size: 1 slice (1/12 of cake)
- Calories: 380
- Sugar: 32 g
- Sodium: 320 mg
- Fat: 15 g
- Saturated Fat: 8 g
- Unsaturated Fat: 6 g
- Trans Fat: 0 g
- Carbohydrates: 48 g
- Fiber: 2 g
- Protein: 4 g
- Cholesterol: 30 mg


