Ingredients
– 1/2 cup unsalted butter provides fat for tender, rich cookies and controls spread
– 1/2 cup granulated sugar sweetens and helps with slight crisping at the edges
– 1 large egg binds the dough and adds structure and moisture
– 1 1/2 teaspoons vanilla extract gives classic flavor; pure vanilla is best
– 1/4 teaspoon salt balances sweetness and heightens flavor
– 1/2 teaspoon baking powder adds a slight lift so cookies are not too dense
– 2 cups all-purpose flour the main structure-builder for the cookies
– Gel food coloring (dark pink recommended) concentrated color for bright marbling without adding liquid
Instructions
1-First Step: Mise en place and mixing Gather all ingredients and measure them precisely. Room-temperature butter creams more evenly with sugar, so let the butter sit out until soft but not melted. Preheat is not needed yet; chilling is part of the plan. In a large bowl or stand mixer, beat 1/2 cup unsalted butter (softened) and 1/2 cup granulated sugar until light and fluffy. Add 1 large egg and 1 1/2 teaspoons vanilla extract, then add 1/4 teaspoon salt and 1/2 teaspoon baking powder. Mix well, scraping the bowl as needed so everything is incorporated.
2-Second Step: Add the flour Gradually add 2 cups all-purpose flour to the wet mixture. Mix on low speed or stir by hand until the dough is fully combined with no streaks of flour. If the dough feels crumbly, a teaspoon or two of milk can bring it together, but this recipe should form a cohesive dough without extra liquid if flour is measured correctly (fluff and spoon, then level).
3-Third Step: Divide and color Divide the finished dough into two equal portions; set one aside. Add a small amount of dark pink gel food coloring to one half and beat until thoroughly tinted. Gel coloring is preferred because it provides a bold hue without thinning the dough.
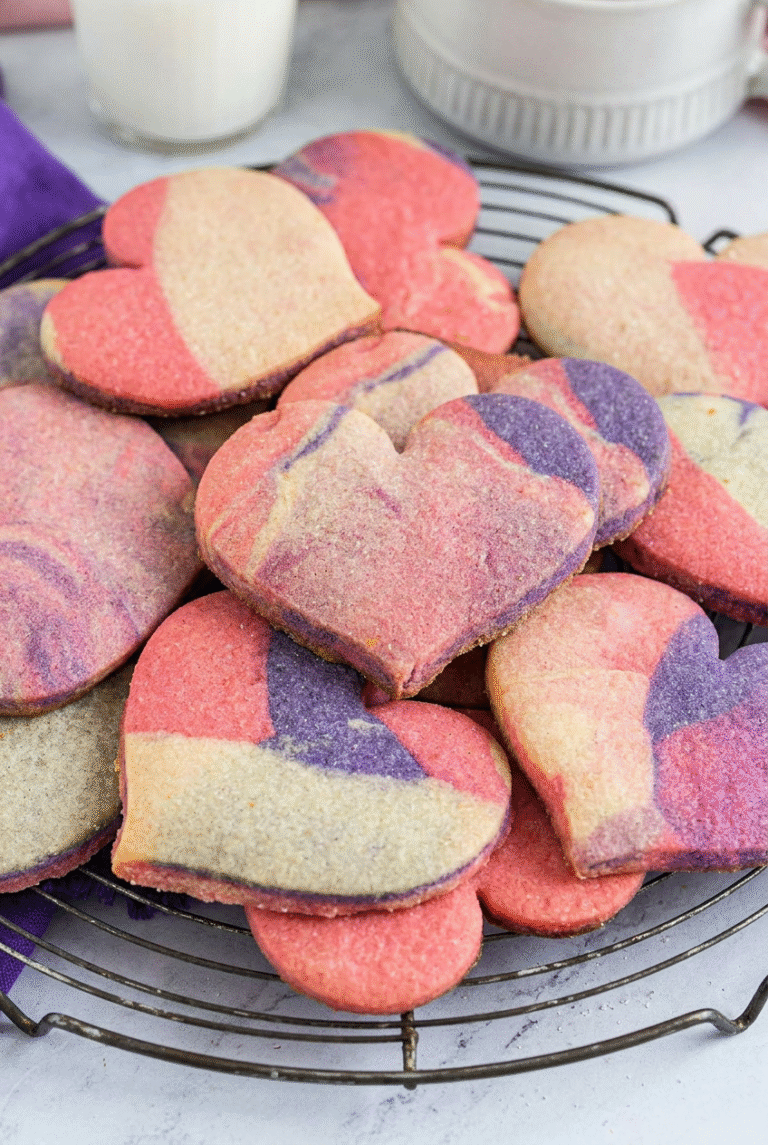
4-Fourth Step: Create the marbled pieces Pinch off golf ball-sized portions from each dough color and arrange them in an alternating pattern on your work surface. Gently press small portions together and lightly knead only until visible marbled swirls appear. Avoid over-mixing; that will blend the colors too much and risk toughening the dough. Tip: Think gentle and patient. The prettier the swirl, the less you’ll want to overwork the dough.
5-Fifth Step: Form and chill Shape the marbled dough into a disc, wrap in plastic wrap, and chill for 30 to 60 minutes. Chilling makes rolling easier and keeps the shapes from spreading during baking. If you need to chill overnight, that is fine; let the dough soften slightly on the counter for 15-20 minutes before rolling.
6-Sixth Step: Rolling and cutting shapes Preheat the oven to 350°F. Prepare a baking sheet with a silicone mat or parchment paper. Lightly flour your work surface and roll the dough to 1/4 inch thickness. Use 3-inch cookie cutters (or any shapes you like) and cut the dough into shapes. Place cookies 2 inches apart on the prepared baking sheet and freeze for 15 minutes before baking; this helps them keep their edges and prevents excessive spreading.
7-Seventh Step: Bake and cool Bake cookies for 12 minutes at 350°F. If you prefer a slightly crisper cookie you can bake at 325°F for the same length, or add 1-2 extra minutes at 350°F with careful watching. Let cookies rest on the pan for 2 minutes, then transfer to a wire rack to cool completely.
8-Final Step: Storing and serving Gather remaining dough scraps, rewrap, and keep chilled to roll and cut later. Store cooled cookies in an airtight container up to one week. Consider packaging them in waxed paper and a pretty box for gifting. If you want to freeze dough instead of baking now, freeze portioned dough balls on a tray until solid, then move to a freezer bag; thaw slightly before rolling and baking as described below.
Last Step:
Please leave a rating and comment letting us know how you liked this recipe! This helps our business to thrive and continue providing free, high-quality recipes for you.Notes
❄️ Freezing dough before baking helps maintain shape and prevents spreading, ensuring your beautiful marbled design stays intact
🎨 Use gel food coloring for concentrated color without altering dough consistency – liquid food coloring can make the dough too wet
🖐️ Lightly knead dough portions to create the marble effect; over-mixing can toughen cookies and diminish the beautiful swirl pattern
- Prep Time: 1 hour 30 minutes
- Chilling time: 30-60 minutes
- Cook Time: 12 minutes
- Category: Dessert
- Method: Baking
- Cuisine: American
- Diet: Vegetarian
Nutrition
- Serving Size: 1 cookie
- Calories: 100
- Sugar: 5 g
- Sodium: 40 mg
- Fat: 5 g
- Saturated Fat: 3 g
- Unsaturated Fat: 2 g
- Trans Fat: 0 g
- Carbohydrates: 13 g
- Fiber: 0.3 g
- Protein: 1 g
- Cholesterol: 19 mg