

Zucchini Relish Recipe: Why You’ll Love This Homemade Canning Favorite
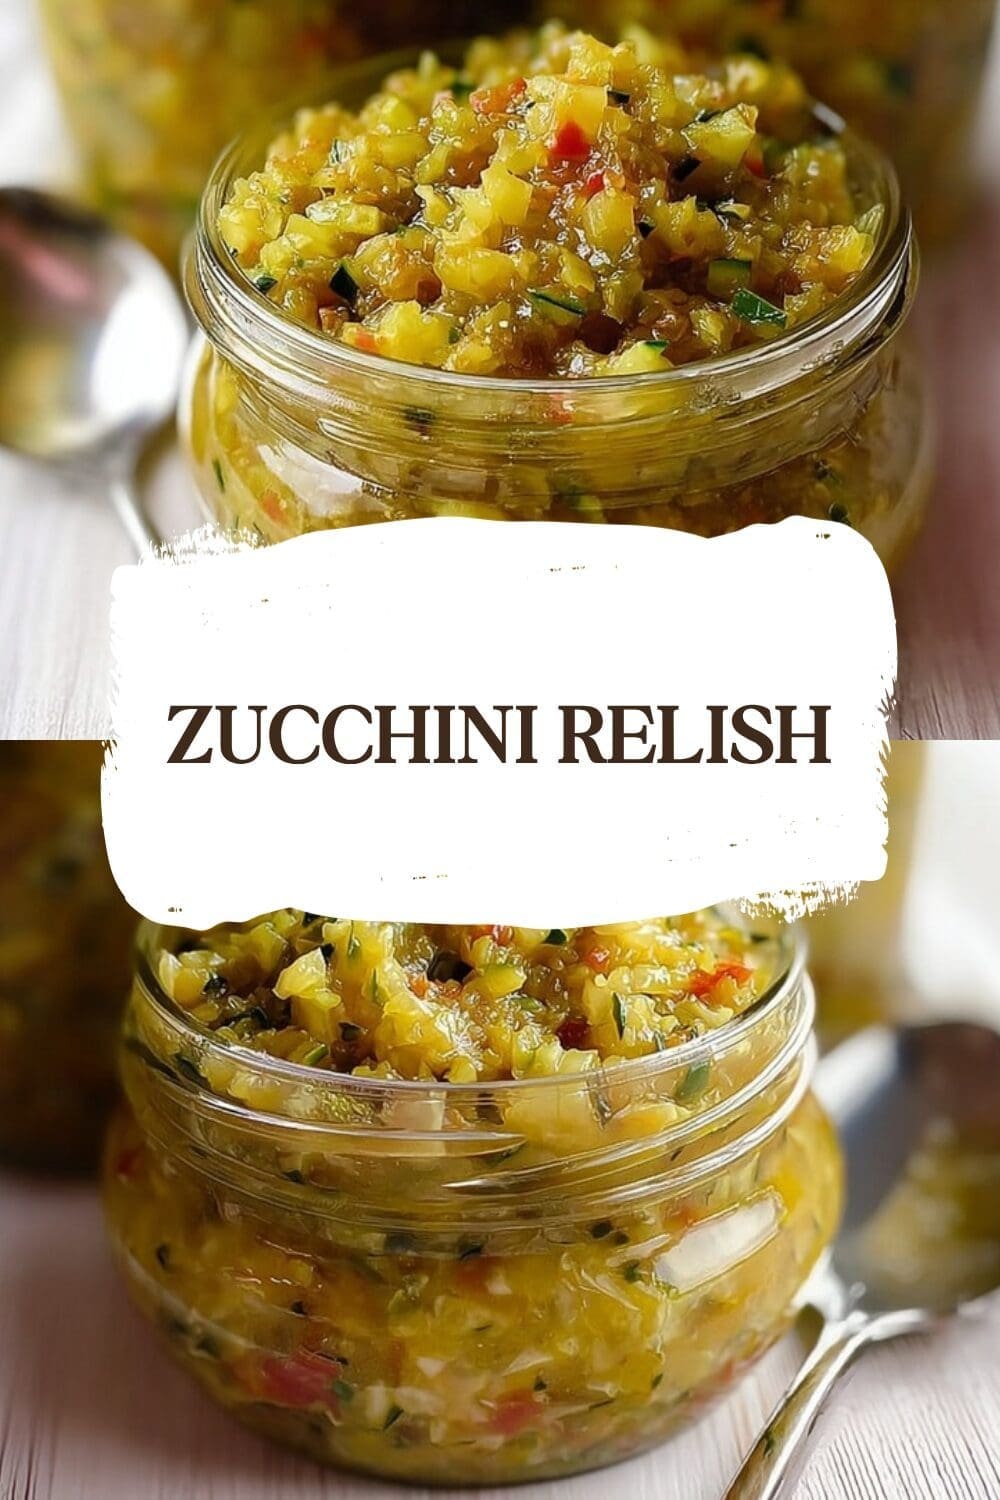
If you have a garden full of zucchini, this zucchini relish recipe is one of the best ways to use it up. It turns simple produce into a sweet, tangy, colorful condiment that works with sandwiches, burgers, grilled meats, and even cheese boards.
For readers who enjoy practical food projects, this homemade zucchini relish brings together easy prep, simple pantry ingredients, and classic canning know-how. If you like making the most of fresh vegetables, you may also enjoy our no-cook summer meal ideas for more fresh kitchen inspiration. For a science-backed look at zucchini nutrition, see Healthline’s guide to zucchini benefits.
- Easy to make: This easy zucchini relish recipe starts with a food processor, so the chopping goes fast. After an overnight brine, the cooking time is only about 30 minutes, which makes it a manageable canning project for busy home cooks.
- Great way to preserve garden produce: Zucchini relish canning recipe fans love this method because it turns a bumper crop into jars you can enjoy later. One batch yields about 5.5 pints, which is helpful for garden harvests and meal prep.
- Bright, balanced flavor: The mix of sugar, vinegar, turmeric, dry mustard, black pepper, and celery seed gives this sweet zucchini relish a classic tangy taste with a warm, savory finish.
- Flexible for many meals: Homemade zucchini relish works for family dinners, cookouts, quick lunches, and snack boards. It fits well into many eating styles because a little spoonful adds a lot of flavor without much effort.
This zucchini relish recipe is the kind of old-fashioned kitchen project that pays off every time you open a jar.
Quick facts at a glance
| Detail | Amount |
|---|---|
| Prep time | 30 minutes |
| Cook time | 30 minutes |
| Processing time | 20 minutes |
| Brining time | Overnight |
| Yield | About 5.5 pints |
Jump to:
- Zucchini Relish Recipe: Why You’ll Love This Homemade Canning Favorite
- Quick facts at a glance
- Essential Ingredients for Zucchini Relish
- Main ingredients
- Special dietary options
- Helpful ingredient notes
- How to Prepare the Perfect Zucchini Relish Recipe: Step-by-Step Guide
- First step: Prep the vegetables
- Second step: Salt and brine overnight
- Third step: Rinse and drain well
- Fourth step: Add the vinegar, sugar, and spices
- Fifth step: Bring to a boil and cook
- Sixth step: Pack into jars
- Seventh step: Process by altitude
- Eighth step: Cool, label, and store
- Dietary Substitutions to Customize Your Zucchini Relish
- Vegetable, sauce, and seasoning modifications
- Protein and main component alternatives
- Mastering Zucchini Relish: Advanced Tips and Variations
- Pro cooking techniques
- Flavor variations
- Presentation tips
- Make-ahead options
- How to Store Zucchini Relish: Best Practices
- Refrigeration
- Freezing
- Reheating
- Meal prep considerations
- Nutrition Information for Zucchini Relish
- FAQs: Frequently Asked Questions About Zucchini Relish
- Zucchini Relish
- Ingredients
- Instructions
- Last Step:
- Notes
- Nutrition
- Did you make this recipe?
Essential Ingredients for Zucchini Relish
This zucchini pickle relish uses a short list of easy-to-find ingredients. The vegetables bring freshness and texture, while the sugar, vinegar, and spices create that classic canning relish flavor people expect from a homemade batch.
Main ingredients
- 10 cups grated zucchini – The base of the relish. No need to peel it, which saves time and keeps the prep simple.
- 3 cups grated onions – Adds savory depth and helps balance the sweetness.
- 4 red bell peppers – Bring color, gentle sweetness, and a little crunch.
- 5 tablespoons canning or pickling salt – Used for brining the vegetables overnight so they release moisture and develop a better texture.
- 3 cups sugar – Gives the relish its sweet zucchini relish flavor and helps preserve the finished product.
- 3 cups apple cider vinegar or white vinegar – Provides the tangy bite and the acidity needed for safe water bath canning.
- 1 teaspoon turmeric – Adds warm color and a mild earthy note.
- 1 teaspoon dry mustard – Brings a subtle sharpness that works well in canning relish.
- 1 teaspoon black pepper – Adds gentle heat.
- 1 teaspoon celery seed – Gives the relish its classic old-fashioned taste.
Special dietary options
- Vegan: This homemade zucchini relish is naturally vegan.
- Gluten-free: All listed ingredients are naturally gluten-free, but check spice labels if needed.
- Low-calorie: For a lighter serving, use smaller spoonfuls as a condiment. The relish is already portion-friendly because a little goes a long way.
Using a non-reactive bowl and colander matters here because vinegar and salt can react with certain metals.
Helpful ingredient notes
Choose firm zucchini with smooth skin and bright color. If your peppers are extra large, you may only need part of them to reach 4 peppers worth of chopped produce. The recipe works best when the vegetables are chopped evenly, so the relish cooks down at the same pace.
For readers who want to learn more about another key ingredient, our bell pepper recipe guide offers more ideas for using sweet peppers in everyday meals. You can also read Healthline’s bell pepper nutrition guide if you want a quick look at why these colorful vegetables are so useful in the kitchen.
How to Prepare the Perfect Zucchini Relish Recipe: Step-by-Step Guide
First step: Prep the vegetables
Start by removing the seeds from the zucchini. Then chop the zucchini, onions, and red bell peppers in a food processor. A food processor makes this zucchini relish recipe much faster, especially when you are working with a large batch. If you do not have one, you can chop by hand, but the texture may be a little less even.
Because the zucchini is grated and then chopped, you get a relish that cooks down nicely without turning mushy. No peeling is needed, which saves time and keeps the process simple for home cooks, students, and busy parents who want a practical canning project.
Second step: Salt and brine overnight
Place the chopped vegetables in a large non-reactive bowl and sprinkle them with 5 tablespoons canning or pickling salt. Stir well so the salt coats everything evenly. Then cover the bowl and refrigerate overnight.
This brining step pulls out extra moisture from the vegetables. It also helps the final zucchini pickle relish have a better bite and brighter flavor. If you are new to canning relish, do not rush this part. The overnight rest is one of the secrets behind a good texture.
Third step: Rinse and drain well
The next day, pour the vegetables into a colander and rinse them thoroughly under cool water. Stir the mixture with your hands or a spoon so the salt washes away as evenly as possible. After rinsing, drain the vegetables very well.
Let the mixture sit for a few minutes to release more water. If needed, gently press it with clean hands or a spoon. Removing extra liquid now helps the sweet zucchini relish thicken properly during cooking.
Fourth step: Add the vinegar, sugar, and spices
Return the drained vegetables to the pot and add 3 cups sugar, 3 cups apple cider vinegar or white vinegar, 1 teaspoon turmeric, 1 teaspoon dry mustard, 1 teaspoon black pepper, and 1 teaspoon celery seed. Stir everything together until the sugar starts to dissolve.
The mixture will look colorful and smell bright right away. The vinegar gives the relish tang, while the turmeric and mustard bring warmth. This is where the zucchini relish recipe starts to look and taste like the classic canned relish people remember from family kitchens.
Fifth step: Bring to a boil and cook
Set the pot over medium-high heat and bring the mixture to a boil. Once it is bubbling, reduce the heat slightly and cook for about 30 minutes, stirring now and then so it does not stick. The relish should thicken and become glossy as it cooks.
If you like a softer relish, cook it a little longer. If you want a bit more texture, stop when it reaches your preferred consistency. The flavor will mellow slightly as it cools, so taste carefully before adjusting anything.
Sixth step: Pack into jars
When the relish is ready, ladle it into clean hot jars, leaving the proper headspace for canning. Remove air bubbles, wipe the rims, and secure the lids and bands according to standard canning practice. Then process the jars in a water bath canner.
One batch yields about 5.5 pints, so it is a useful recipe if you want to stock your pantry. This canning zucchini relish is ideal for anyone who likes homemade condiments and wants to save garden produce for later in the year.
Seventh step: Process by altitude
Process the jars for the right amount of time based on your altitude. Use 15 minutes at 0 to 3000 feet, 20 minutes at 3000 to 6000 feet, and 25 minutes above 6000 feet. This step matters because the boiling point changes with altitude.
After processing, remove the jars and let them cool undisturbed for 12 to 24 hours. Check the seals before storing. Properly sealed jars are the key to safe, shelf-stable storage.
Eighth step: Cool, label, and store
Once the jars are cool, label them with the date and batch name. Put them in a cool, dark place. If a jar does not seal, refrigerate it and use it first. Opened jars should always be kept in the fridge.
This easy homemade zucchini relish is ready to use on sandwiches, hot dogs, burgers, chopped salads, and anything else that needs a tangy-sweet boost.

Dietary Substitutions to Customize Your Zucchini Relish
Vegetable, sauce, and seasoning modifications
The classic zucchini relish canning recipe is already flexible, but there are a few ways to adjust it based on what you have on hand. If you need to use yellow summer squash, you can swap in part of the zucchini for a similar texture. If you want a little more color, add green bell peppers along with the red ones.
For a sweeter result, use the full amount of sugar. For a more tart version, you can slightly reduce the sugar, but keep the vinegar amount consistent for safe canning. If you like stronger spice, add a pinch more black pepper or celery seed. For a milder relish, use less dry mustard.
Some home cooks also like to blend a small portion of the relish before canning for a smoother texture. That said, most people prefer the classic chopped style because it feels hearty and old-fashioned.
Protein and main component alternatives
While this recipe does not rely on protein, it can pair with many dishes that do. Use the relish as a topper for grilled chicken, turkey burgers, tuna salad, baked tofu, or bean patties. That makes it a smart pantry item for mixed households with different dietary needs.
If you are serving guests with low-sugar preferences, serve the relish in small spoonfuls rather than as a main side. The flavor is bold enough that a little bit goes a long way. For readers who like meal planning, this homemade zucchini relish can sit beside other preserve recipes in the pantry and round out quick meals.
Mastering Zucchini Relish: Advanced Tips and Variations
Pro cooking techniques
Grating and chopping the vegetables in a food processor is the fastest way to handle a large zucchini harvest. It also gives you more even pieces, which helps the relish cook in a more uniform way. Use a non-reactive bowl and colander for the brining step so the salt and vinegar do their job without unwanted flavors from the container.
Do not skip the overnight rest. That step pulls out moisture and helps the final relish stay pleasantly thick. If your relish seems too loose after cooking, give it a few extra minutes on the stove before packing the jars.
Flavor variations
You can make this sweet zucchini relish recipe a little more your own by changing the seasoning profile. A pinch of red pepper flakes adds heat. A little more turmeric gives a deeper golden color. If you enjoy a stronger vinegar bite, choose apple cider vinegar. If you prefer a cleaner sharpness, white vinegar works well too.
Some cooks also add a few chopped dill pickles or a touch of mustard seed for a different canning relish style. If you do that, keep your ratios balanced and avoid adding too much extra liquid.
Presentation tips
Serve the relish in a small glass bowl or spoon it into a tiny jar for a rustic look. It looks especially nice beside grilled foods because the red peppers and golden color stand out. A sprig of parsley on the side can make the plate look fresh without changing the flavor.
A good relish should brighten the plate before the first bite even happens.
Make-ahead options
This is a great project for weekend prep. You can grate and chop the vegetables the night before, then finish the brining step when you are ready. Since the recipe already includes an overnight rest, it fits well into a two-day kitchen schedule for working professionals, parents, and students.
If you like filling your pantry in batches, double-check that you have enough jars and a large enough canner before starting. Planning ahead keeps the process calm and organized.
How to Store Zucchini Relish: Best Practices
Refrigeration
Store sealed jars in a cool, dark pantry after processing. Once opened, keep the jar in the refrigerator and use a clean spoon each time. Opened zucchini relish usually keeps well in the fridge for several weeks when handled properly.
Freezing
Freezing is not the best choice for this canning relish if you want to keep the texture at its best. The vegetables can soften more after thawing. If you do freeze a small amount, use freezer-safe containers and leave room for expansion.
Reheating
Zucchini relish is typically served cold or at room temperature, so reheating is not needed. If you want it slightly warmer for a sandwich or hot dish, let it sit out briefly before serving. Avoid boiling it again, since that can change the texture.
Meal prep considerations
This homemade zucchini relish is useful for batch cooking because a small amount adds flavor to many meals. Keep a jar in the fridge for quick lunches and family dinners. Since one batch yields about 5.5 pints, it is easy to divide the jars between pantry storage and gifts.
Nutrition Information for Zucchini Relish
Per 176 tablespoons serving, this zucchini relish recipe provides 17 calories, 4g carbohydrates, 1g protein, 1g fat, 1g saturated fat, 199mg sodium, 31mg potassium, 1g fiber, 4g sugar, 99IU vitamin A, 5mg vitamin C, 3mg calcium, and 1mg iron. Those numbers make it a small but flavorful condiment that adds interest without a heavy calorie load.
| Nutrient | Amount |
|---|---|
| Calories | 17 |
| Carbohydrates | 4g |
| Protein | 1g |
| Fat | 1g |
| Saturated fat | 1g |
| Sodium | 199mg |
| Potassium | 31mg |
| Fiber | 1g |
| Sugar | 4g |
| Vitamin A | 99IU |
| Vitamin C | 5mg |
| Calcium | 3mg |
| Iron | 1mg |
FAQs: Frequently Asked Questions About Zucchini Relish
Print
Zucchini Relish
🥒🧂 Zucchini relish easy homemade canning guide turns garden glut into tangy sweet condiment – preserves flavor pantry staple year-round!
🫙🍎 Food processor quick prep boil spice pack process – versatile burger hotdog topping low-cal vegan essential try canning!
- Total Time: 1 hour 20 minutes + overnight
- Yield: 5.5 pints
Ingredients
– 10 cups grated zucchini
– 3 cups grated onions
– 4 red bell peppers
– 5 tablespoons canning or pickling salt
– 3 cups sugar
– 3 cups apple cider vinegar or white vinegar
– 1 teaspoon turmeric
– 1 teaspoon dry mustard
– 1 teaspoon black pepper
– 1 teaspoon celery seed
Instructions
1-First step: Prep the vegetables Start by removing the seeds from the zucchini. Then chop the zucchini, onions, and red bell peppers in a food processor. A food processor makes this zucchini relish recipe much faster, especially when you are working with a large batch. If you do not have one, you can chop by hand, but the texture may be a little less even. Because the zucchini is grated and then chopped, you get a relish that cooks down nicely without turning mushy. No peeling is needed, which saves time and keeps the process simple for home cooks, students, and busy parents who want a practical canning project.
2-Second step: Salt and brine overnight Place the chopped vegetables in a large non-reactive bowl and sprinkle them with 5 tablespoons canning or pickling salt. Stir well so the salt coats everything evenly. Then cover the bowl and refrigerate overnight. This brining step pulls out extra moisture from the vegetables. It also helps the final zucchini pickle relish have a better bite and brighter flavor. If you are new to canning relish, do not rush this part. The overnight rest is one of the secrets behind a good texture.
3-Third step: Rinse and drain well The next day, pour the vegetables into a colander and rinse them thoroughly under cool water. Stir the mixture with your hands or a spoon so the salt washes away as evenly as possible. After rinsing, drain the vegetables very well. Let the mixture sit for a few minutes to release more water. If needed, gently press it with clean hands or a spoon. Removing extra liquid now helps the sweet zucchini relish thicken properly during cooking.
4-Fourth step: Add the vinegar, sugar, and spices Return the drained vegetables to the pot and add 3 cups sugar, 3 cups apple cider vinegar or white vinegar, 1 teaspoon turmeric, 1 teaspoon dry mustard, 1 teaspoon black pepper, and 1 teaspoon celery seed. Stir everything together until the sugar starts to dissolve. The mixture will look colorful and smell bright right away. The vinegar gives the relish tang, while the turmeric and mustard bring warmth. This is where the zucchini relish recipe starts to look and taste like the classic canned relish people remember from family kitchens.
5-Fifth step: Bring to a boil and cook Set the pot over medium-high heat and bring the mixture to a boil. Once it is bubbling, reduce the heat slightly and cook for about 30 minutes, stirring now and then so it does not stick. The relish should thicken and become glossy as it cooks. If you like a softer relish, cook it a little longer. If you want a bit more texture, stop when it reaches your preferred consistency. The flavor will mellow slightly as it cools, so taste carefully before adjusting anything.
6-Sixth step: Pack into jars When the relish is ready, ladle it into clean hot jars, leaving the proper headspace for canning. Remove air bubbles, wipe the rims, and secure the lids and bands according to standard canning practice. Then process the jars in a water bath canner. One batch yields about 5.5 pints, so it is a useful recipe if you want to stock your pantry. This canning zucchini relish is ideal for anyone who likes homemade condiments and wants to save garden produce for later in the year.
7-Seventh step: Process by altitude Process the jars for the right amount of time based on your altitude. Use 15 minutes at 0 to 3000 feet, 20 minutes at 3000 to 6000 feet, and 25 minutes above 6000 feet. This step matters because the boiling point changes with altitude. After processing, remove the jars and let them cool undisturbed for 12 to 24 hours. Check the seals before storing. Properly sealed jars are the key to safe, shelf-stable storage.
8-Eighth step: Cool, label, and store Once the jars are cool, label them with the date and batch name. Put them in a cool, dark place. If a jar does not seal, refrigerate it and use it first. Opened jars should always be kept in the fridge. This easy homemade zucchini relish is ready to use on sandwiches, hot dogs, burgers, chopped salads, and anything else that needs a tangy-sweet boost.
Last Step:
Please leave a rating and comment letting us know how you liked this recipe! This helps our business to thrive and continue providing free, high-quality recipes for you.Notes
🌀 Food processor grates fast – uniform texture effortless.
🥬 Non-reactive bowl/colander – no metallic taste.
⏱️ Altitude adjust processing – safe long-term canning.
- Prep Time: 30 minutes
- Brining + Canning: Overnight + 20 minutes
- Cook Time: 30 minutes
- Category: Condiments & Sauces
- Method: Canning
- Cuisine: American
- Diet: Vegan
Nutrition
- Serving Size: 1 tablespoon
- Calories: 17 kcal
- Sugar: 4g
- Sodium: 199mg
- Fat: 1g
- Saturated Fat: 1g
- Unsaturated Fat: 0g
- Trans Fat: 0g
- Carbohydrates: 4g
- Fiber: 1g
- Protein: 1g
- Cholesterol: 0mg


