

Why You’ll Love Refrigerator Quick Pickled Red Onions
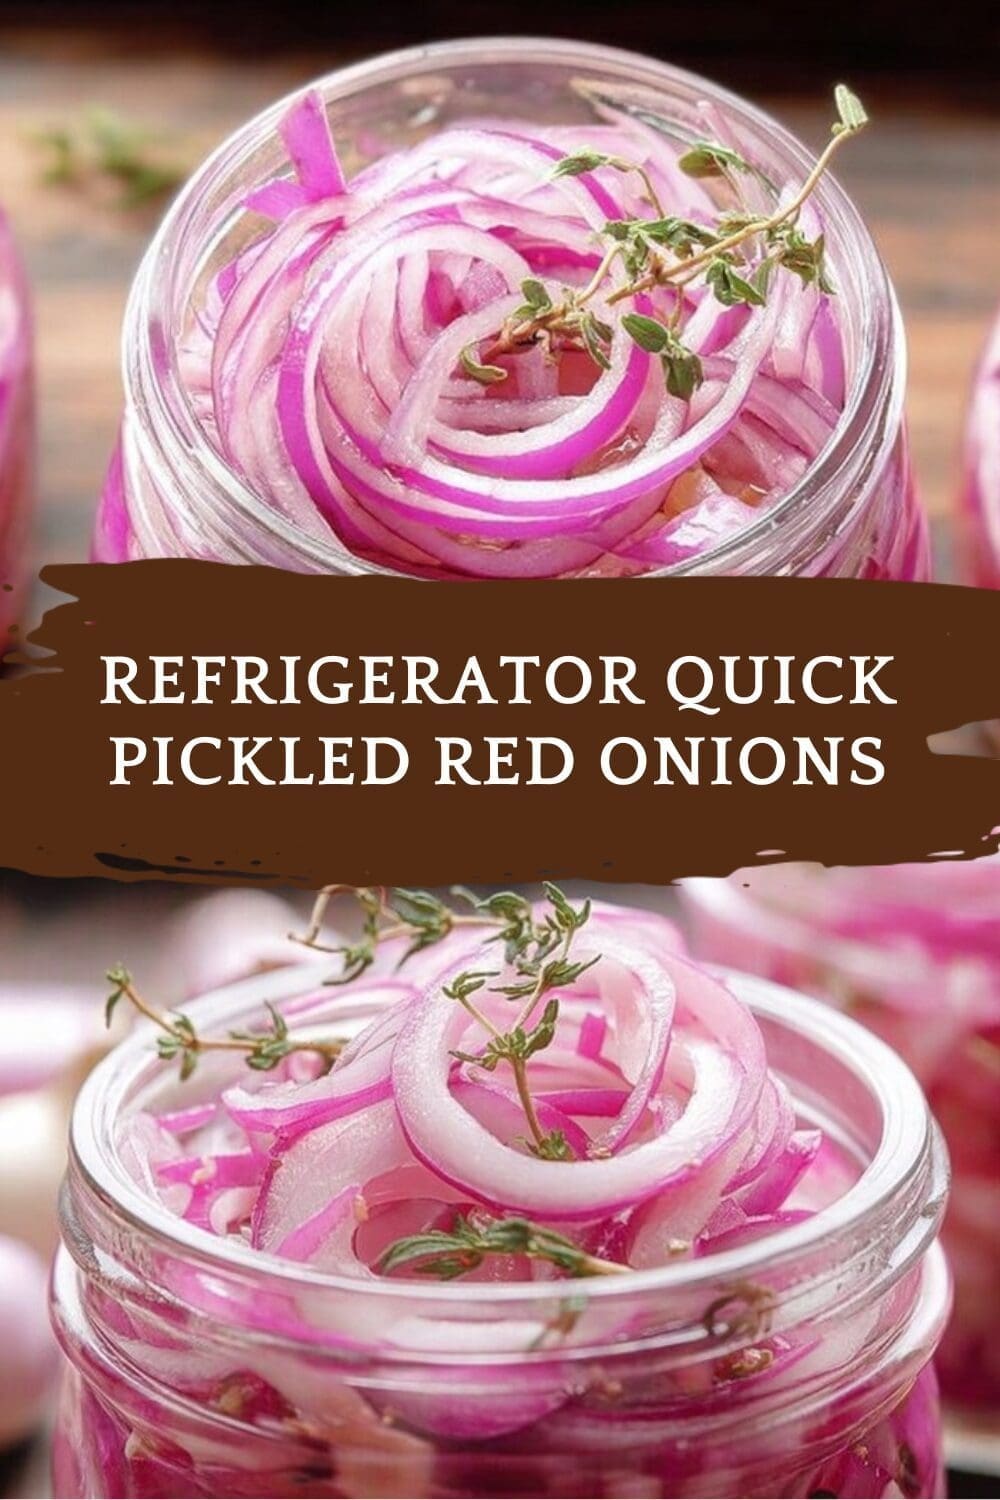
Refrigerator Quick Pickled Red Onions are one of those simple fridge staples that make everyday meals taste a whole lot brighter. If you like fast recipes that fit into a busy schedule, this is a great one to keep on repeat. It takes just 10 minutes of prep time, 5 minutes on the stove, and then a short 1 hour cooling time before you can start using them.
- Easy to make: This recipe uses a few basic pantry ingredients and does not require canning equipment. You just slice, simmer, pour, and chill.
- Fresh and better for you: Red onions bring natural plant compounds and a crisp bite. For more on onion nutrition, see this onion nutrition guide from Healthline.
- Works with many meals: These quick pickled onions fit tacos, salads, grain bowls, sandwiches, burgers, wraps, and snack boards.
- Bright, tangy flavor: The mix of vinegar, sugar, and salt gives the onions a lively taste and that pretty pink color people love.
These pickled onions are the kind of recipe that quietly saves dinner. A little jar in the fridge can make leftovers feel fresh again.
They are also a smart choice for home cooks who want something low effort but big on flavor. Because the brine comes together fast, you can make a batch whenever you have an onion that needs using up. If you enjoy simple make-ahead condiments, you may also like our quick salad ideas for easy meals that pair well with fridge-friendly toppings.
Jump to:
- Why You’ll Love Refrigerator Quick Pickled Red Onions
- Essential Ingredients for Refrigerator Quick Pickled Red Onions
- Special Dietary Options
- How to Prepare the Perfect Refrigerator Quick Pickled Red Onions: Step-by-Step Guide
- First Step: Prep the onion
- Second Step: Make the brine
- Third Step: Pour the hot brine over the onions
- Fourth Step: Let the onions cool
- Final Step: Refrigerate and use
- Dietary Substitutions to Customize Your Refrigerator Quick Pickled Red Onions
- Protein and Main Component Alternatives
- Vegetable, Sauce, and Seasoning Modifications
- Mastering Refrigerator Quick Pickled Red Onions: Advanced Tips and Variations
- Pro cooking techniques
- Flavor variations
- Presentation tips
- Make-ahead options
- How to Store Refrigerator Quick Pickled Red Onions: Best Practices
- FAQs: Frequently Asked Questions About Refrigerator Quick Pickled Red Onions
- How long do quick pickled red onions last in the fridge?
- How do you store refrigerator pickled red onions?
- What’s the best vinegar for pickling red onions?
- Can you freeze quick pickled red onions?
- Do you cool the pickling brine before adding to red onions?
- Refrigerator Quick Pickled Red Onions
- Ingredients
- Instructions
- Last Step:
- Notes
- Nutrition
- Did you make this recipe?
Essential Ingredients for Refrigerator Quick Pickled Red Onions
For the best results, use the exact ingredients below. Each one plays a role in the flavor, texture, and color of the finished pickles.
- 1 large red onion – The star of the recipe. Red onions give the best pink color and a sharp but pleasant bite.
- 1 cup distilled white vinegar – This creates the tangy pickling base and helps the onions soften quickly.
- 1/2 cup water – Water balances the vinegar so the brine is not too harsh.
- 1 tablespoon granulated white sugar – Sugar smooths out the sharpness and helps round the flavor.
- 1 1/2 teaspoon kosher salt – Salt seasons the onions and helps draw out moisture for faster pickling.
Special Dietary Options
- Vegan: This recipe is naturally vegan because it uses only vegetables, vinegar, water, sugar, and salt.
- Gluten-free: The ingredients listed are gluten-free as written.
- Low-calorie: If you want a lighter batch, reduce the sugar slightly, though the flavor will be a bit sharper.
| Ingredient | Amount | Why It Matters |
|---|---|---|
| Red onion | 1 large | Provides crunch, color, and flavor |
| Distilled white vinegar | 1 cup | Forms the quick pickling brine |
| Water | 1/2 cup | Softens the vinegar bite |
| Granulated white sugar | 1 tablespoon | Balances the tang |
| Kosher salt | 1 1/2 teaspoon | Adds seasoning and helps brine the onions |
How to Prepare the Perfect Refrigerator Quick Pickled Red Onions: Step-by-Step Guide
This method is simple, fast, and friendly for beginners. Since you are making refrigerator quick pickled red onions instead of canned pickles, there is no special processing step. Just follow the steps below and you will have a crisp, tangy condiment ready to chill.
First Step: Prep the onion
Peel 1 large red onion, cut it in half, then slice it crosswise into thin slices. A sharp knife helps you get clean cuts and can reduce tears, which is always a nice bonus. Try to keep the slices fairly even so they pickle at the same rate.
Once the onion is sliced, pack it into a medium-size glass jar with a tight-fitting lid. A mason jar works well, but any clean glass jar with a secure lid will do. Packing the onions snugly helps them stay submerged in the brine later.
Second Step: Make the brine
Set a small saucepan over high heat and add 1 cup distilled white vinegar, 1/2 cup water, 1 tablespoon granulated white sugar, and 1 1/2 teaspoon kosher salt. Stir the mixture as it heats so the sugar and salt dissolve evenly. Bring it just to a simmer, not a hard rolling boil.
This step only takes about 5 minutes, so keep an eye on it. As soon as the sugar and salt dissolve, the brine is ready. If you want easier pouring, transfer the hot liquid into a measuring cup before adding it to the jar.
Third Step: Pour the hot brine over the onions
Carefully pour the hot vinegar mixture over the sliced red onions in the jar. Make sure the onions are mostly covered. If a few slices float, use a clean spoon to gently press them down into the liquid.
Pour slowly so the jar does not crack from sudden temperature changes. Using a heat-safe glass jar helps, and a measuring cup gives you more control than pouring straight from the pan. The hot brine starts softening the onions right away and begins that bright pink transformation.
Fourth Step: Let the onions cool
Cover the jar with the lid and let it stand at room temperature for 1 hour to cool. This cooling time is part of the recipe and helps the flavor settle in. It also keeps condensation from building up in the jar once you move it to the fridge.
During this time, the onions will keep softening slightly and turning a lovely pink color. The brine will look a little cloudy at first, which is normal. As the onions sit, the flavor gets better and the color deepens.
Final Step: Refrigerate and use
After the jar has cooled, place it in the refrigerator. The onions are ready to eat once chilled, though they taste even better after a little more time in the brine. You can start using them soon after they go into the fridge, but they get more balanced as they sit.
Use them on tacos, burgers, hot dogs, grain bowls, avocado toast, salads, wraps, and sandwiches. If you like simple make-ahead toppings, this is one of the easiest ways to keep flavor ready in the fridge. For another no-fuss kitchen idea, you might also like our no-cook meal prep tips.
For the best texture, keep the onions fully covered in brine and use a clean utensil each time you scoop some out.

Dietary Substitutions to Customize Your Refrigerator Quick Pickled Red Onions
Protein and Main Component Alternatives
While this recipe does not contain protein, the main ingredient can still be changed based on what you have at home. If you do not have a red onion, use a white onion, sweet onion, or yellow onion instead. The flavor will change a bit, but the method stays the same.
You can also make quick pickled onions with other vegetables. Thin cucumber slices work well, and so do blanched carrots, green beans, and okra. These are great options when you want a colorful side or topping for bowls and sandwiches.
Vegetable, Sauce, and Seasoning Modifications
If distilled white vinegar is not available, try apple cider vinegar, red wine vinegar, white wine vinegar, or rice vinegar, as long as the vinegar has at least 5 percent acidity. Distilled white vinegar gives the cleanest taste and the brightest color, but other vinegars can add more personality.
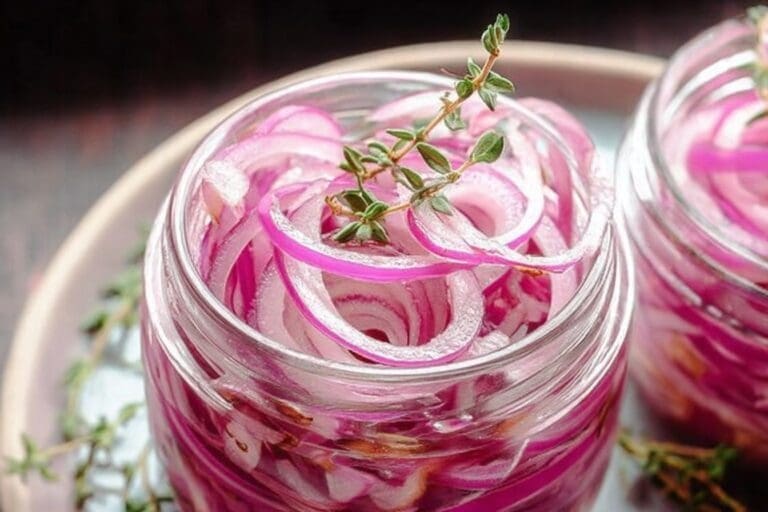
You can also change the flavor with simple add-ins. Crushed red pepper flakes add heat, while fresh rosemary or thyme gives the jar a savory herb note. A bay leaf is another easy way to add a little depth without much work.
Mastering Refrigerator Quick Pickled Red Onions: Advanced Tips and Variations
Once you have made this recipe once or twice, it becomes easy to tweak it for different meals. The basic method is simple, but a few smart tricks can make the results even better.
Pro cooking techniques
Use a very sharp knife for thinner, cleaner onion slices. Thin slices pickle faster and have a softer bite on top of burgers or salads. If you want a stronger pickle flavor, let the jar sit in the fridge overnight before serving.
For easier pouring, move the hot brine into a measuring cup after the sugar and salt dissolve. That small step can save you from spills and helps the liquid go right where you want it. Also, choose a jar that is just large enough to hold the onions snugly, since less extra air means better contact with the brine.
Flavor variations
For a spicy batch, add a pinch of crushed red pepper flakes to the jar before pouring in the brine. For a more fragrant version, tuck in a sprig of rosemary, a few thyme leaves, or one bay leaf. These small additions can give your refrigerator pickled onions a new personality without making the recipe harder.
Presentation tips
Serve the onions in a small bowl with a fork or spoon so people can add them easily to their plates. They look especially nice on tacos, avocado toast, and salads where the pink color stands out. A few strands on top of a finished dish can make a simple meal look fresh and inviting.
Make-ahead options
This is a great batch-prep recipe for busy weeks. Make a jar on the weekend, and you will have a flavorful topping ready all week long. If you cook for a crowd, double the recipe and keep one jar for everyday meals and one for gatherings.
How to Store Refrigerator Quick Pickled Red Onions: Best Practices
Store refrigerator quick pickled red onions in a sealed glass jar in the refrigerator. A tight-fitting lid helps keep the onions fresh and keeps other fridge odors out. They are best within the first week, when they are crisp and brightly pink, but they can last up to 3 weeks if stored properly.
Do not freeze the finished pickled onions because freezing can change the texture and make them soft. If you want to plan ahead, you can freeze the raw onion slices first, then pickle them later after thawing. That gives you a little more flexibility without sacrificing quality.
There is no reheating needed for this recipe. In fact, these onions are meant to be eaten cold or at room temperature. For meal prep, keep them submerged in brine and use a clean utensil each time you take some out.
FAQs: Frequently Asked Questions About Refrigerator Quick Pickled Red Onions
How long do quick pickled red onions last in the fridge?
Quick pickled red onions made with a refrigerator method typically last up to 3 weeks when stored properly in the fridge. They’re at their best—crisp, tangy, and vibrantly pink—within the first week. After that, the color starts to fade to a softer pink or red, and the texture may soften slightly, but they remain safe and flavorful. Always check for off smells, sliminess, or mold before eating; discard if any appear. For longest freshness, pack them tightly in brine and use a clean jar. This simple storage keeps them ready for tacos, salads, or burgers without canning equipment.
How do you store refrigerator pickled red onions?
Store refrigerator pickled red onions in a clean, medium-sized glass jar with a tight-fitting lid to keep air out and maintain freshness. Mason jars work great for their durability and seal. After packing sliced onions in the jar and pouring hot brine over them, let everything cool to room temperature (about 1-2 hours) before refrigerating. This prevents condensation and bacterial growth. Keep the jar submerged in brine, and if needed, press onions down with a clean spoon. Label with the date made. Avoid plastic containers, as they can stain or leach flavors. Proper storage ensures they stay crunchy for weeks.
What’s the best vinegar for pickling red onions?
Distilled white vinegar is the best choice for pickling red onions, with at least 5% acidity to ensure safe preservation and that signature bright pink color. It provides a clean, neutral tang without overpowering the onions’ sweetness. Avoid apple cider or rice vinegar here, as they can dull the color and add unwanted fruitiness. If you want a milder bite, mix 50/50 with water, but maintain the acidity level. Heat the vinegar with sugar, salt, and spices like peppercorns for the brine. This ratio—typically 1 cup vinegar, 1/2 cup water, 1/4 cup sugar, 1 tbsp salt—pickles a pound of onions perfectly in under an hour.
Can you freeze quick pickled red onions?
You can freeze quick pickled red onions, but it’s not ideal as it often makes them mushy when thawed due to water crystals breaking cell walls. For best results, freeze raw sliced red onions first on a tray, then transfer to a freezer bag; pickle after thawing. If freezing already pickled ones, use a freezer-safe jar or bag, leaving headspace for expansion, and consume within 2-3 months. Thaw in the fridge overnight. Freezing works better for longer storage than fridge pickling, but fresh batches are crispier. If texture changes bother you, make small batches weekly instead—refrigerator pickling is quick, taking just 15 minutes active time.
Do you cool the pickling brine before adding to red onions?
No need to fully cool the pickling brine before pouring it over sliced red onions—the hot or warm liquid (just off the boil) softens the onions slightly for faster flavor infusion, ready in 30 minutes to an hour. This “quick pickle” method skips overnight waits. Stir the brine (vinegar, water, sugar, salt) until dissolved, then pour directly into the jar of onions. Let the jar sit at room temperature until cool (1-2 hours), then refrigerate. Hot brine kills surface bacteria and extracts onion juices for better taste. For extra safety, use boiling-hot brine and sterile jars. This technique yields tangy, pink onions perfect for immediate use on sandwiches or salads.
Refrigerator Quick Pickled Red Onions
🧅🫙 Quick simple refrigerator pickled red onions deliver vibrant tangy crunch – transforms salads tacos burgers in 1 hour no canning!
🌶️🍴 Versatile vegan fridge staple lasts 3 weeks – pucker boost elevates any dish effortlessly!
- Total Time: 1 hour 15 minutes
- Yield: 2 cups (8 servings)
Ingredients
– 1 large red onion for crunch, color, and flavor
– 1 cup distilled white vinegar for quick pickling brine
– 1/2 cup water for softening the vinegar bite
– 1 tablespoon granulated white sugar for balancing the tang
– 1 1/2 teaspoon kosher salt for seasoning and brining the onions
Instructions
1-First Step: Prep the onion
Peel 1 large red onion, cut it in half, then slice it crosswise into thin slices. A sharp knife helps you get clean cuts and can reduce tears, which is always a nice bonus. Try to keep the slices fairly even so they pickle at the same rate.
Once the onion is sliced, pack it into a medium-size glass jar with a tight-fitting lid. A mason jar works well, but any clean glass jar with a secure lid will do. Packing the onions snugly helps them stay submerged in the brine later.
2-Second Step: Make the brine
Set a small saucepan over high heat and add 1 cup distilled white vinegar, 1/2 cup water, 1 tablespoon granulated white sugar, and 1 1/2 teaspoon kosher salt. Stir the mixture as it heats so the sugar and salt dissolve evenly. Bring it just to a simmer, not a hard rolling boil.
This step only takes about 5 minutes, so keep an eye on it. As soon as the sugar and salt dissolve, the brine is ready. If you want easier pouring, transfer the hot liquid into a measuring cup before adding it to the jar.
3-Third Step: Pour the hot brine over the onions
Carefully pour the hot vinegar mixture over the sliced red onions in the jar. Make sure the onions are mostly covered. If a few slices float, use a clean spoon to gently press them down into the liquid.
Pour slowly so the jar does not crack from sudden temperature changes. Using a heat-safe glass jar helps, and a measuring cup gives you more control than pouring straight from the pan. The hot brine starts softening the onions right away and begins that bright pink transformation.
4-Fourth Step: Let the onions cool
Cover the jar with the lid and let it stand at room temperature for 1 hour to cool. This cooling time is part of the recipe and helps the flavor settle in. It also keeps condensation from building up in the jar once you move it to the fridge.
During this time, the onions will keep softening slightly and turning a lovely pink color. The brine will look a little cloudy at first, which is normal. As the onions sit, the flavor gets better and the color deepens.
5-Final Step: Refrigerate and use
After the jar has cooled, place it in the refrigerator. The onions are ready to eat once chilled, though they taste even better after a little more time in the brine. You can start using them soon after they go into the fridge, but they get more balanced as they sit.
Use them on tacos, burgers, hot dogs, grain bowls, avocado toast, salads, wraps, and sandwiches. If you like simple make-ahead toppings, this is one of the easiest ways to keep flavor ready in the fridge. For another no-fuss kitchen idea, you might also like our no-cook meal prep tips.
Last Step:
Please leave a rating and comment letting us know how you liked this recipe! This helps our business to thrive and continue providing free, high-quality recipes for you.Notes
🔪 Sharp knife/mandoline reduces tears, ensures thin even slices.
☕️ Pack measuring cup with hot brine for spill-free pour.
🌿 Spice up: add red pepper flakes, herbs, bay leaf variations.
- Prep Time: 10 minutes
- Cooling & Pickling: 1 hour
- Cook Time: 5 minutes
- Category: Condiments
- Method: Pickling
- Cuisine: American
- Diet: Vegan
Nutrition
- Serving Size: 1/4 cup
- Calories: 25 kcal
- Sugar: 3g
- Sodium: 550mg
- Fat: 0g
- Saturated Fat: 0g
- Unsaturated Fat: 0g
- Trans Fat: 0g
- Carbohydrates: 6g
- Fiber: 1g
- Protein: 0g
- Cholesterol: 0mg


